Tricky Doors Walkthrough Level 8 - Theater
More Tricky Doors
You've arrived at Theater in Tricky Doors and need a little help? Then this page is for you, with our complete Tricky Doors Level 8 walkthrough to the Theater episode. Read on to find out how to complete the level and ace puzzle.
Tricky Doors Walkthrough Level 8 - Theater
In episode 8, you are now trapped in a grand theater. Investigate the rooms and find the clues and tools to escape.
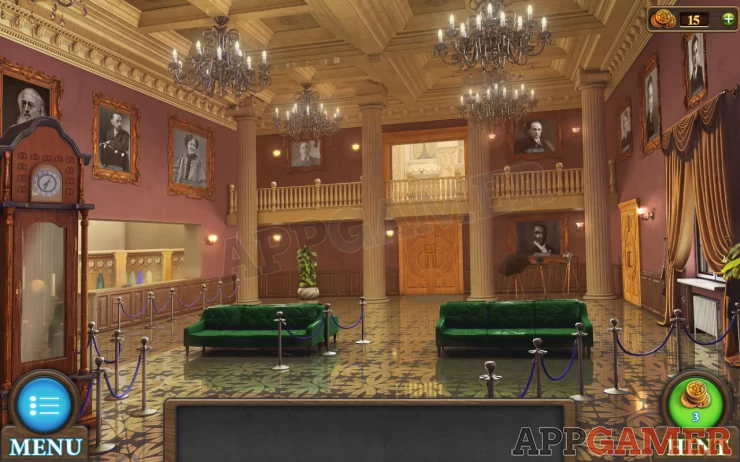
You are in the foyer. First view the green sofa on the left.
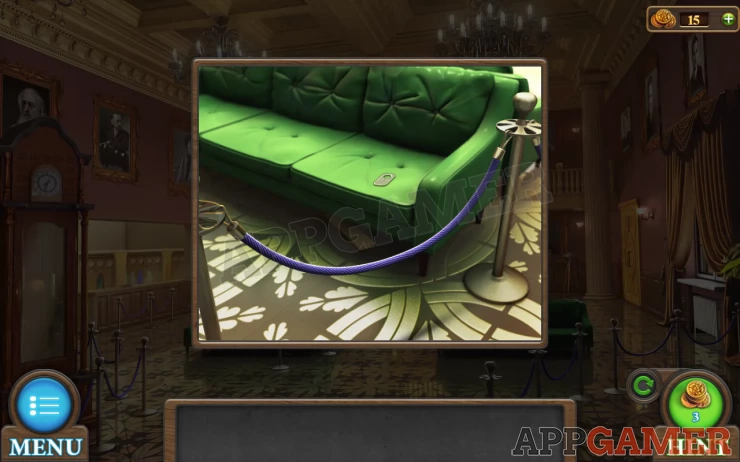
Collect a Tag (Tags 1 of 4) and also a Plank (Planks 1 of 4) from underneath.
Then view the coat check on the left.
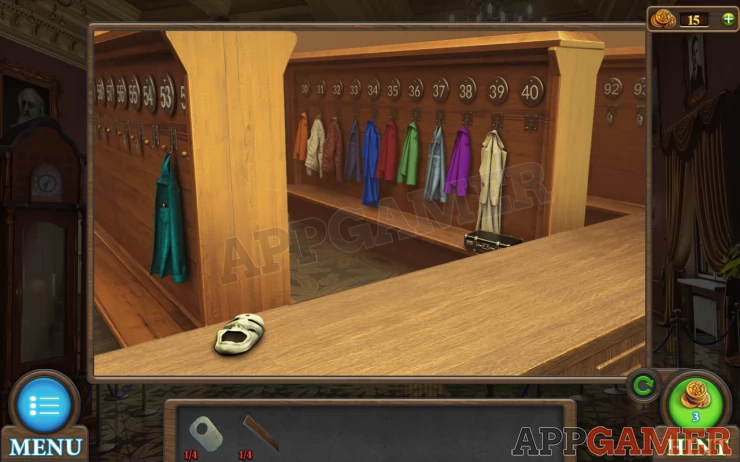
Collect the Porcelain Mask (1 of 2), then tap on the green coat on the left.
Collect a handle from the pocket.
Above the Coat check area are 3 pictures that you can view for clues.
Now view the window on the right of the room.
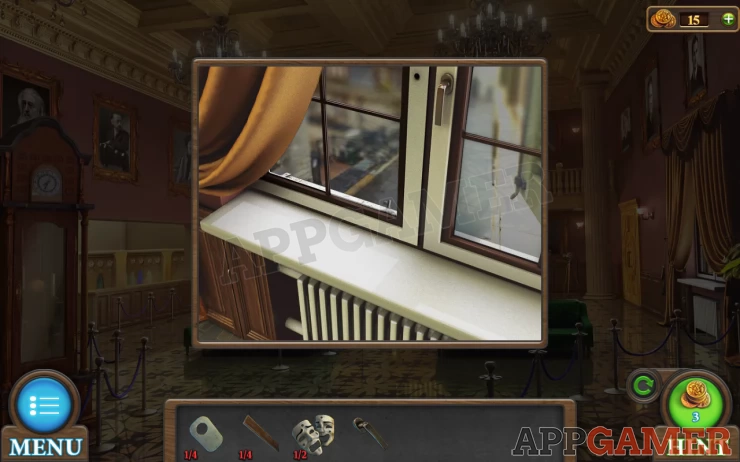
Add the handle to the left and then open the window to collect a key.
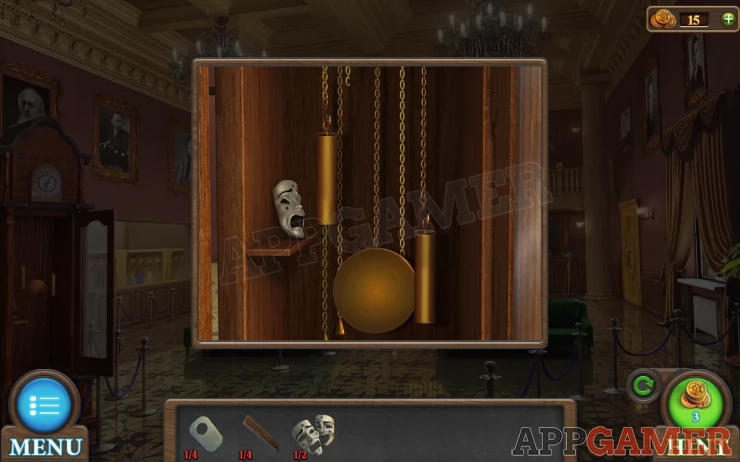
View the body of the grandfather clock on the left.
Use the key to open it and collect a second mask (#2 of 2)
Now you can tap on the double doors at the far end.
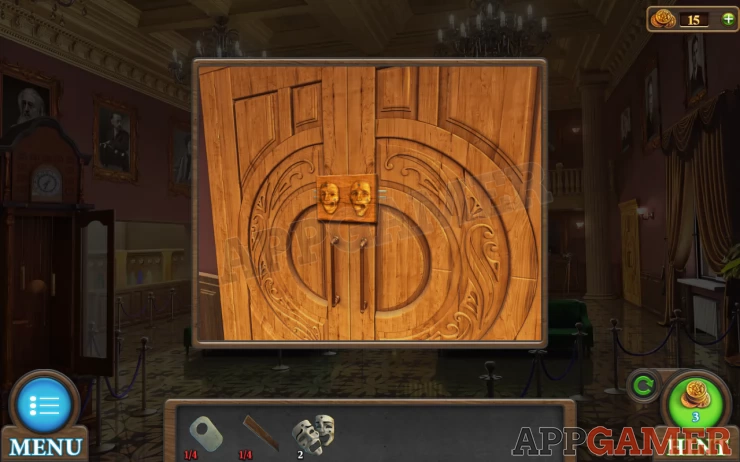
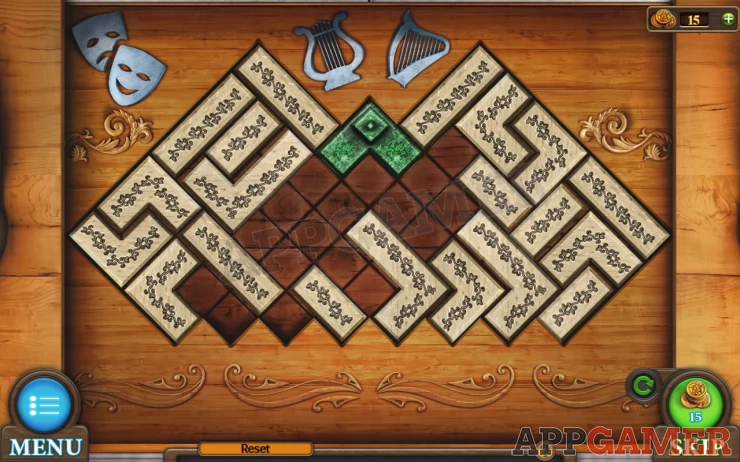
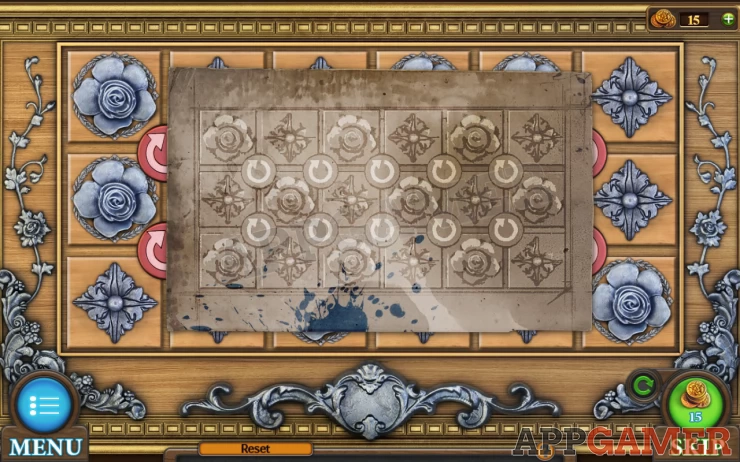
Add the 2 masks to open the panel and find a puzzle lock.
You need to move the green block up to the top center.
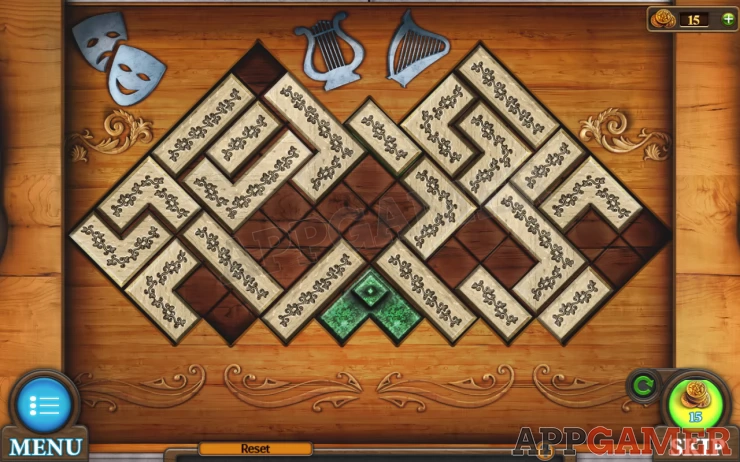
Show
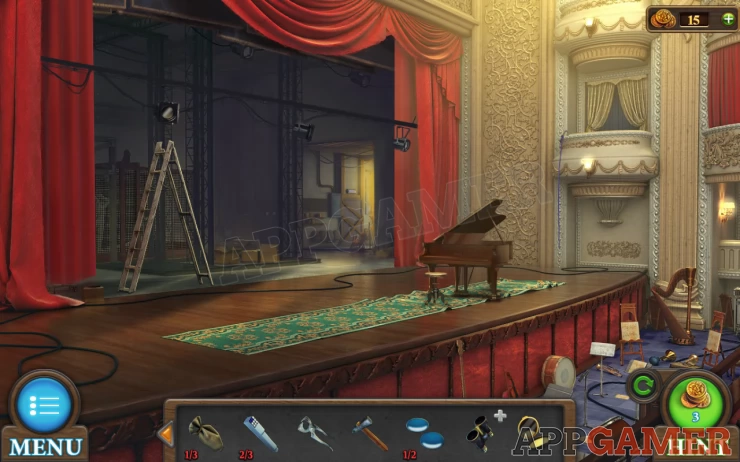
You can them go through to the stage.
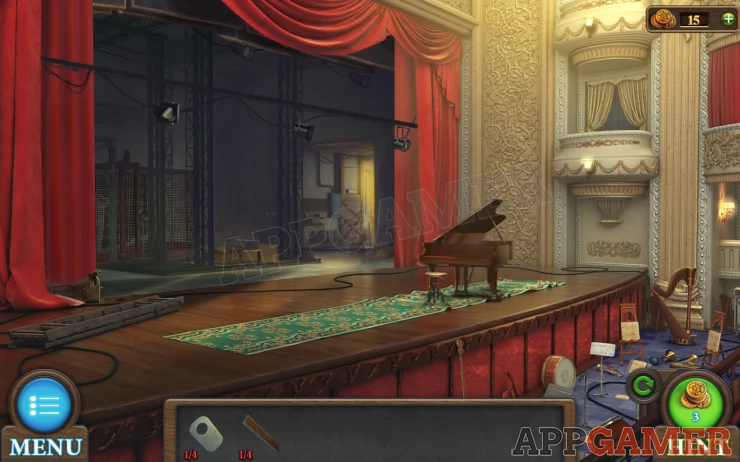
On the left above the ladder is a sandbag to collect. (Sandbags 1 of 3)
Then view the ladder. It is broken.
Collect the knife.
View the piano and collect a second tag (#2 of 4)
Next view the Harp on the far right.
Collect a Piano Key (piano keys 1 of 3) from the side
Now tap in the center to move to the back stage area
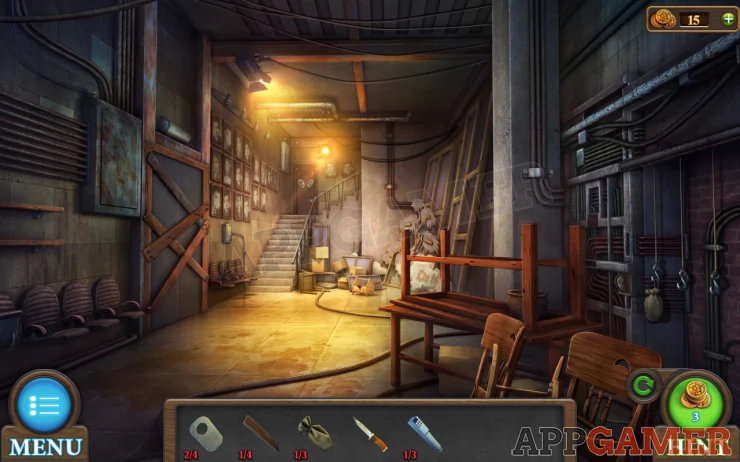
There is a toolbox on the floor to the right of the stairs. View this
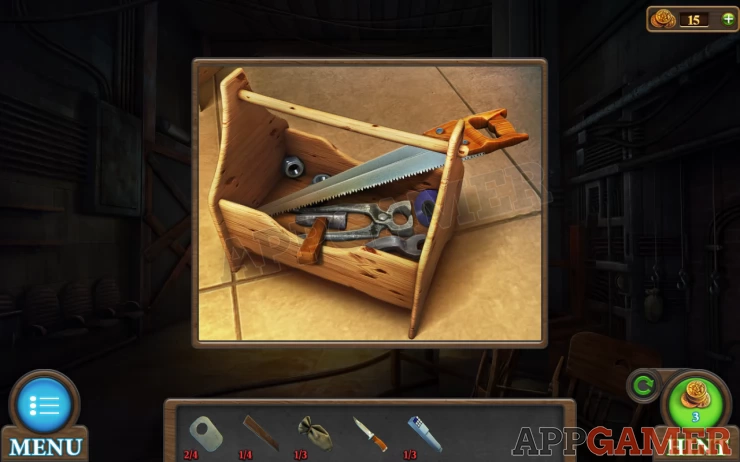
Collect the Saw, Pincers and Hammer.
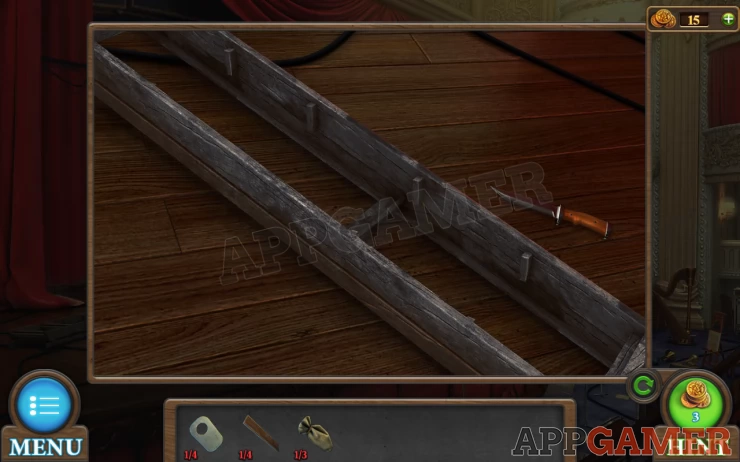
Then tap to view the door on the left of the area with boards across it.
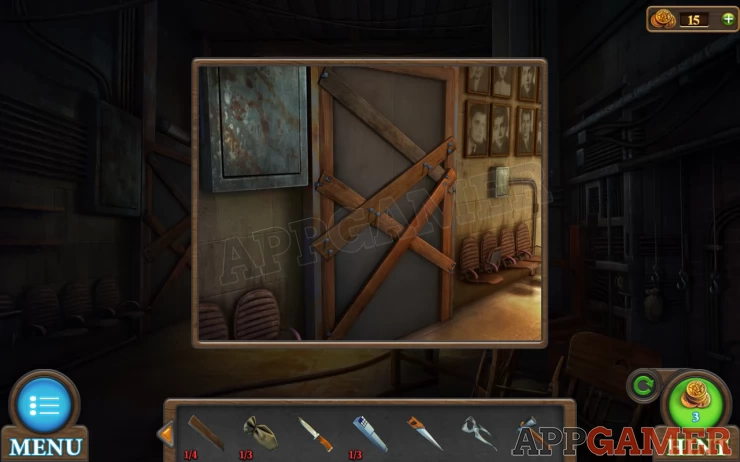
Use the pincers here to remove some nails to collect, you will also get a long plank.
Back out from there to the Foyer area.
View the coat check again and use the knife on the loose hook by the green coat. You will collect the hook.

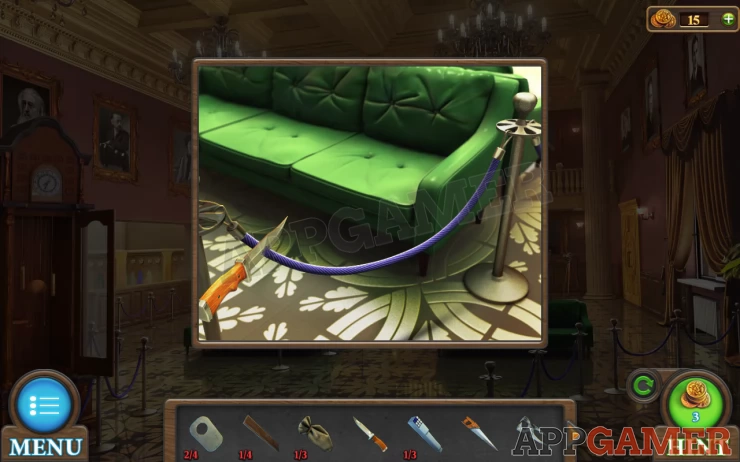
Now view the left green sofa again. Use the knife on the rope to cut it and collect it.
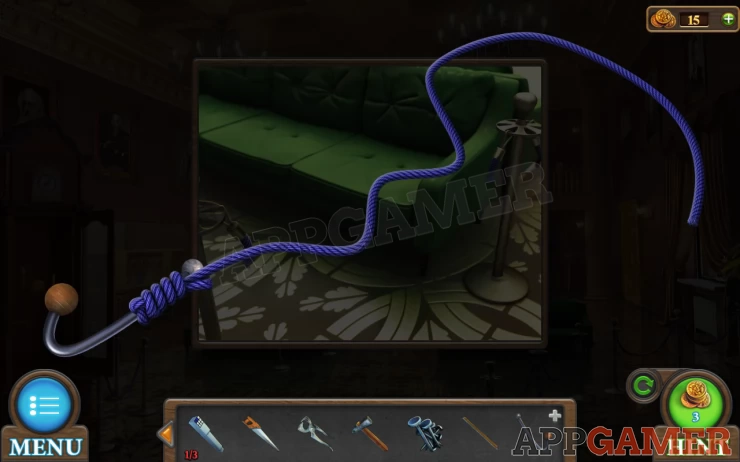
Now combine the Hook with the rope to get a Rope with hook.
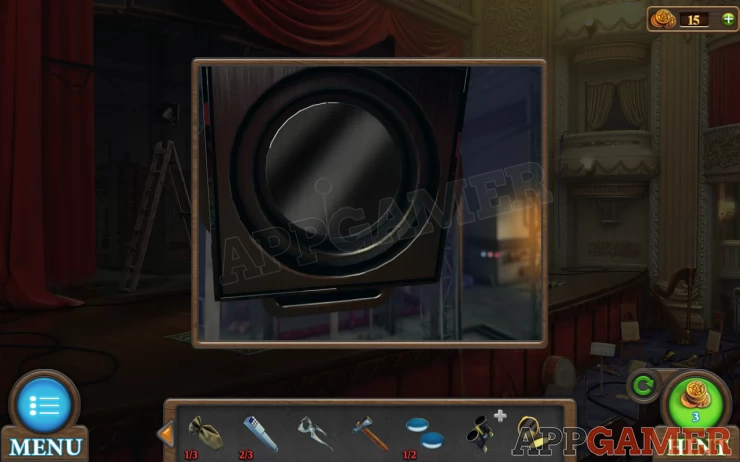
Next tap to view a camera on the back right.
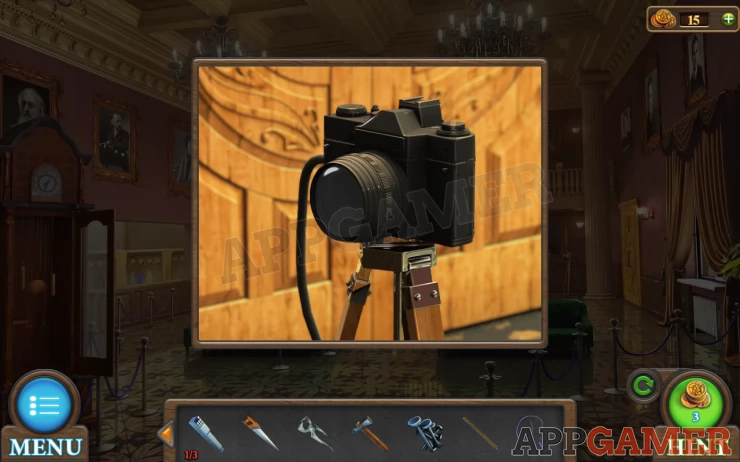
Use the knife on this as well and you will collect a lens (Lenses 1 of 2)
Go back to the stage. Use the rope with hook on the viewing Box above and to the right of the piano.
You can then climb up to look inside.
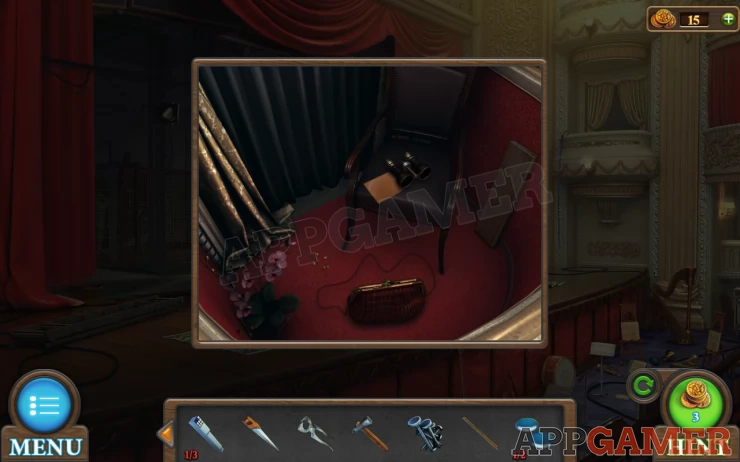
Collect the Binoculars from the chair, and a plank from the right (#2 of 4).
Use the pincers to open the handbag on the floor and collect a powder compact and another piano key (#2 of 3)
Also view the paper on the chair for a clue.
Show
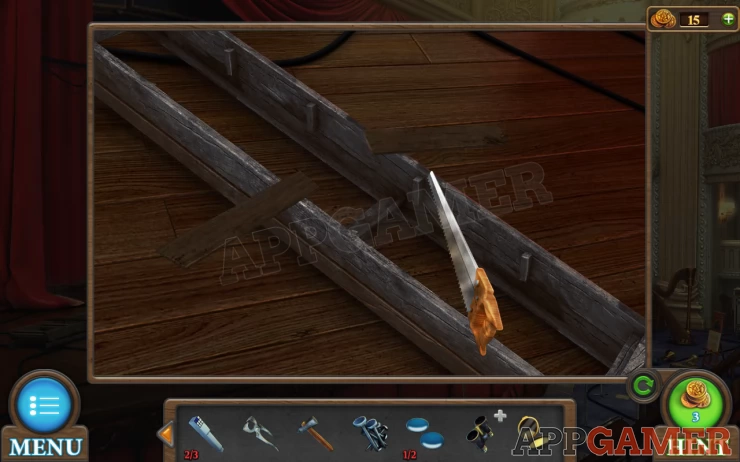
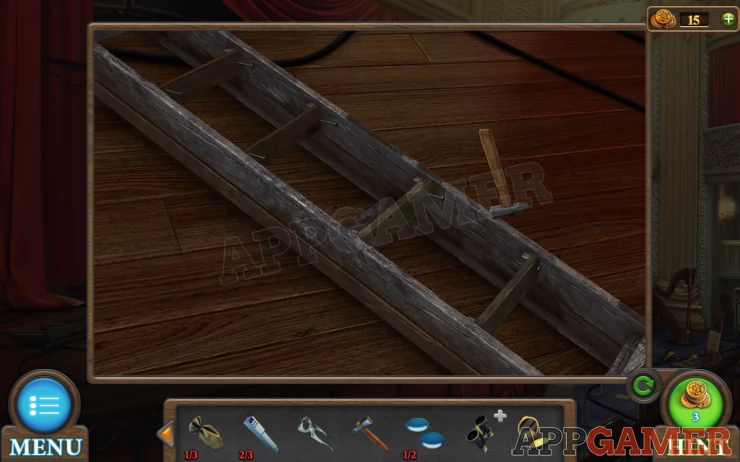
Back up and view the broken ladder on the stage.
Add the long plank to it and then use the saw to cut it. You will collect 2 planks (#3 and #4 of 4)
Now place the 4 planks onto the ladder. Then the nails and finally use the hammer to secure them.
You can now collect the ladder.
Place the ladder on the stage under the left spot light.
Then view the spotlight.
Use the hammer to break it and collect a key.
Go back stage again and tap the door on the stairs.
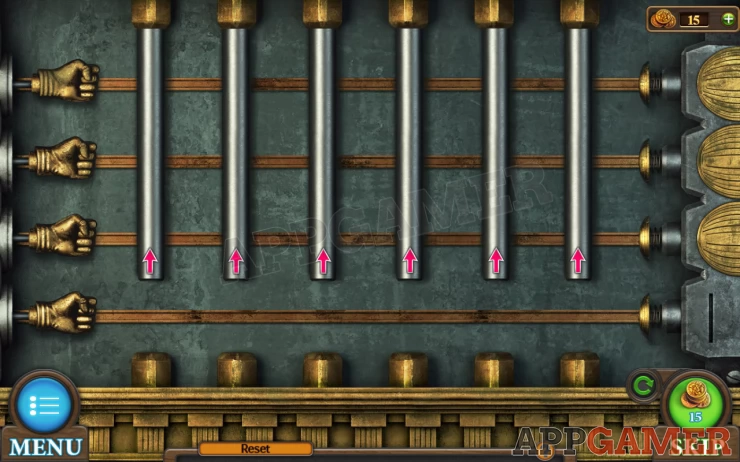
Use the key to open the lock panel and find a puzzle.
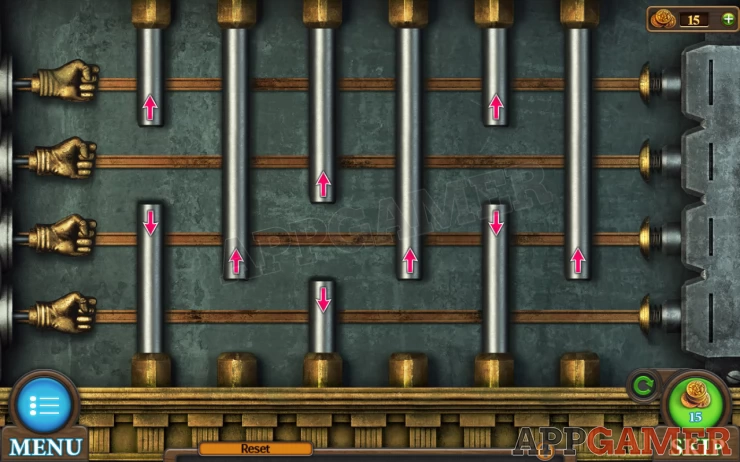
for this you need to tap each of the fists on the left to hit the buttons on the right. You must move the 6 bars to make paths for each.
As you try to move each one some others can move and some other may need to be moved first. If you tap and other bars flash red then you need to move at leas one of the first.
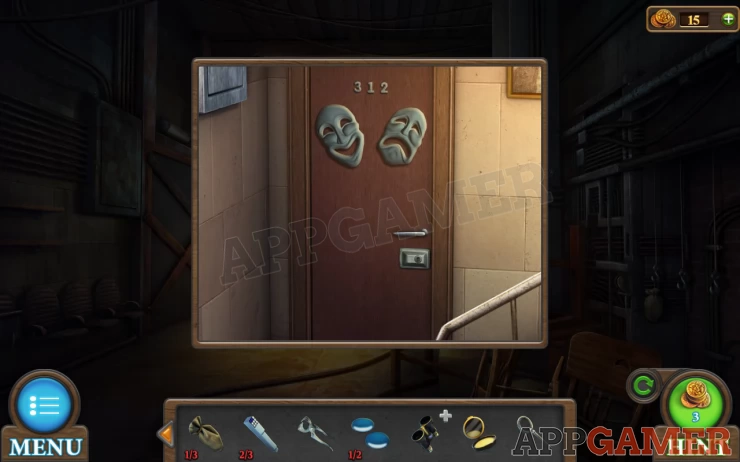
Once done enter the dressing room.
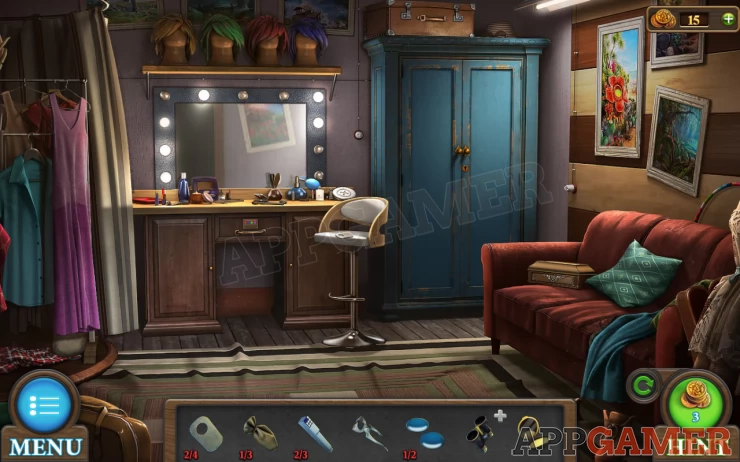
Collect another tag (#3 of 4) from the stool.
View the dressing table.
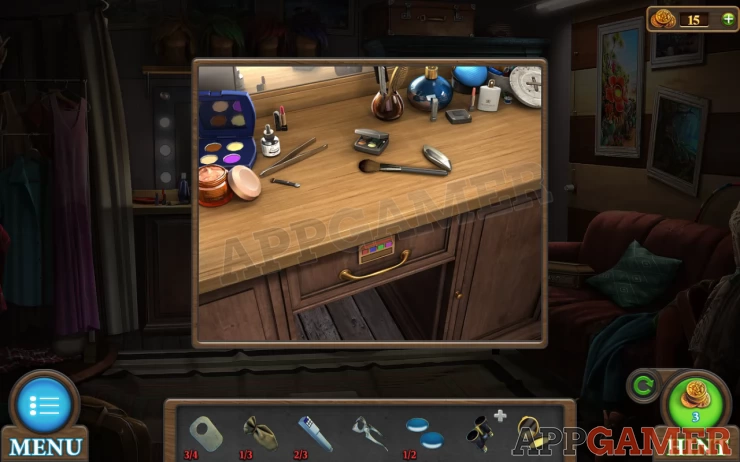
Collect the Brush and the Tweezers.
Now tap the long pink dress on the left to lift it. Collect a sandbag (#2 of 3).
Take note of the lights around the mirror.
Now back out to the Foyer. View the window on the right again.
There is a tag stuck in the wooden panel on the bottom left. Use the tweezers here to collect it. (#4 of 4)
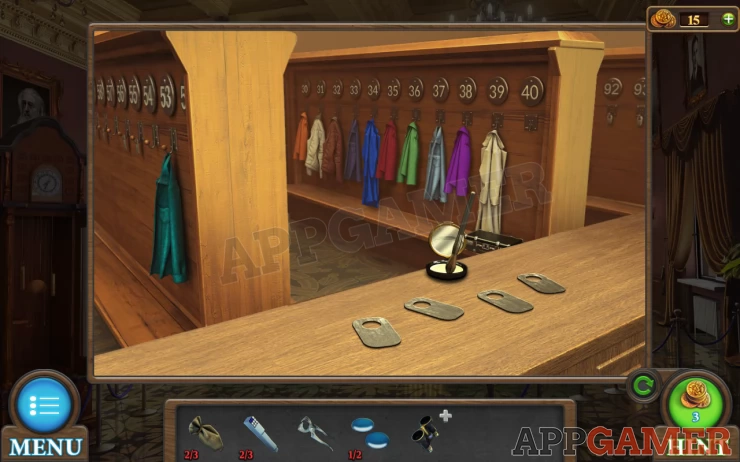
Now view the coat check area again and place the 4 tags on the counter.

Add the powder to the counter and then use the brush on the powder. This will reveal numbers on the tags.
Match the numbers to the coats on the hooks.
34 - blue, 35 - red, 36 - green, 38 - purple.Show
Go back to the dressing room and view the drawer below the table.

Tap the color buttons in the numerical order of the tags. Then press the large button at the bottom.
Collect a piano key (#3 of 3) and a weight.
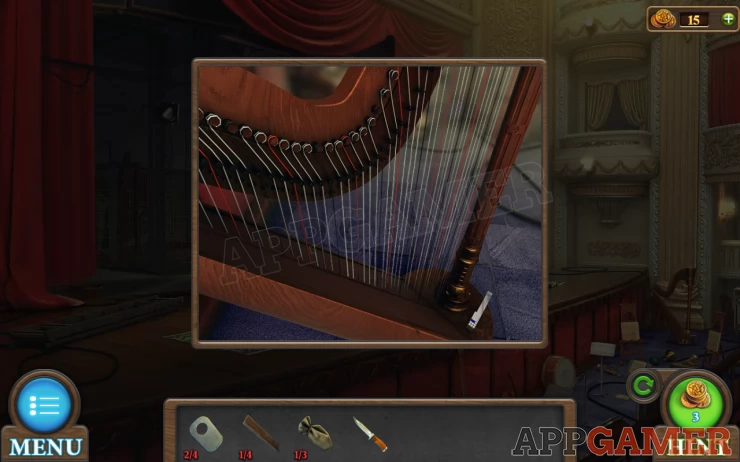
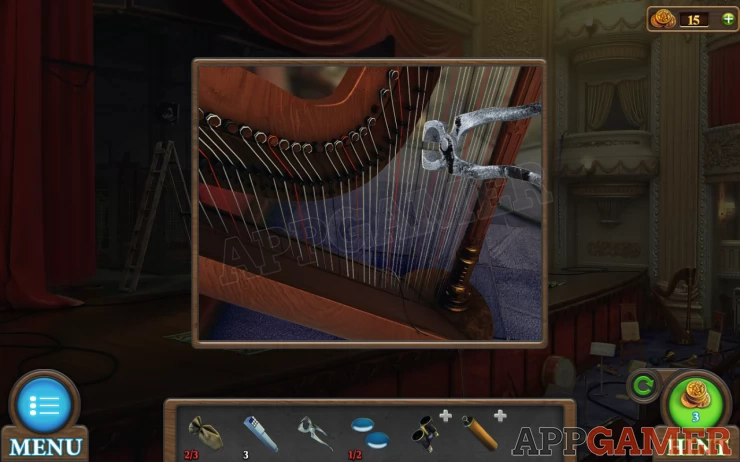
Back out to the stage and view the Harp again on the right. Use the Pincers to collect some String.
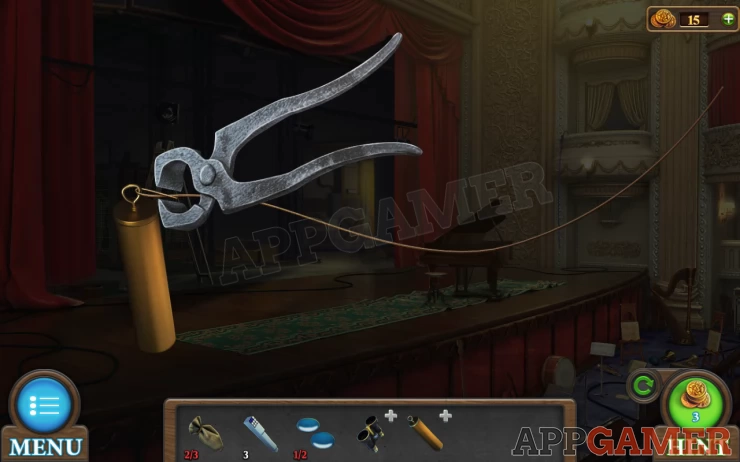
Now combine the weight with the string, the use the pincers again to attach them. Collect the clock weight.
Return to the foyer and view the body of the grandfather clock again. Add the weight to it and the clock will start working. You will view the clock face. This is a puzzle.
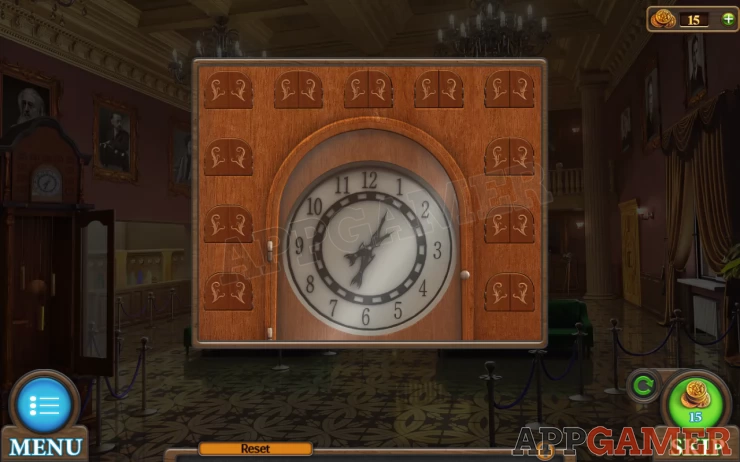
The doors around the face can be open or closed.
Solution: Follow the clue in the mirror lights in the dressing room. Open the doors that match the lights that are on. Check to see if the lights you see are the same as mine.Show
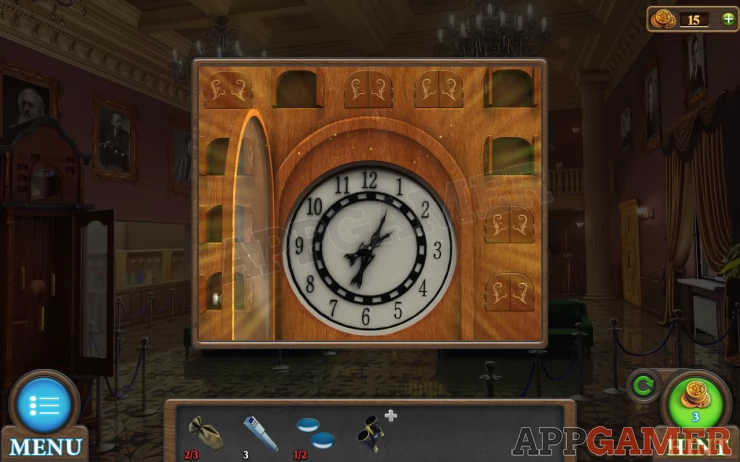
The clock opens and you can collect a paper Hint.
Go back to the stage and view the piano again. Tap open the lid to find the keyboard.
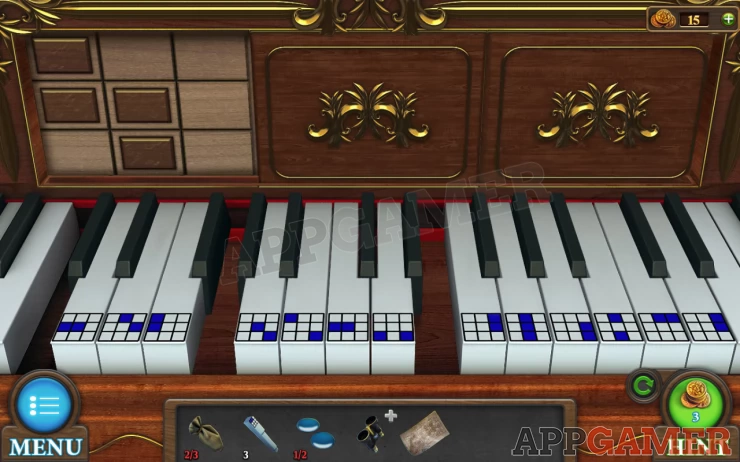
How to complete the Piano Keys Puzzle
Add the 3 piano keys to start the puzzle.
There are 3 panels, the first is open and show a pattern. You need to press the keys with the cumulative patterns to to match the panel patterns shown. If the keys have the same square highlighted twice then it will cancel out.
Collect a key.
Return to the dressing room. Use the key to open the blue cupboard on the right.

Inside is a jacket.
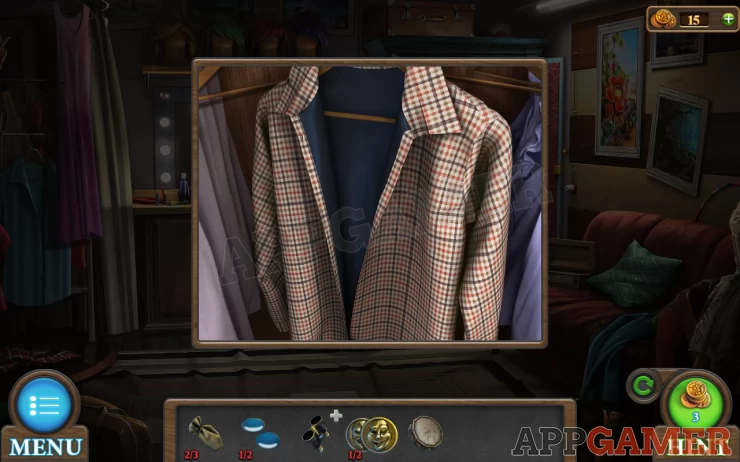
Open the jacket and collect another Lens (#2 of 2)
Then collect another sandbag (#3 of 3) from the bottom of the cupboard.
Next view the small box on the sofa on the right.
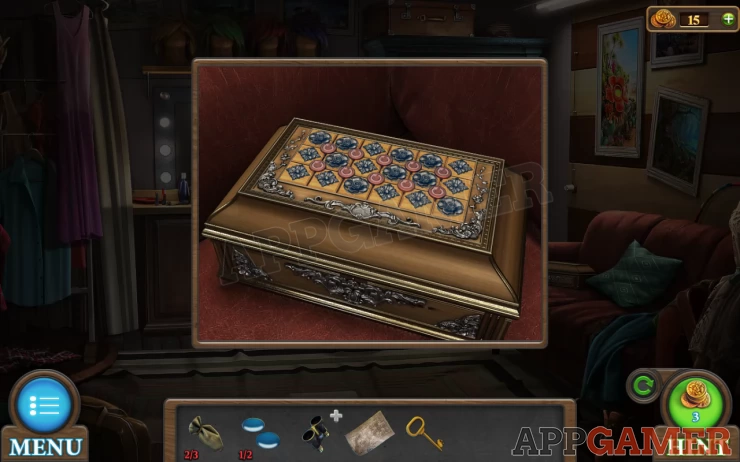
How to Complete the Blocks Puzzle
View the puzzle on top, then select the paper Hint to add it to the puzzle to help you.
Rotate the blocks to match the patter on the paper.
Once done you can collect a Metal mask (Metal masks 1 of 2) and a Wheel.
Now go back to the Foyer and the coat check area.
Tap on the briefcase on the bench.
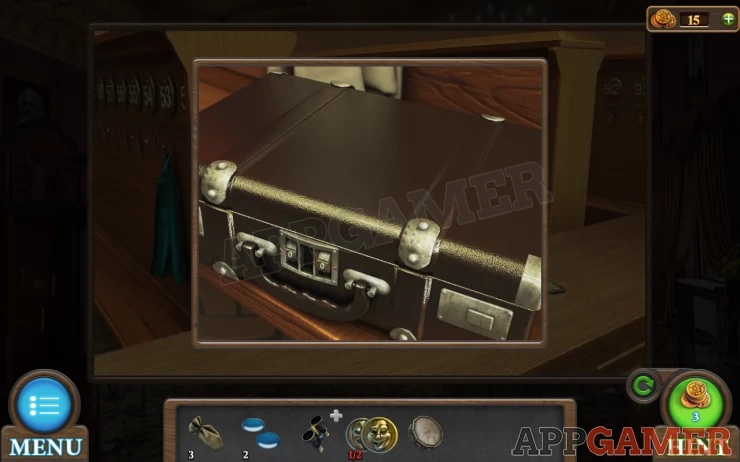
Add the wheel to the lock and then you can input the combination.
Solution: above the coat check area is a picture of a man with a briefcase. Check the number.Show
Code: 930Show
Collect a Lever.
Move to the backstage area. On the right are hooks with 1 sandbag.
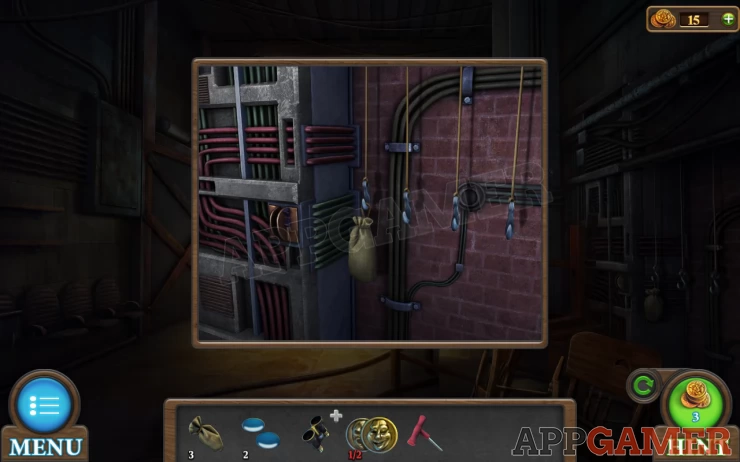
Add the lever on the left and the 3 sandbags to the empty hooks.
Return to the stage and you will see that some scenery has appeared.
View the binoculars in your inventory and add the lenses to them.
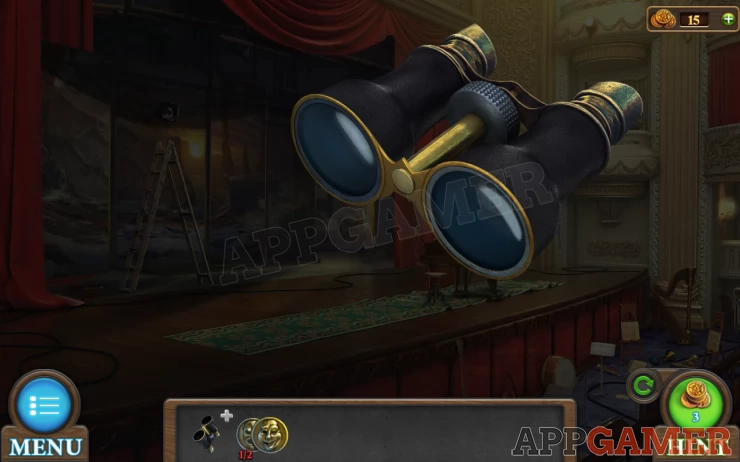
How to complete the scenery section
Now use the Binoculars on the scenery.
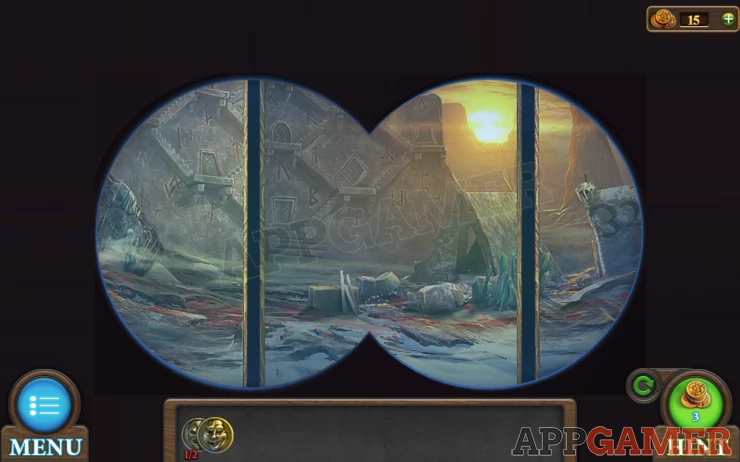
Look around for some numbers.
1: 3246Show
Return to the back stage and pull the lever by the sandbags. This will change the scenery. Check this one as well.
2: 6577Show
You can do this to find 4 different scenes and 4 numbers.
3: 2433Show
4: 4537Show
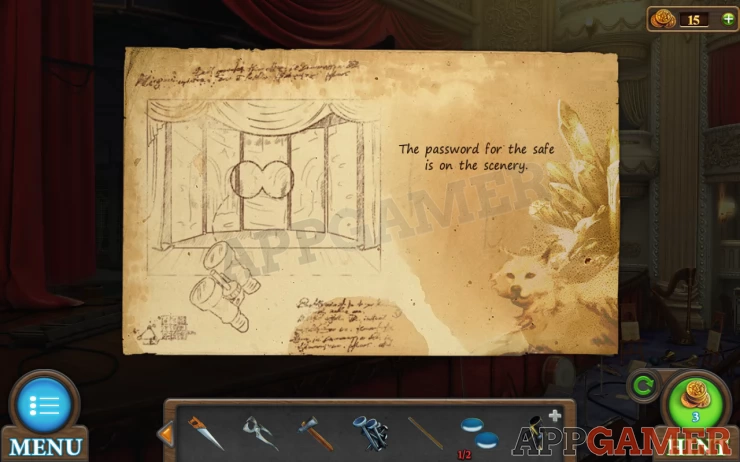
Go back to the dressing room. Open the cupboard door on the bottom left of the dressing table. There is a safe inside.
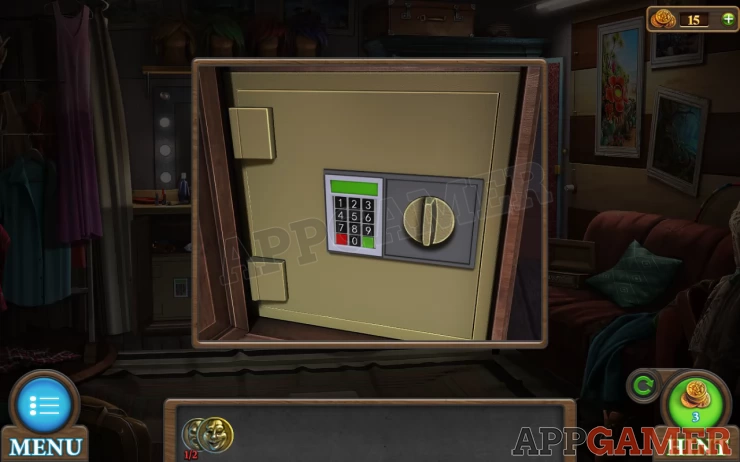
Open the safe. you can try each code or choose the correct one based on the clue found earlier.
Code: 4537 - Wolf in the sceneShow
Collect the metal mask (#2 of 2)
Return to the Foyer. On the right wall is a door, view this.
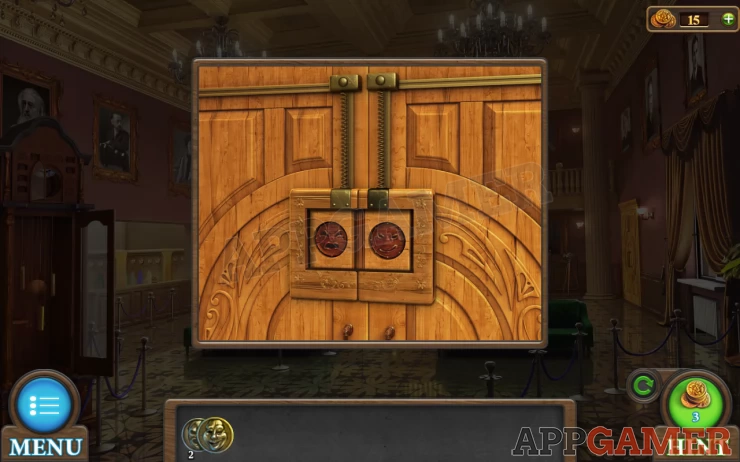
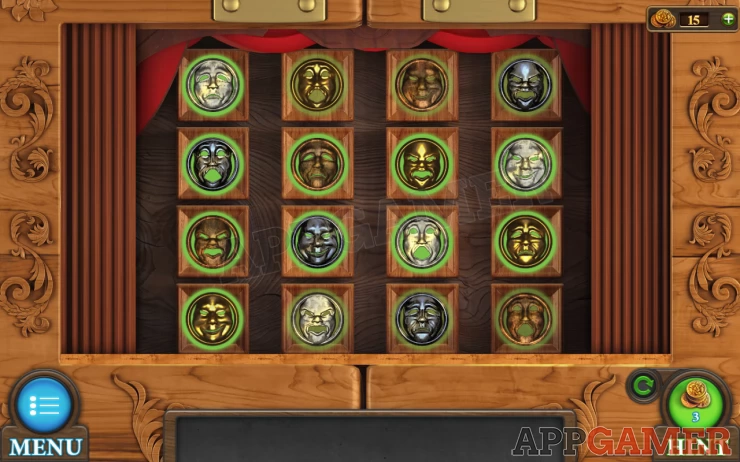
Use the metal masks to open the panel and find a puzzle.
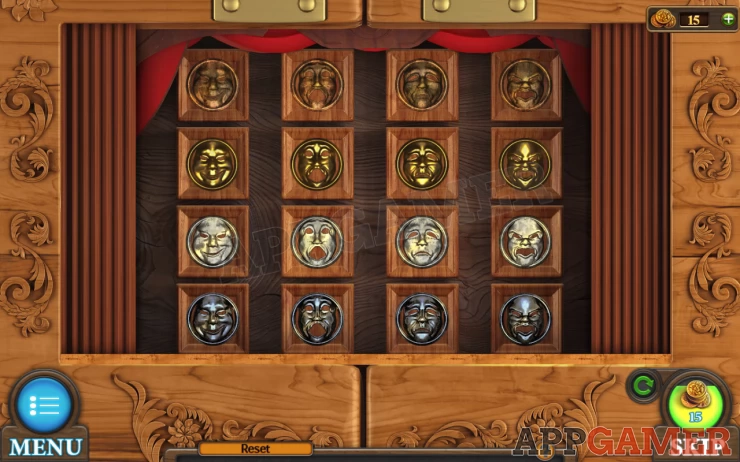
Hint: swap the masks around to arrange them so that each row or column has 4 different expressions and also 4 different colors.
Solution: Show
This completes our Tricky Doors Level 8 walkthrough, here is a link to our guide to level 9 - Antique District
We have questions and answers related to this topic which may also help you: Show all