Chapter 5 - Aurora Walkthrough
More Boxes: Lost Fragments
Welcome to the walkthrough guide for Chapter 5 of Boxes: Lost Fragments. Another beautifully designed puzzle and escape room style game from Snapbreak.
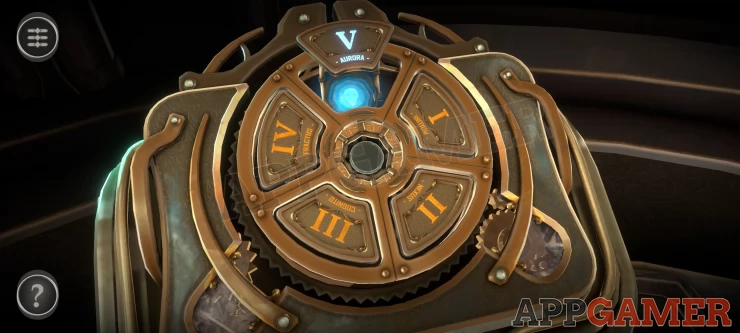
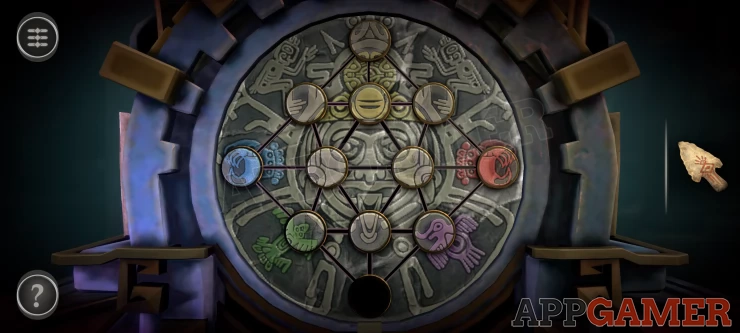
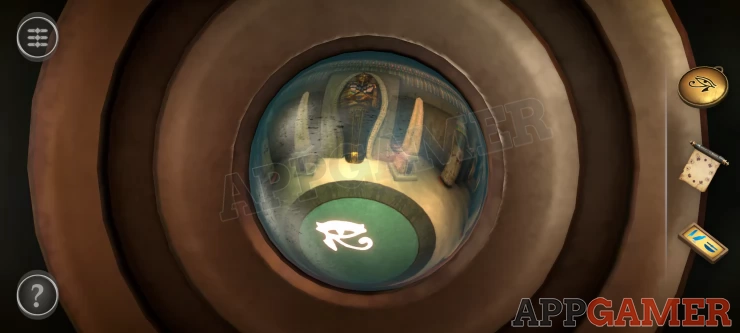
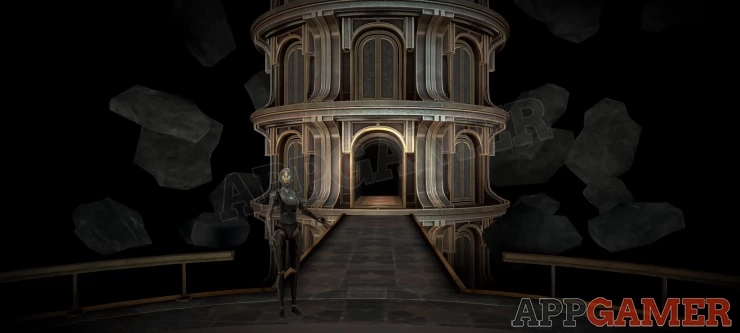
After completing Chapter 4 you receive a new Token and can use this on the central pedestal as before to unlock a new set of rooms for Chapter 5 - Aurora. Each with puzzles boxes to solve. As you complete each section the next door will open.
Boxes: Lost Fragment - Chapter 5 Walkthrough
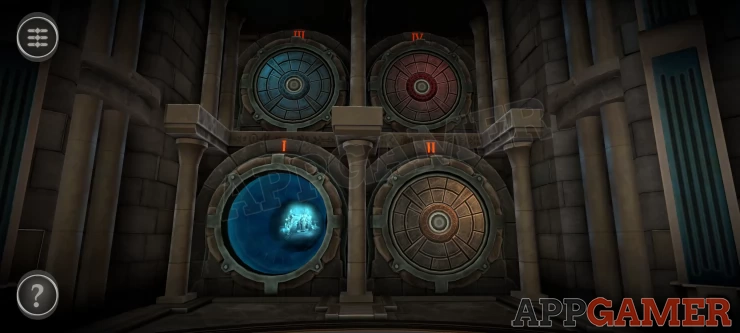
After unlocking Chper 5 the wall will open to reveal 4 round doors, door number 1 will open. This is where you will find the puzzle box rooms of Chapter 5. Tap the first door to pass through.
Chapter 5 - Room 1 Walkthrough
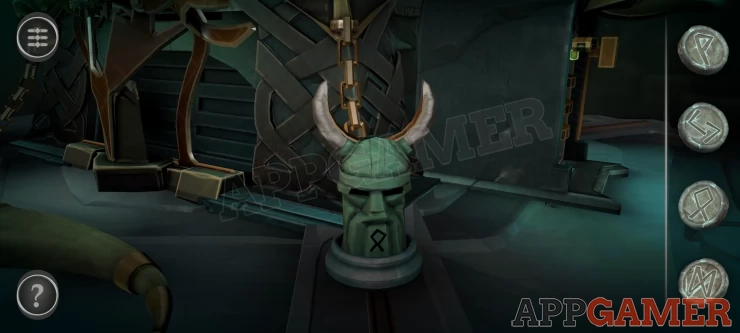
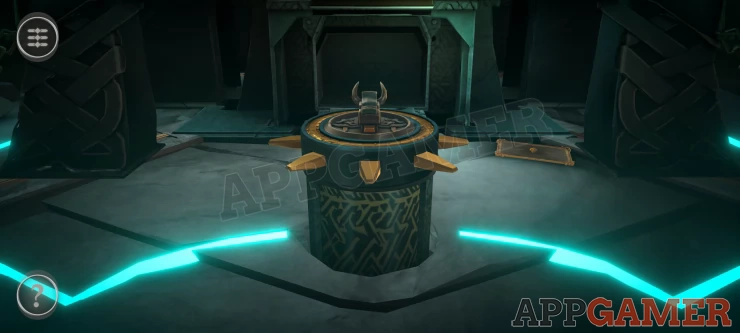
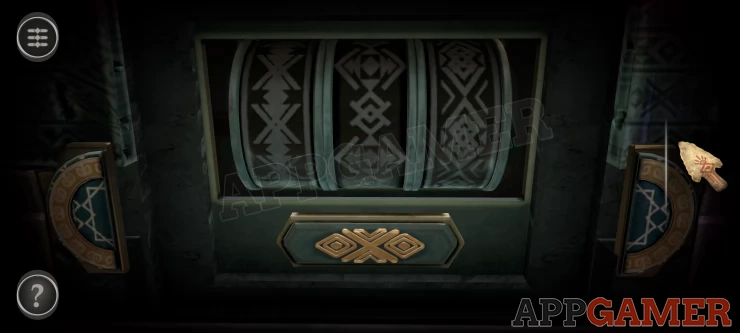
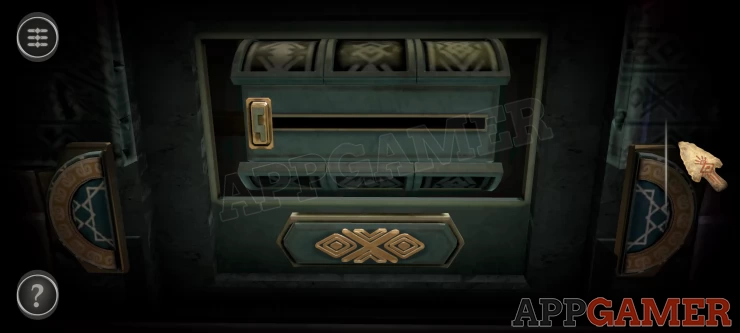
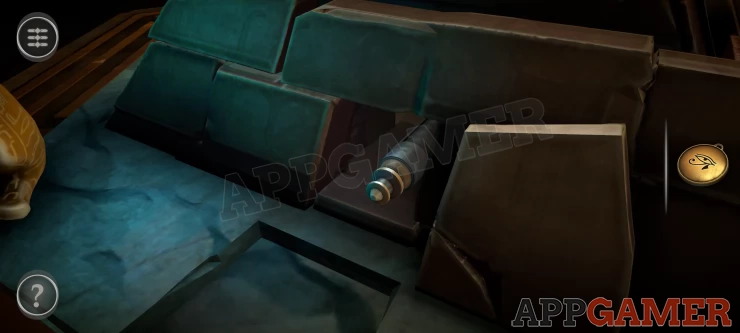
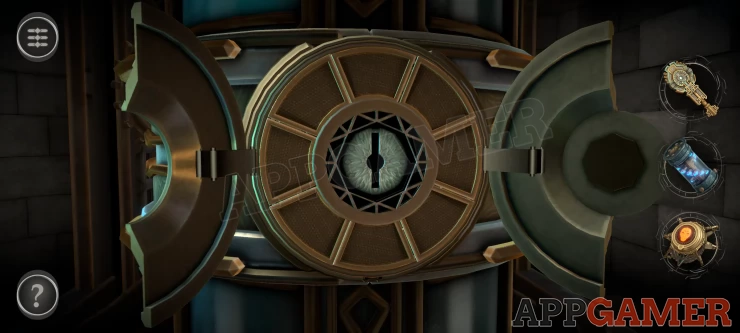
The first room has a large puzzle box with wolf heads on each end, and a Horn on the table.
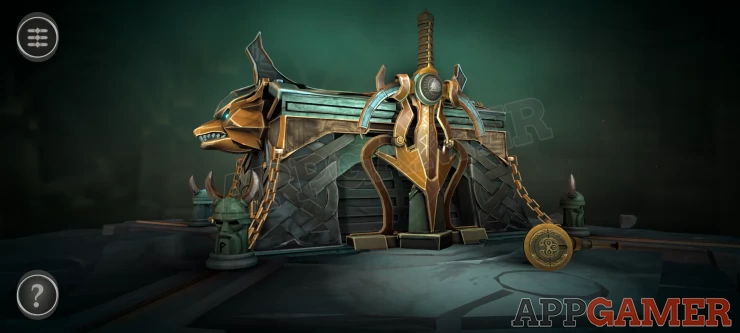
First view the horn. There is a small switch on it.
Turn the center dial around so that you can slide the switch to the right. Then turn it back so the the center line is vertical.
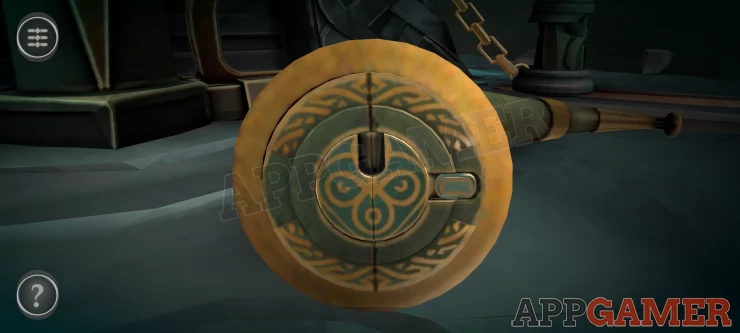
The horn will open and you can collect a Handle.
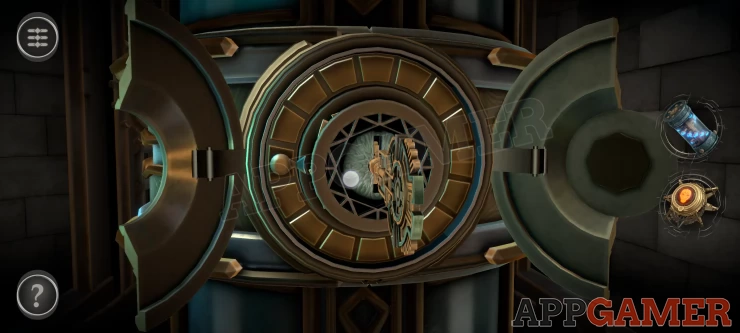
Turn to the back of the Box.
Slide the 2 bars to the left and right out of the way and then place the handle in the center.
Turn the handle to open the back and find a puzzle
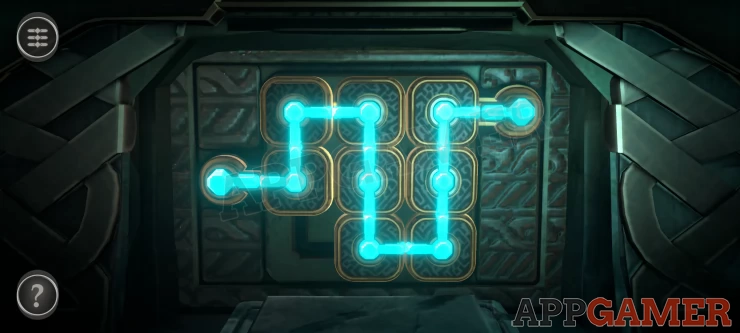
Block Slide Puzzle
- There are 8 square blocks that you can slide around the grid.
- Arrange the blocks to make a complete lines from the left to the top right.
Solution: Show
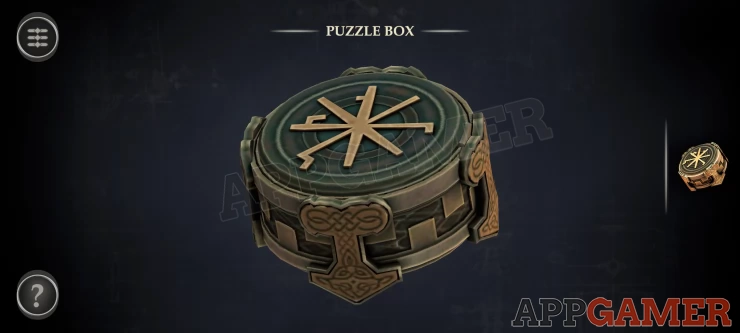
Once done you can collect a Puzzle Box
View the puzzle box in your inventory and open it. To do this just look underneath to find a dial. Turn this to line up the arrows.
Collect the Celtic Knot.
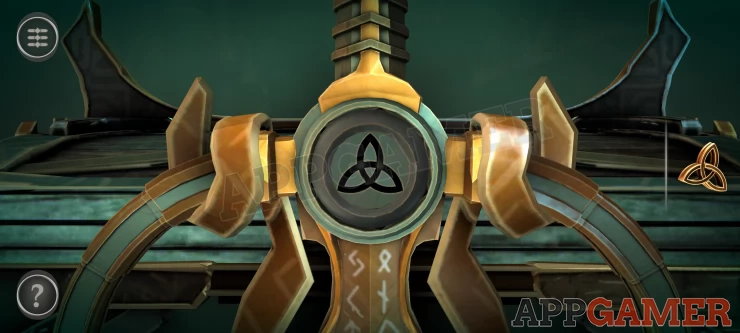
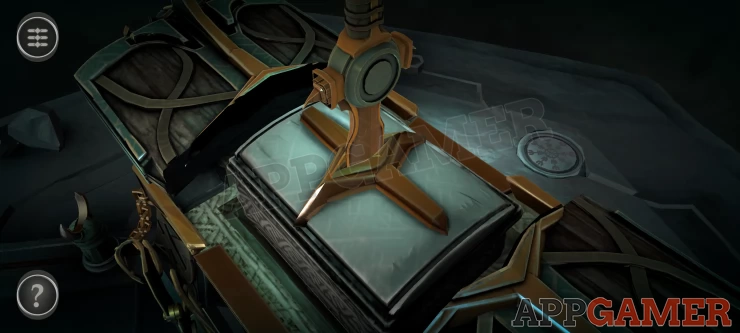
Turn back to the front of the box and view the top of the sword in the center.
Swipe the center of the hilt to turn it and then you can place the Celtic knot here.
Slide down the 2 side clasps to release the sword handle and then collect the Short Sword.
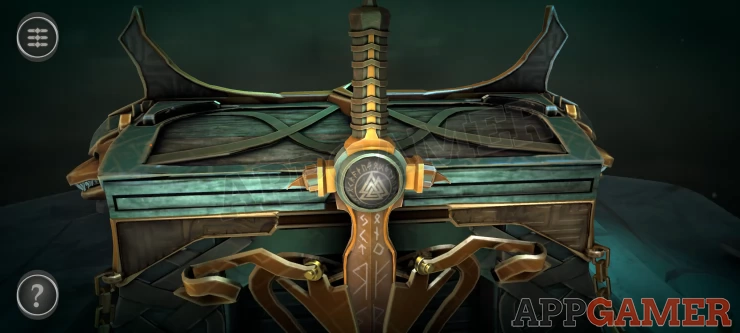
View the top of the box and place the short sword into the slot in the center.
This will open up panels on the ends of the box.
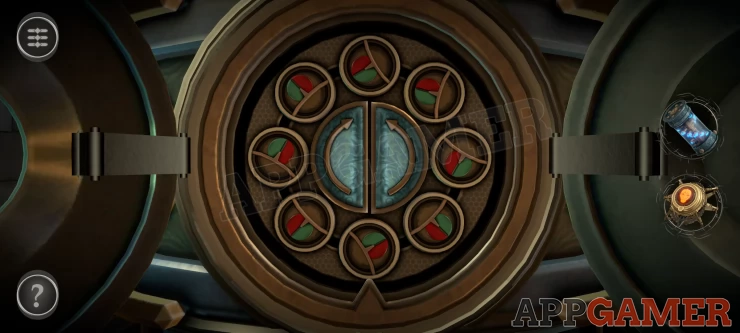
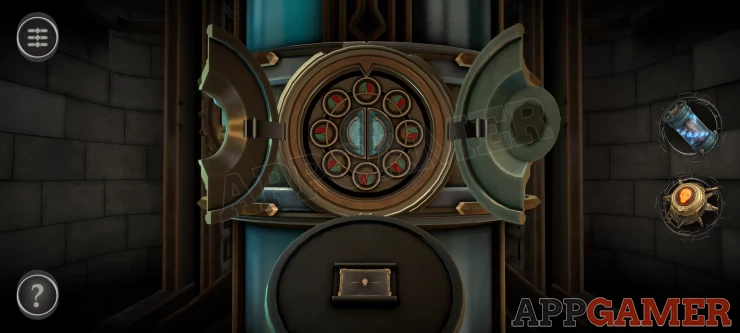
Rings Puzzles
- In each end is a puzzle with 4 rings, these can be turned by sliding the switch on the right up and down.
- Each ring has a gap in it at a different location.
- There is a handle at the bottom that you need to move up to the top.
- Rotate the rings to find a gap for the handle to pass through then move it up one ring at a time to the top.
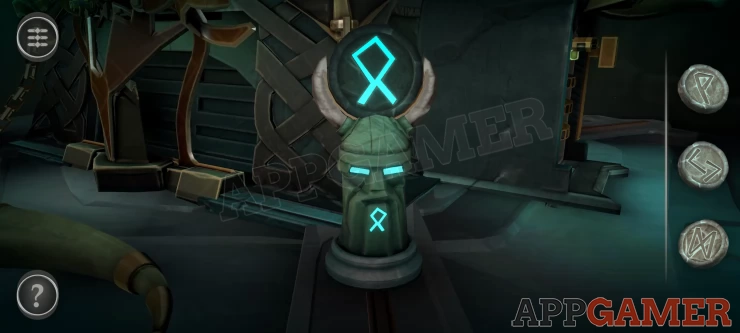
Once done the wolf head opens and you can collect 2 Rune Stones. Repeat this process at the other end of the box to get 4 Runes in total.
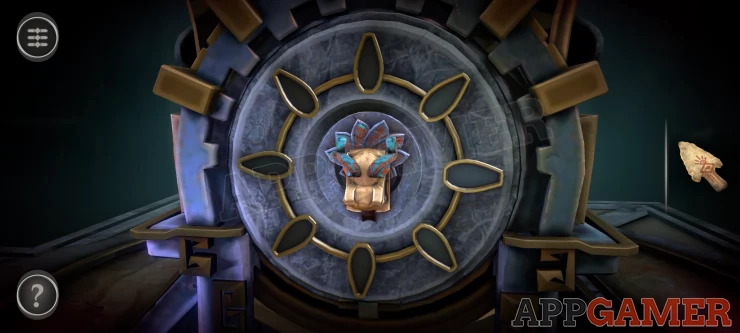
Now view one of the 4 small figures attached to the box corners by chains. Each of the 4 figures will have a rune symbol on it.
Place the matching rune stone onto the top of the figure, then repeat this for the other 3 figures.
The figure will move out from the box and activate lights and then reveal a round container from the table.
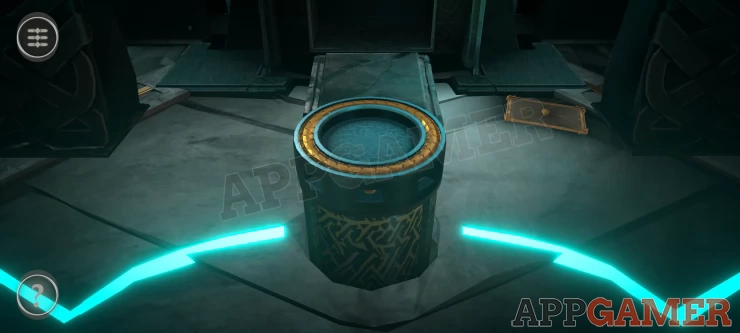
Now look on top of the corner sections that have been pulled from the box. The one to the back left from the container has a Dragon Token to collect.
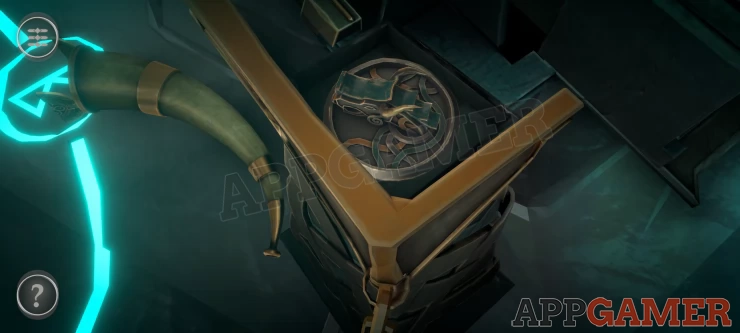
Place the Dragon Token on top of the round container to reveal some handles.
Now turn the top of the container with the handles until it lifts up and opens. Inside is a glowing rune stone in 3 parts.
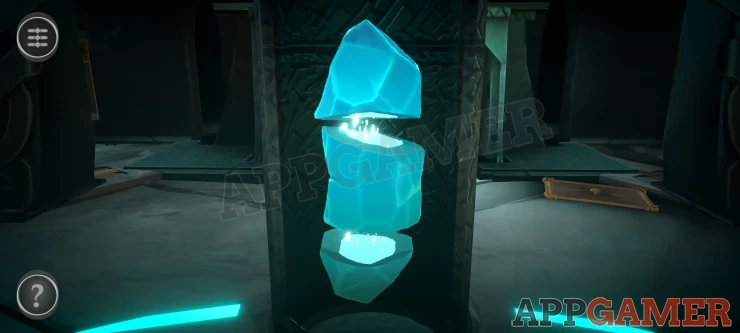
Turn each of the parts around to reveal and line up the rune symbol on it.
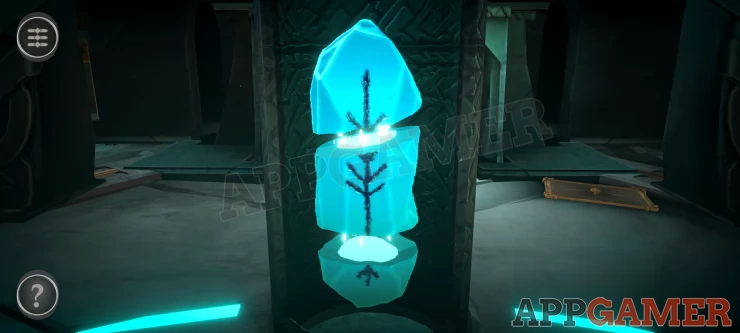
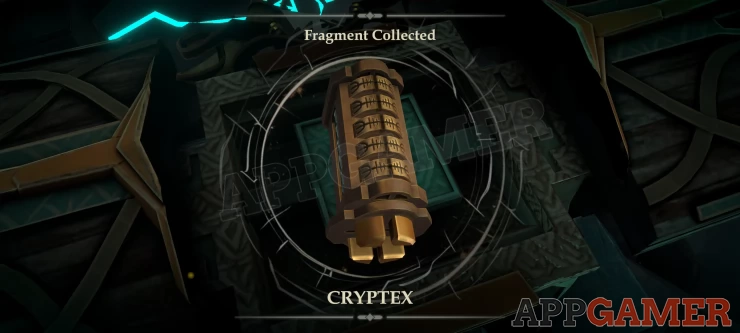
It will then join together releasing a dragon spirit that will break open the top of the box.
Collect the Cryptex Fragment to complete room 1.
Chapter 5 - Room 2 Walkthrough
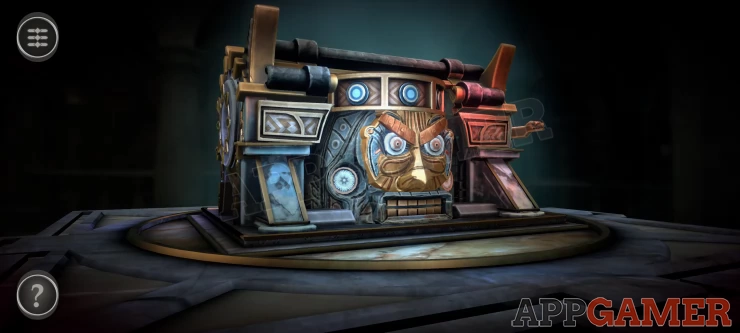
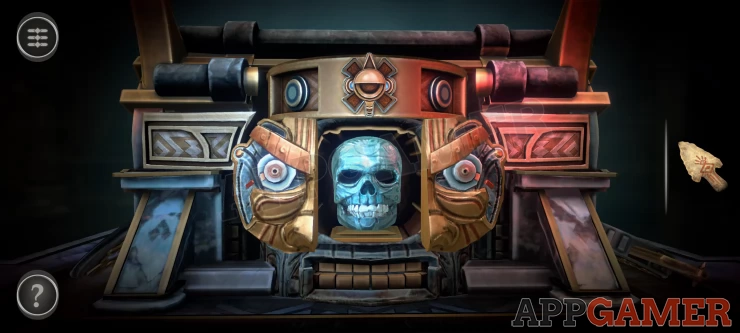
In room 2 we have an Aztec themed chest with a face on the front.
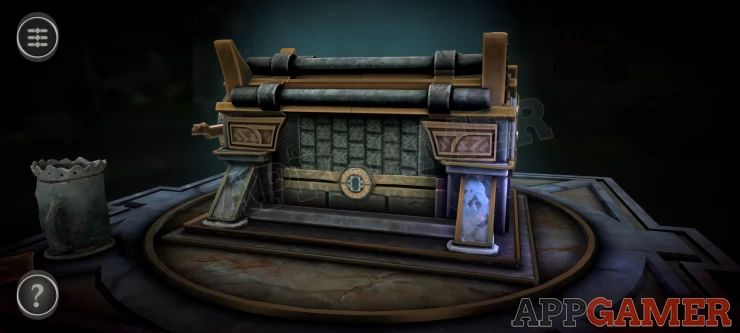
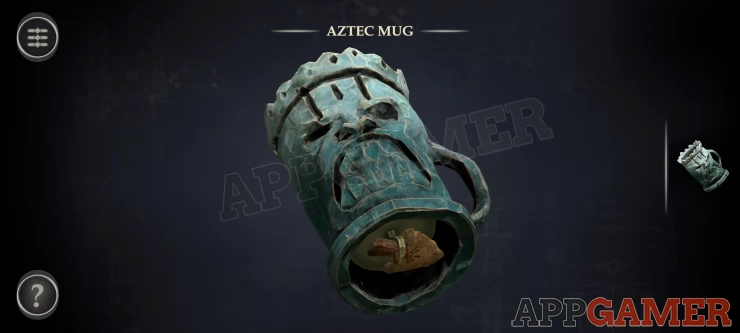
First turn to the back of the chest and then collect the Aztec Mug that is on the table top .
View the mug in your inventory and look underneath it. Collect the Old Arrow Head.
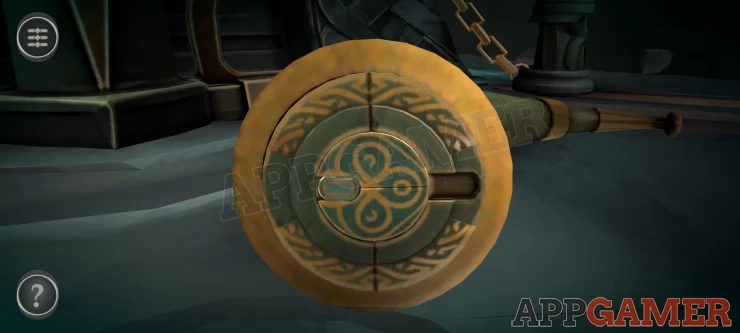
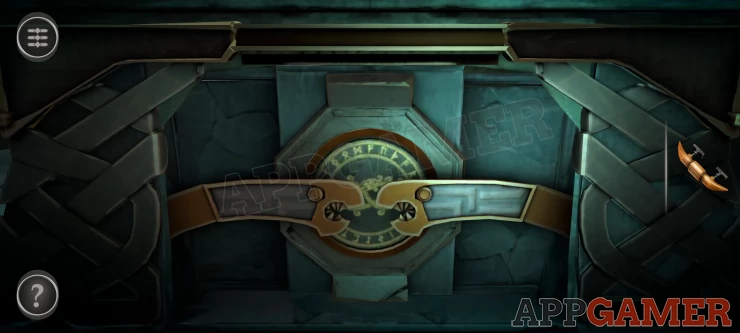
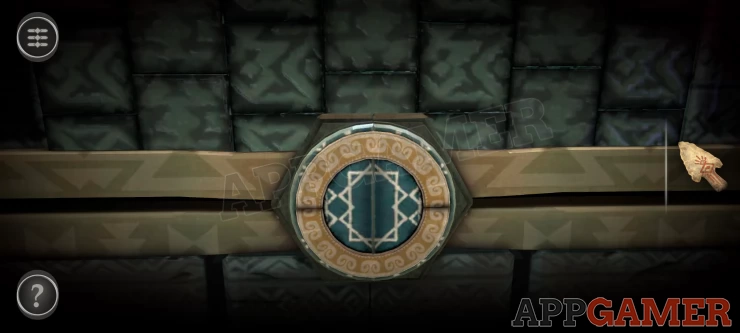
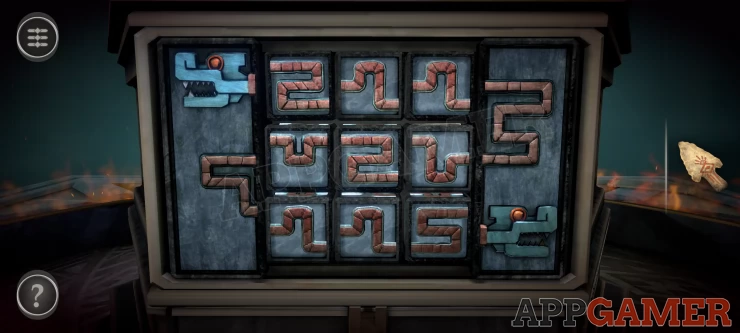
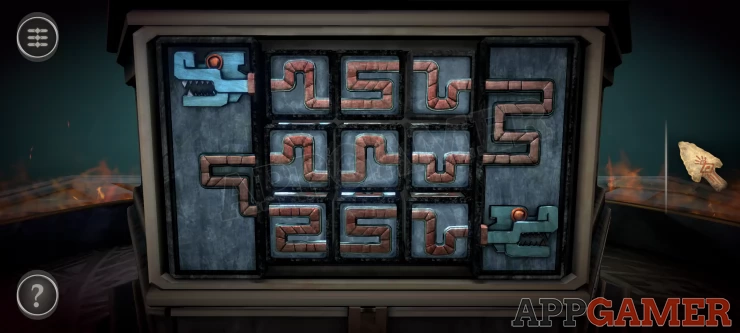
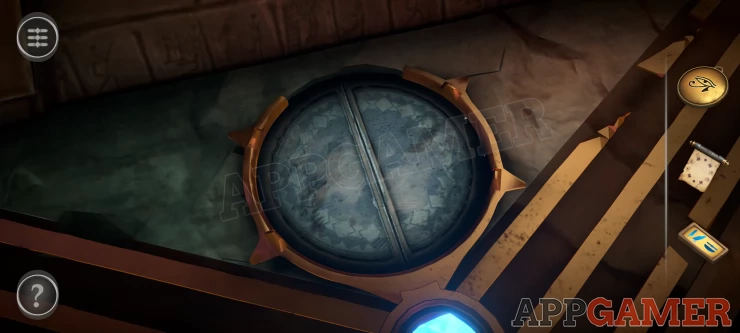
View the circular lock on the back of the chest.
Rotate the outer ring on this to make the center line vertical. You can then slide the sides apart to open the wall.
Inside are 3 tumblers, tap and hold the button below them to rotate them one at a time, release the button when the gap appears at the front.
Then you can slide the button across to the right. Collect the Small Figure.
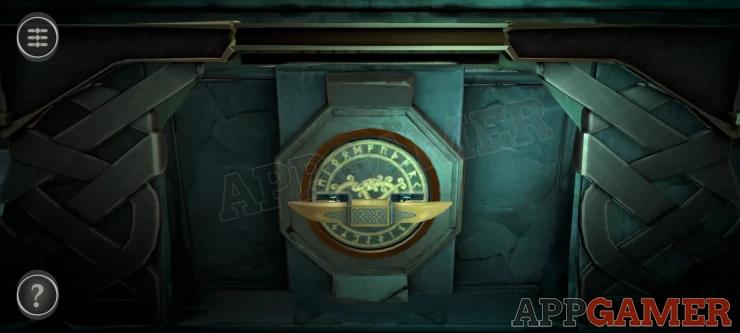
Now view the left side of the chest. Add the Small Figure to the center.
When it opens press the green button to open the full panel.
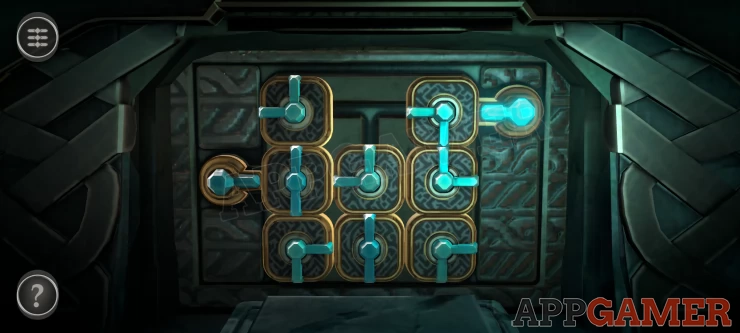
Mosaic Puzzle
- The engraving has 11 circle parts that are mixed up.
- Use the empty slot to slide thee around and arrange them to complete the image.
Solution: Show
Collect the Aztec Arifiact.
Now turn to the other end of the chest to see another puzzle
Blue Gems Puzzle

- There are 3 circle elements that rotate.
- There is also a center bar that moves left and right.
- On the puzzle are 5 blue gems.
- Move them around to arrange them all into the center gold circle.
Collect the Crystal Skull.
Now turn to the front of the chest with the face.

Rotate the top section until a large symbol appears that matches the Aztec Artifact that you have collected. Place the artifact here and to parts on the side of the face will flip over.
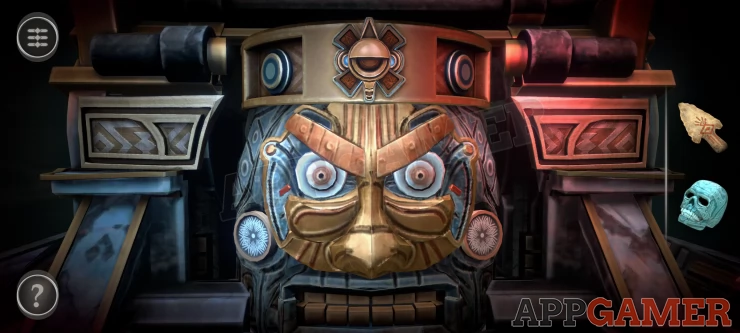
Turn these 2 dials to rotate the eyes of the face until small red lines line up with those on the sides.
The face will open up. Place the Crystal Skull inside.
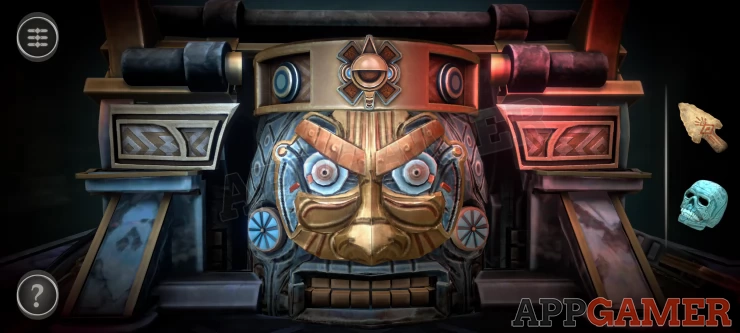
The chest transforms into a tall Totem.
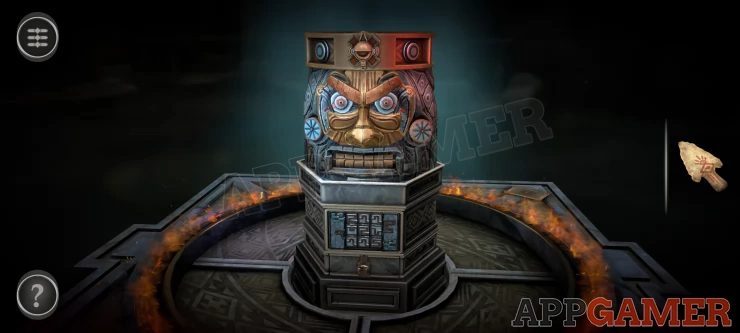
View the puzzle on the front.
Snake Puzzle
- The snake has 9 squares that can be changed.
- Arrange them to make a complete line from head to tail.
[liSwipe each square to flip and change the snake part on each.[/li]
Solution: Show
Once done the base will twist and you will have a track running up the center. Place the Old Arrow Head into the holder at the bottom.
Slide this up to the top and the mouth will now open.
Collect the Ancient Key Fragment to complete room 2.
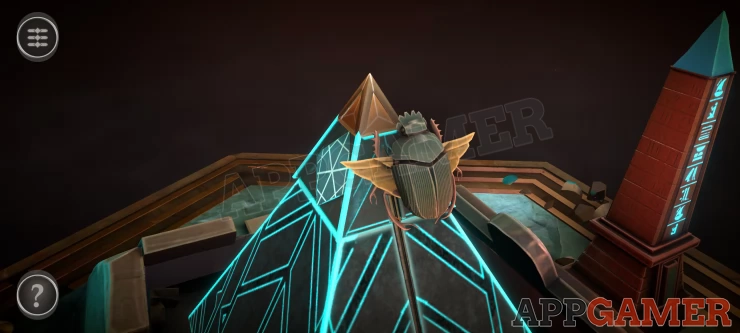
Chapter 5 - Room 3 Walkthrough
Room 3 contains a Pyramid shaped box

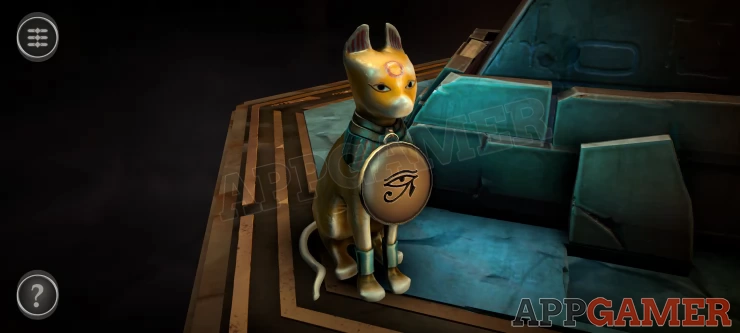
First look on the left to see the Cat figurine and collect the Medallion from its collar.
Then look on the side of the pyramid base next to the cat to see a stone that can be moved.
Slide it to the right and collect the Scroll.
View the scroll in your inventory and you can open it to find a clue on the Scroll with Symbols.
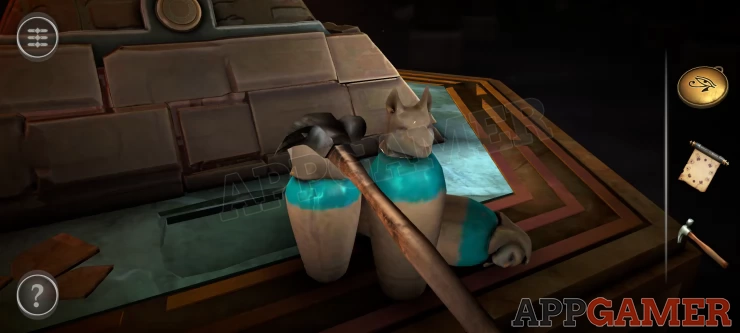
Now look on the other side of the pyramid to collect a Hammer.
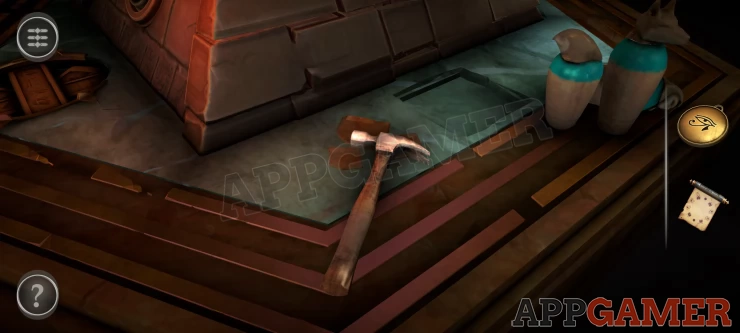
Then use the hammer on the 3 Coptic jars that are next to it.
After breaking them you will collect a Puzzle Piece.
Look on the side of the pyramid next to the jars to see a round hatch.
Open this and then examine it to look inside the pyramid.
Move the view around until you line up the eye symbol with an outline on the wall.

Two columns will appear and then a circular section will uncover at the front.
Examine this and slide open the 2 doors to find a puzzle.
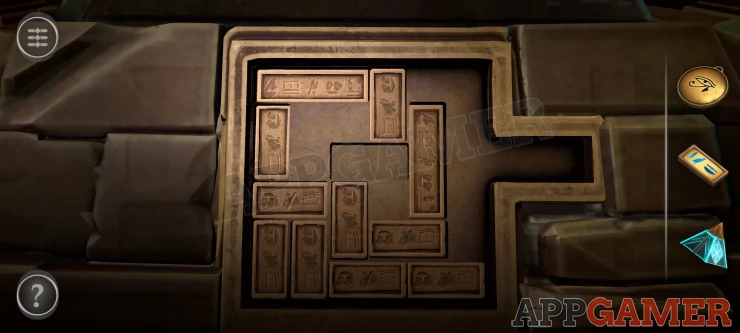
Symbols Puzzle
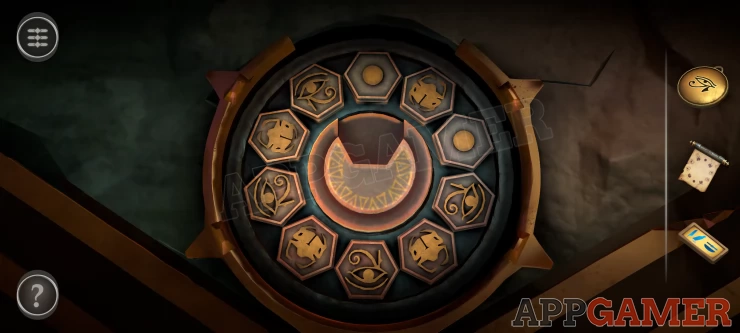
- There are 10 hexagonal pieces with symbols on them.
- You can collect a piece with the center dial and more it to a new location
- Slide it put to push it into place between any two others
- The clue for this is on the scroll with symbols.
Solution: Show
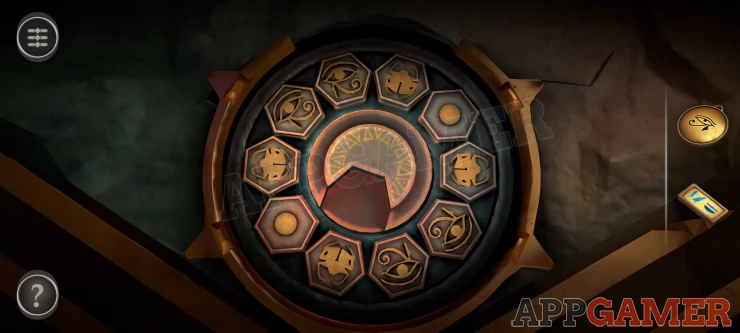
Collect the Strange Pyramid.
Now turn to the back of the pyramid. There is a puzzle
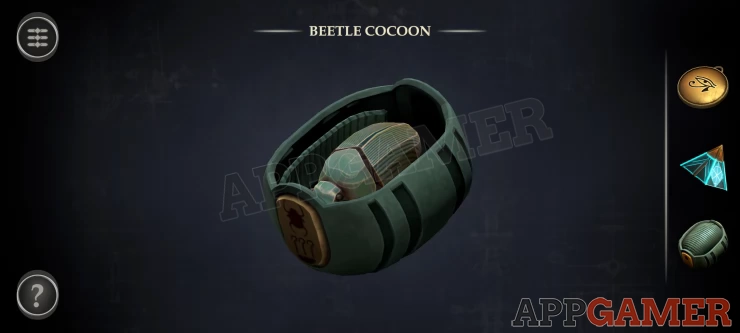
Block Puzzle
- Place the Puzzle Piece onto the board to start.
- Now slide the pieces around to make a path to let you move the puzzle piece to the slot on the right.

Collect the Beetle Cocoon. View this in your inventory and open it to collect the Scarab.
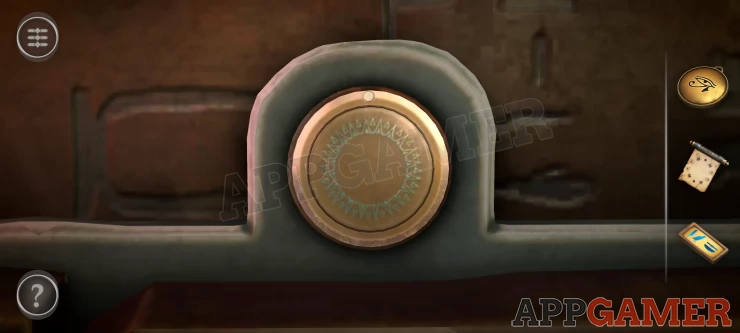
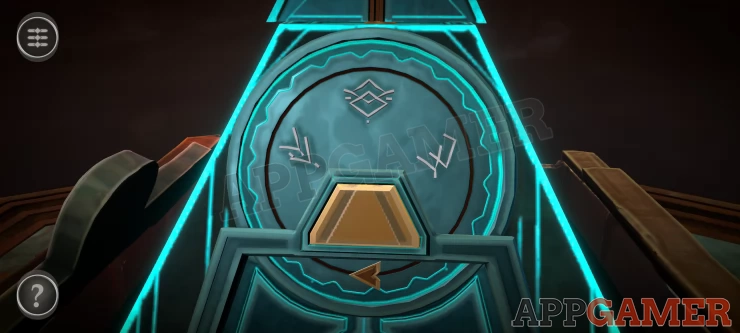
Now view the front of the pyramid and place the medallion onto the Circle.
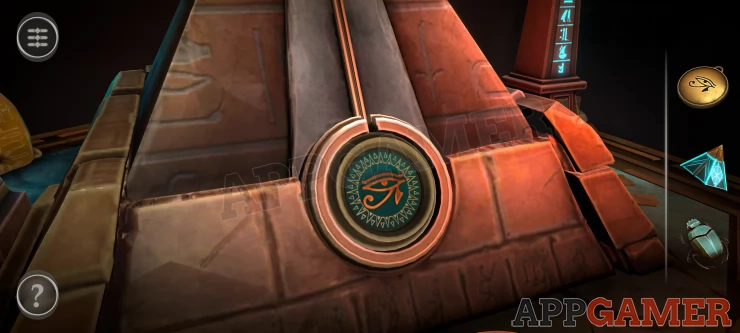
When the pin appears place the scarab on to it and then slide it up the track to the mark near the top.
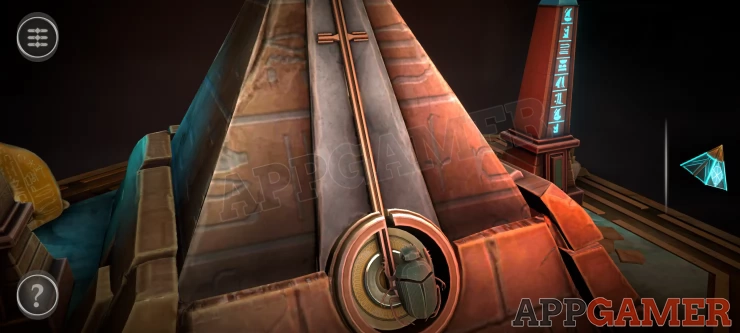
After the pyramid opens up you can place the Strange pyramid on top. Then slide the scarab all the way up.
The top turns and a holder appears. Now turn to the back of the pyramid again and view a section with a yellow button.
Pressing the button will send a pointer around the circle illuminating the symbols.
Press and hold the button and then release it on the first symbol to keep it lit.
Then do the same again for the second symbol and finally the third.
Once all are on you you can collect a Small Crystal.
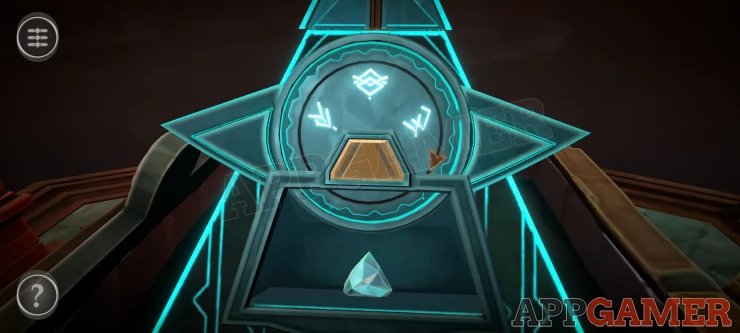
Tun back to the front and place the small crystal in the holder.
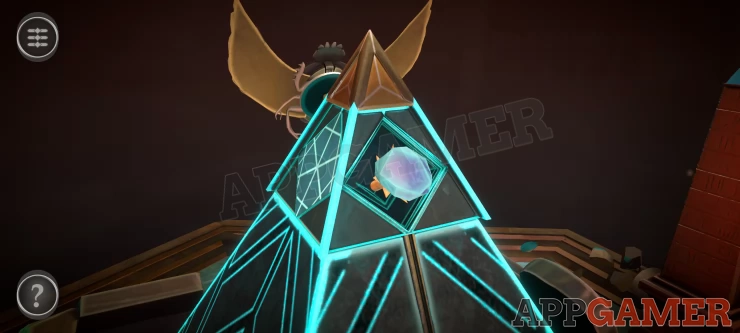
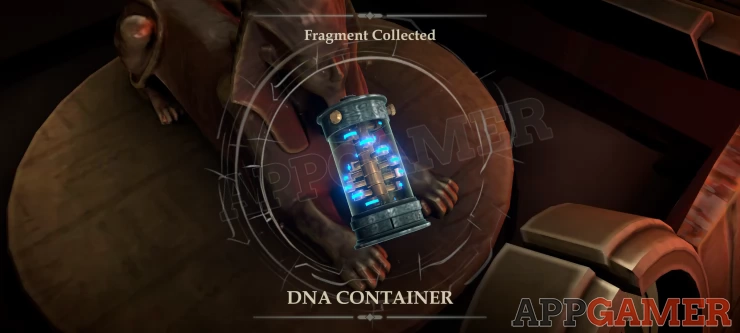
After this the pyramid will be destroyed and you can view the Sphinx inside.
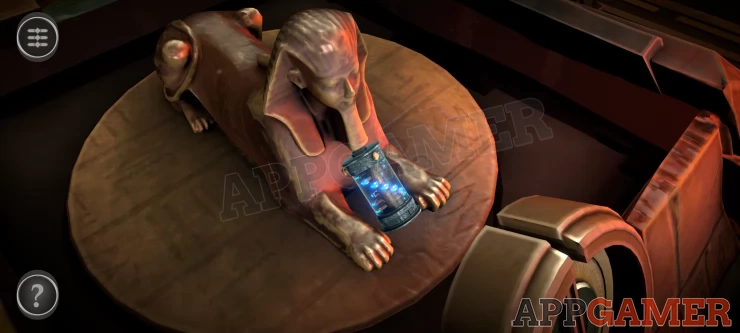
Collect the DNA Container Fragment to complete Room 3.
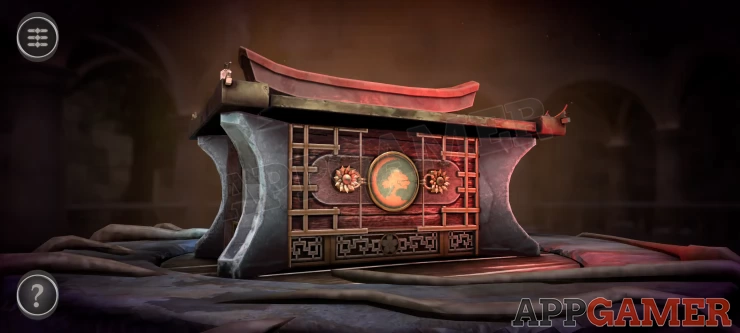
Chapter 5 - Room 4 Walkthrough
In room 4 we have a Japanese themed puzzle box.
First look at the top corner of the box on the front left.
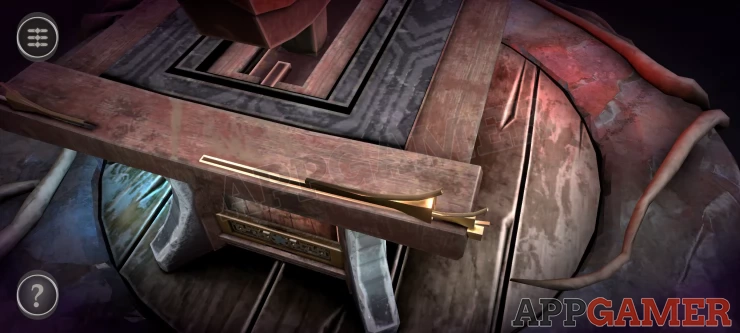
Slide the metal piece to the left to open a panel on the left end.
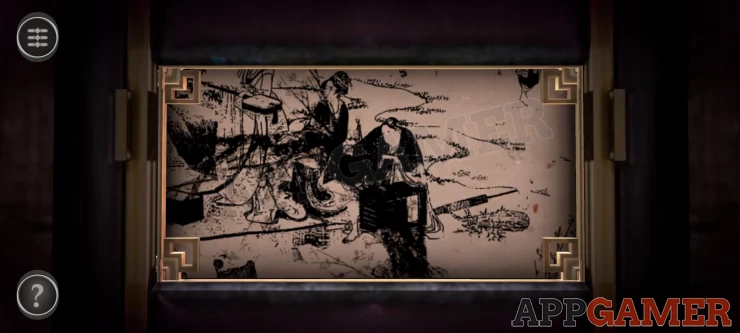
Now view he picture that is revealed, you can slide the image around to find 4 clues in numbers of dots.
Now turn to the other end of the box.
Swipe the top right cylinder to turn it and find a switch. Slide this down this to open the panel and find a puzzle.
Dice Puzzle
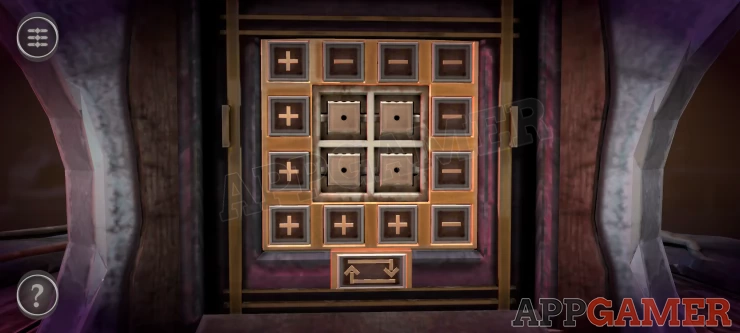
- There are 4 dice in the center
- Use the + and - buttons on the edges to change the number on the dice in the same rows or columns or diagonals.
- Match the numbers in the 4 dice to those shown in the clue image.
Solution: Show
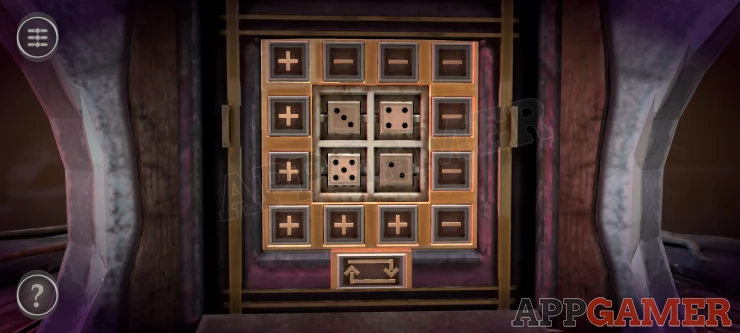
Collect the Brass Handle.
Turn to the back of the box and place the brass handle into the round opening at the bottom
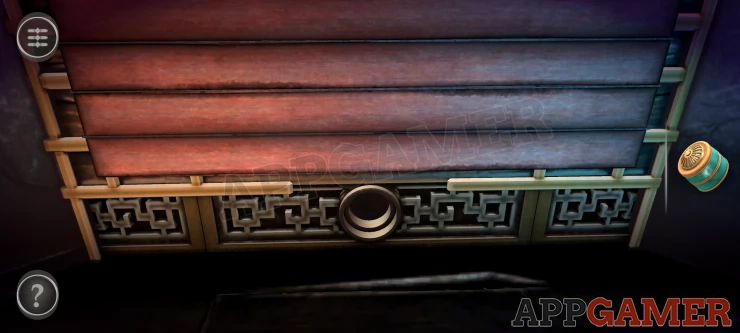
Segment Puzzle
- There is a circle with 6 segments
- Pressing the button on the left will turn the circle 2 segments clockwise
- Pressing the button on the right will turn it 3 segments clockwise
- After turning the segment at the top will flip over.
- Flip all of the segments so that the pattern it showng
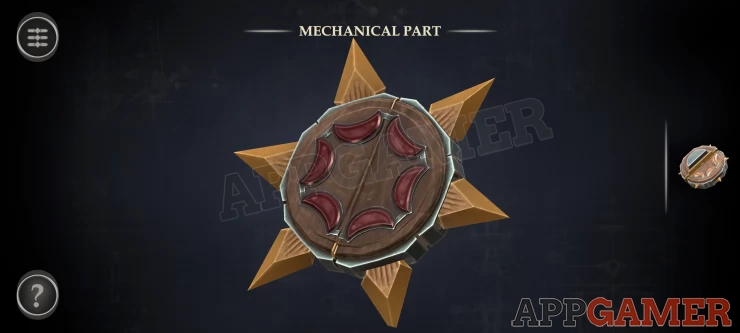
Collect the Mechanical Part.
View the mechanical part in your inventory, it has 2 halves with a thread in the middle.
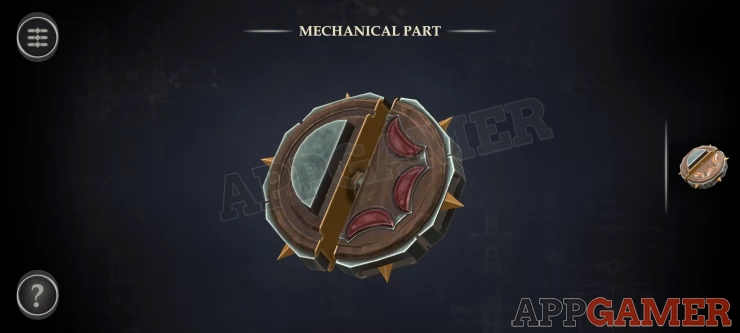
Spin the left half around to screw the halves together, once done it will become a Shuriken.
Now view the front of the box.
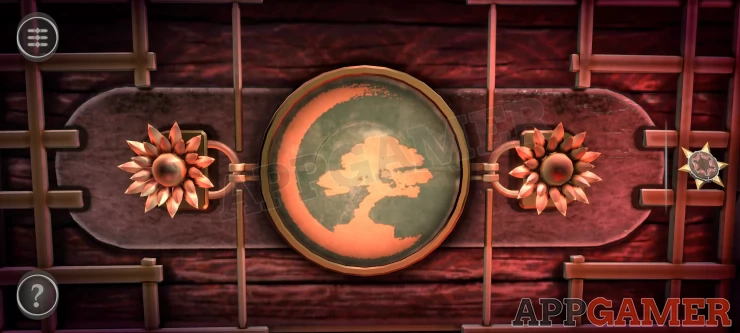
There are 2 flower shaped handles on the left and right, turn these to release the rings. Then you can slide the green cover away from the center.
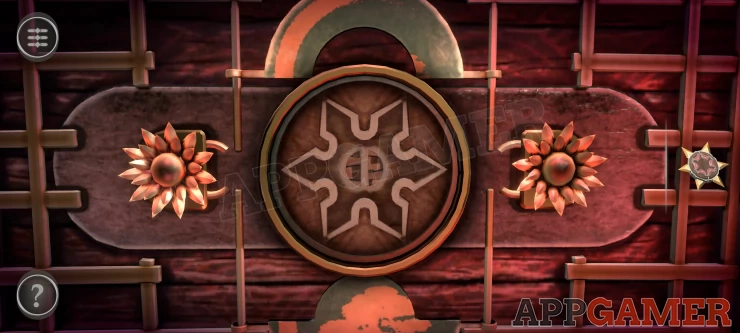
Place the Shuriken into the center slot
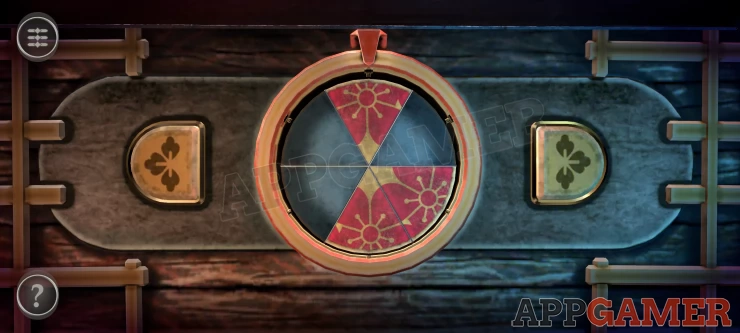
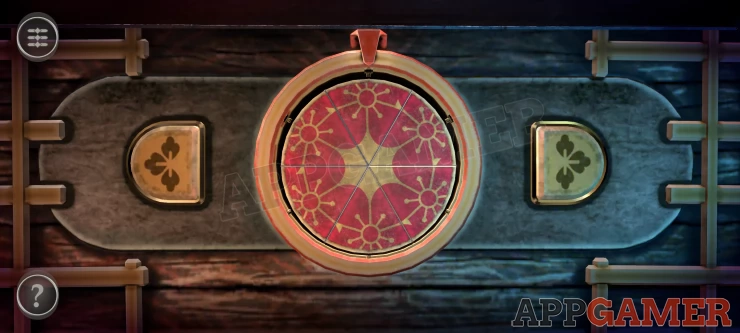
Shuriken Puzzle
- Press the moon shaped buttons to extent the points outwards.
- You need to do this in the correct order. If you make a mistake they will resent and you have to start again.
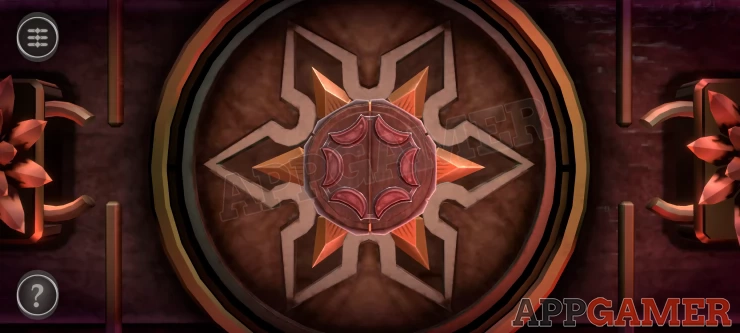
Solution: Lower Left, Lower right, Top Right, Right, Left, Top Left.Show
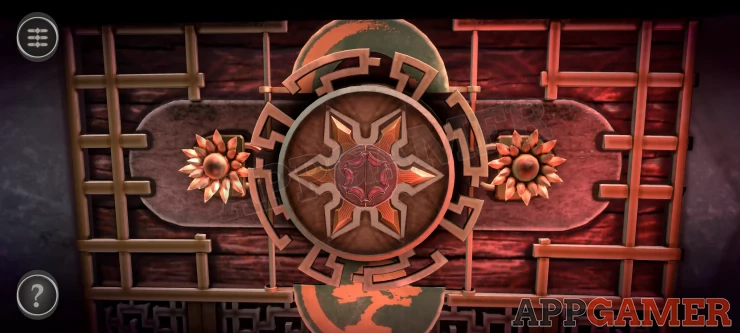
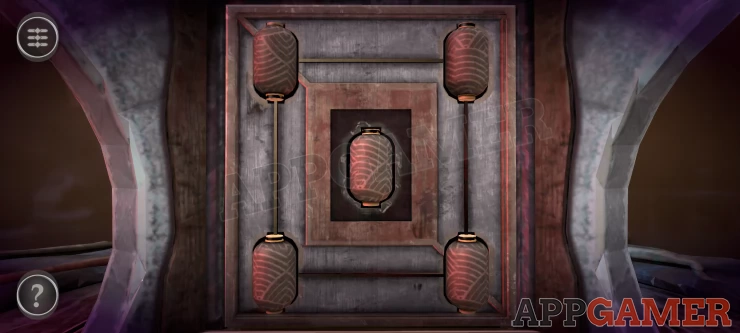
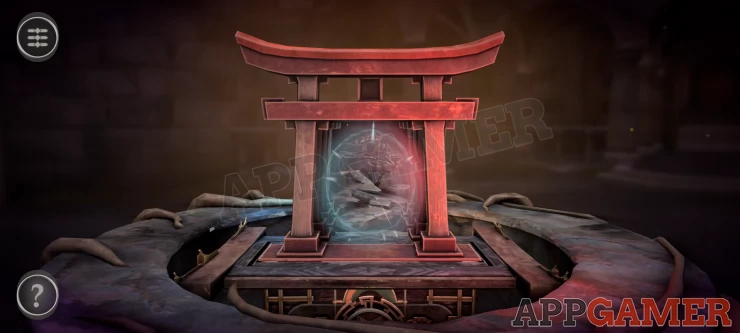
Once done you can turn the center section. This will lower the box and reveal a Torii Gate with a portal in the center.
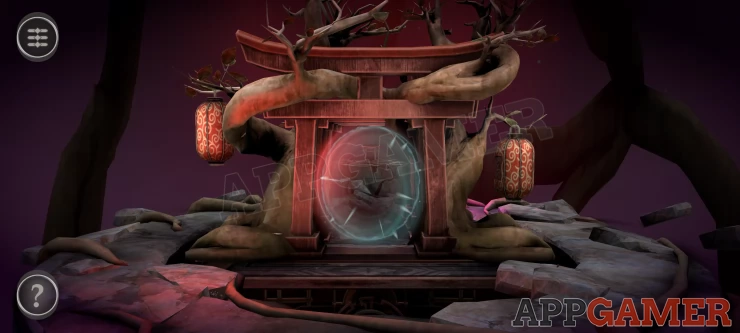
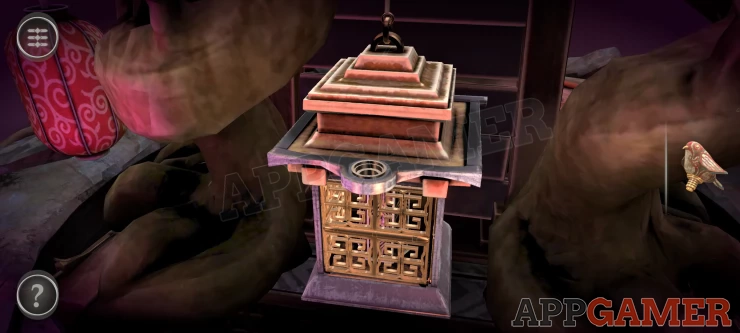
Move through the portal to a new location. Here is another Torii gate, overgrown, with 2 lanterns hanging.
View the lantern on the right side and turn it around to find a panel.
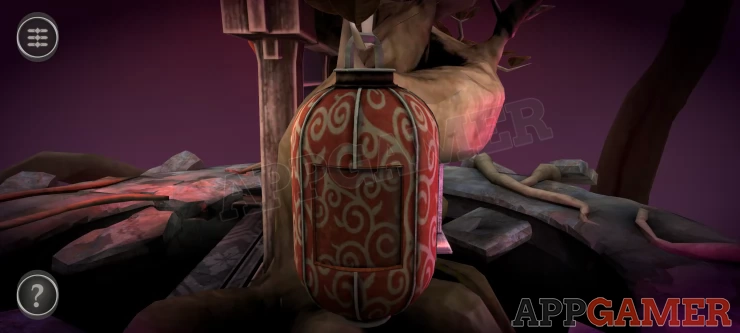
Open this and collect the Bird Figure.
Now turn to the back of the gate to find a metal cage.
Place the bird figure on the hole at the top and turn it to screw it in place.
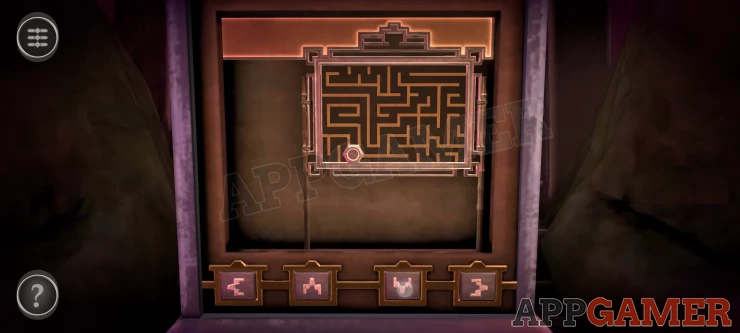
The cage turns to reveal a puzzled on the back.
Maze Puzzle

- There are 4 arrow buttons at the bottom that will let you move the Maze around the central hexagonal pin.
- There is no exit to the maze
- You need to move the maze block around the pin to raise it up until it fits into the cut out section of the top of the puzzle board.
Solution: Show
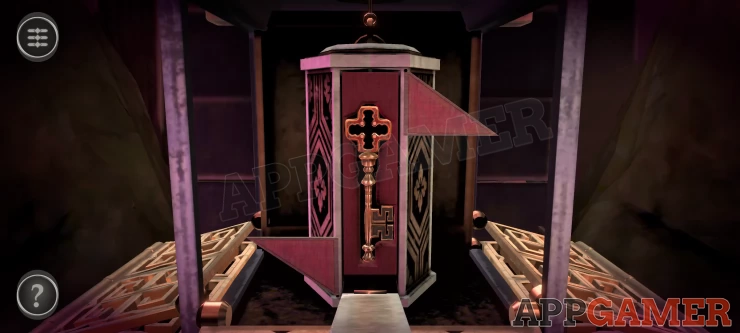
The cage will open to find a 6 sided box. Turn this around to find 2 red triangles.
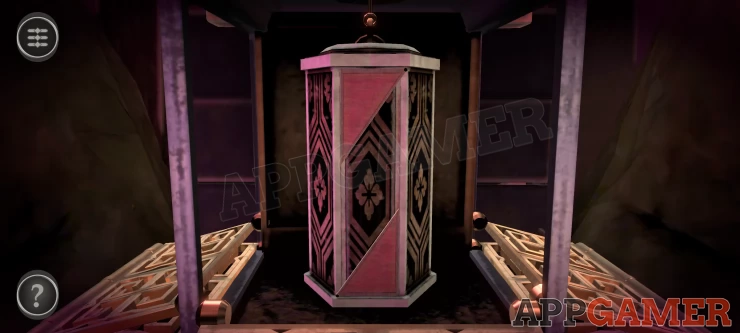
Slide the triangles to the side to open the box and collect the Key.
Now turn to the other side of the gate and go through this portal back to the original location.
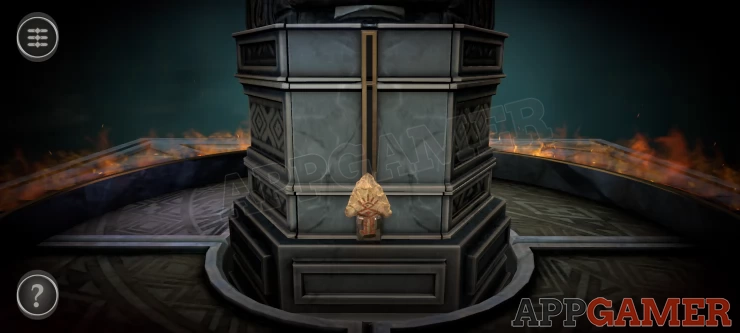
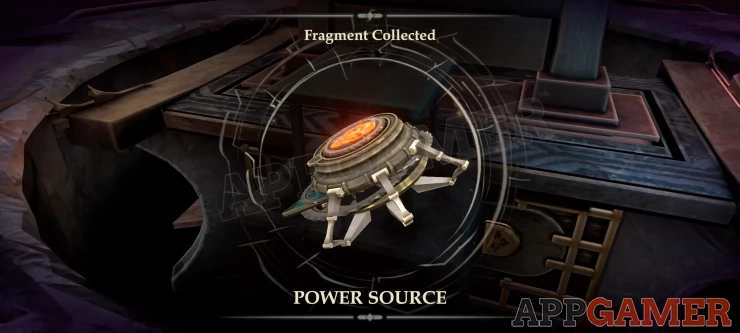
Turn to the back of the gate to find a Small box.
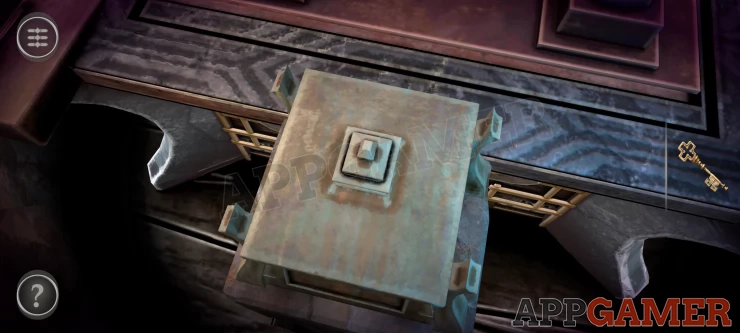
View the top of this and turn it to unscrew it. There is a keyhole beneath.

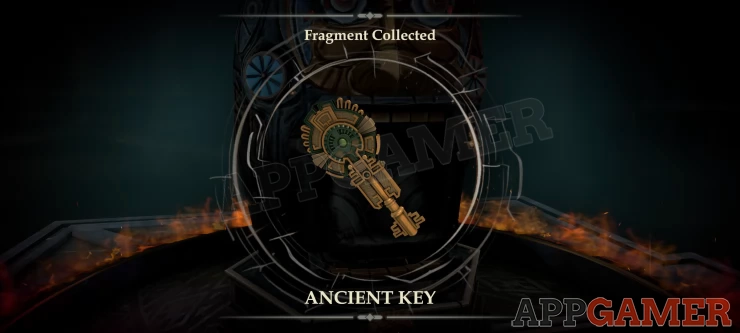
Use the Key on this to ope up the box then collect the Power Source Fragment to complete Room 4.
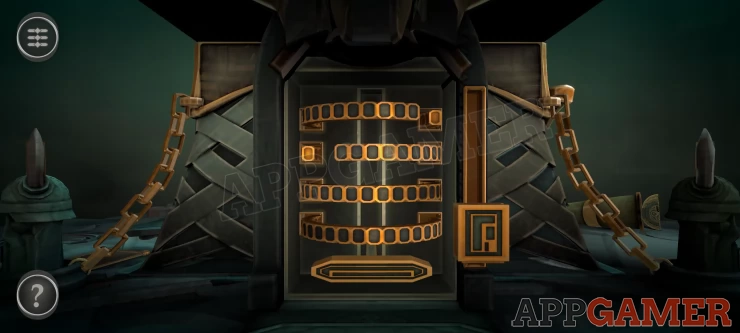
Use the Fragments
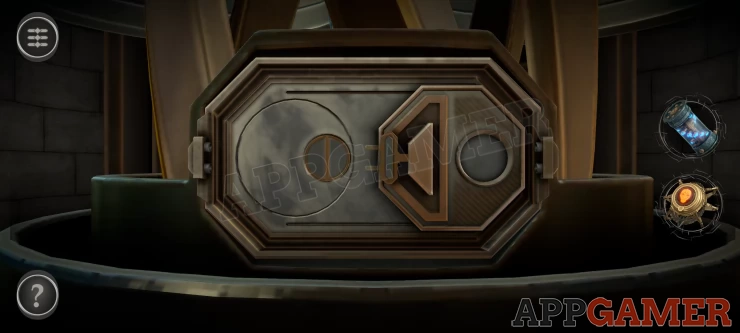
Turn to the right to see the spinning cylinder.
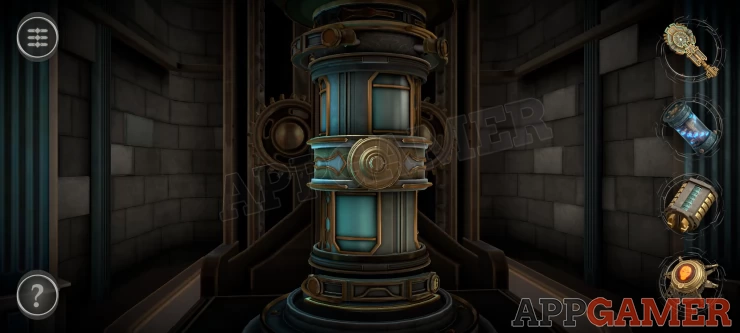
View the base and add the Cryptex to the socket on the right. This opens a panel on the front.
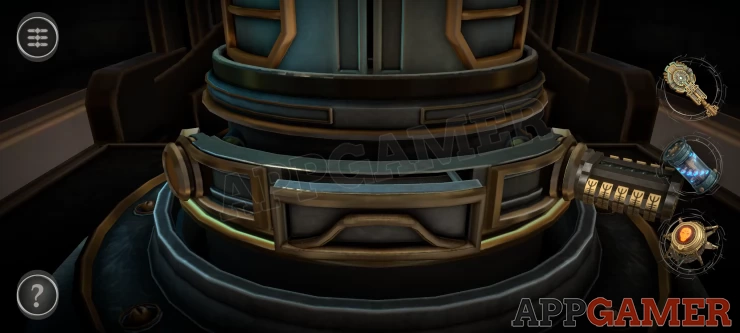
Slide the panel to the left and then slide the blue button to the right. Now view the center of the cylinder where a keyhole has opened up.
Use the Ancient Key on this and turn it, Then rotate the outer dial to line up with the blue arrow.
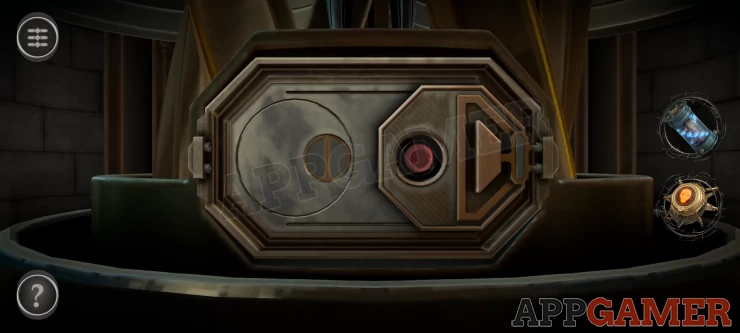
Inside is a puzzle
Circles Puzzle
- Use the arrow buttons to turn the outer ring
- When the arrow point to a circle it will turn.
- Rotate all of the small circles to create a single circle line with the green and red sections on the outside as shown.
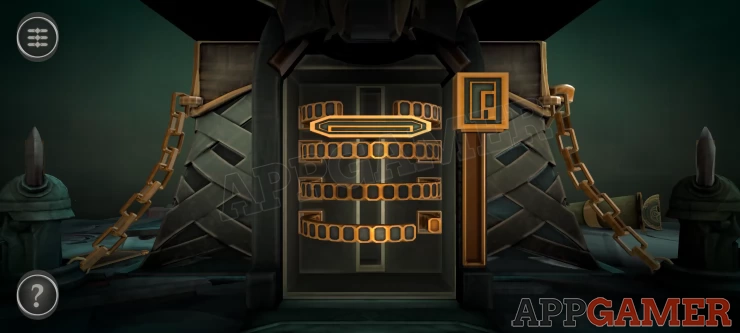
The case opens and you will see a panel at the bottom.
Slide the Octagonal switch to the left, this will reveal a green button, press this.
Then slide it to the right again to reveal a red button, press this as well.
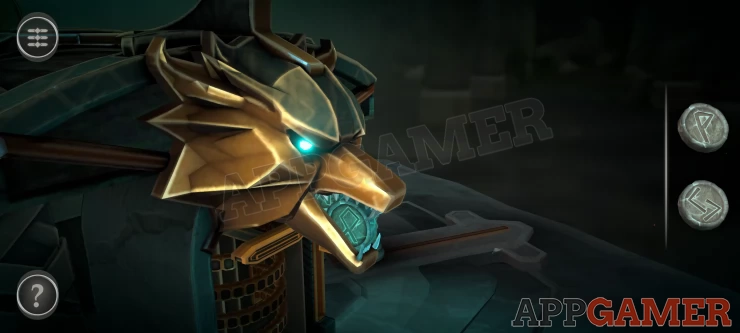
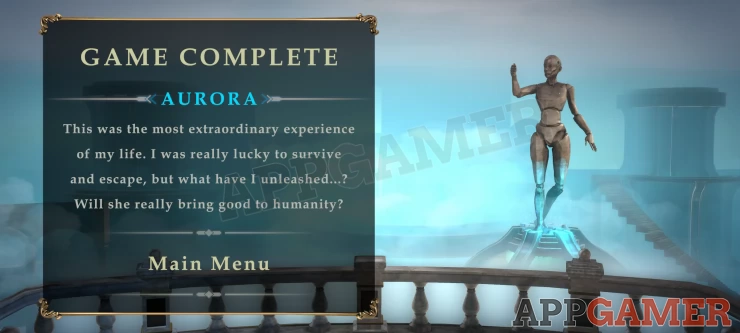
The case is now fully open. Turn to look at the back of Aurora. Place the DNA Comtainer in the opening.
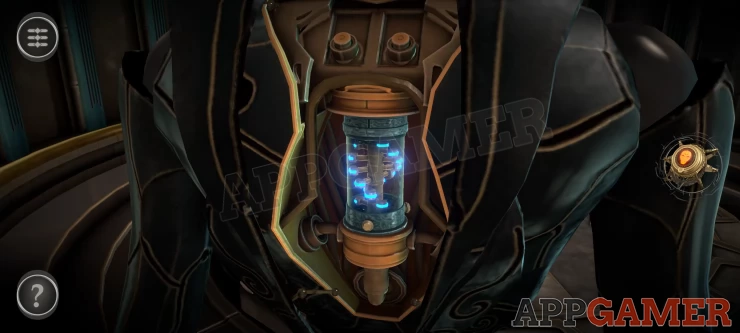
Then turn to the front and place the Power Source into the chest cavity.
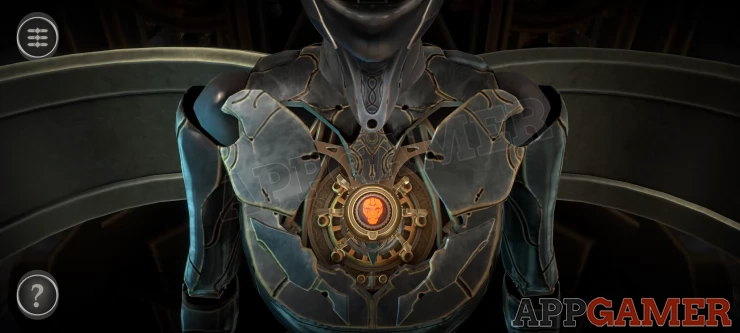
A final scene will now play where Aurora awakes and then seems to free you from the mysterious room. But are you out, we have to see what comes next.
 With 20 years of experience in creating video game content for the internet and over 30 years as a gamer, Mark is now a passionate mobile App Gamer. Loving a challenge, he is always ready to get stuck in to both survival builders and puzzle solving games. He has been providing content for AppGamer since 2014.