Chapter 2 - Nexus Walkthrough
More Boxes: Lost Fragments
Welcome to the walkthrough guide for Chapter 2 of Boxes: Lost Fragments. Another beautifully designed puzzle and escape room style game from Snapbreak.
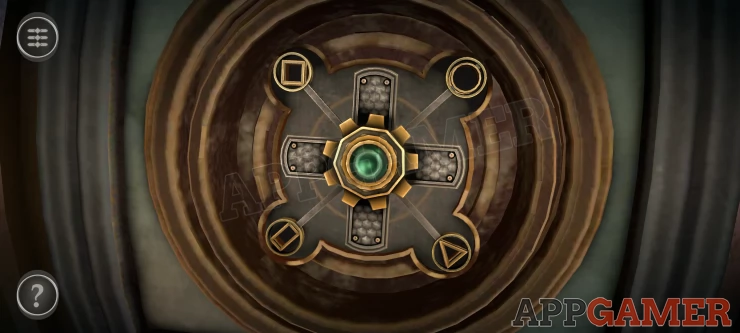
After completing Chapter 1 you receive a new Token and can use this on the central pedestal as before to unlock a new set of rooms for Chapter 2. Each with puzzles boxes to solve. As you complete each section the next door will open.
Boxes: Lost Fragment - Chapter 2 Walkthrough
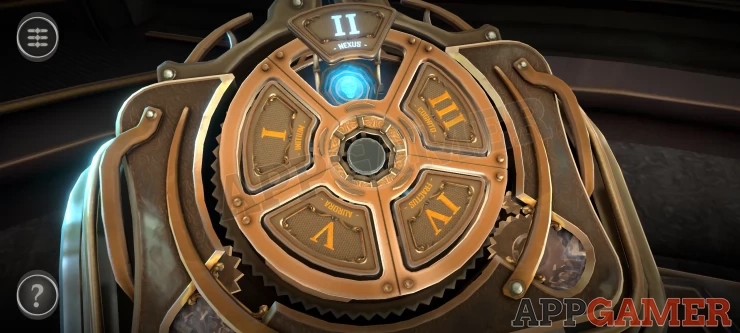
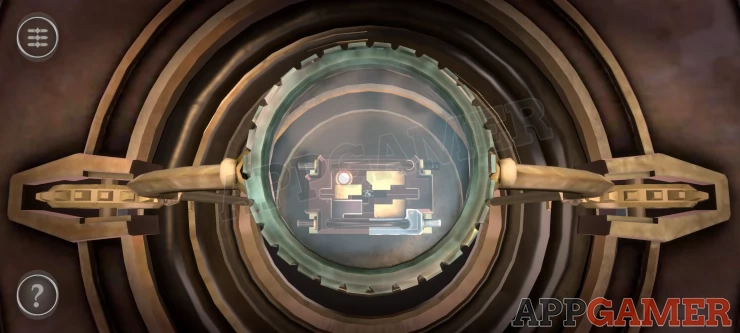
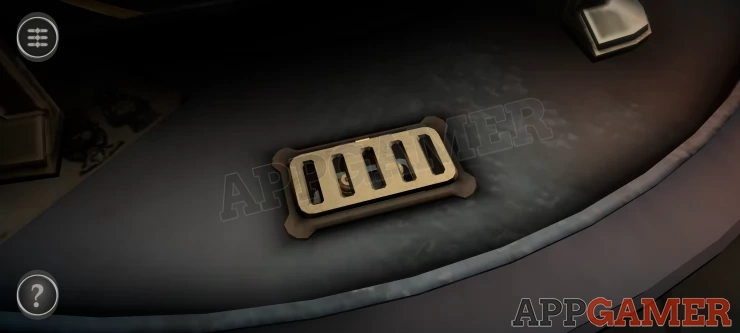
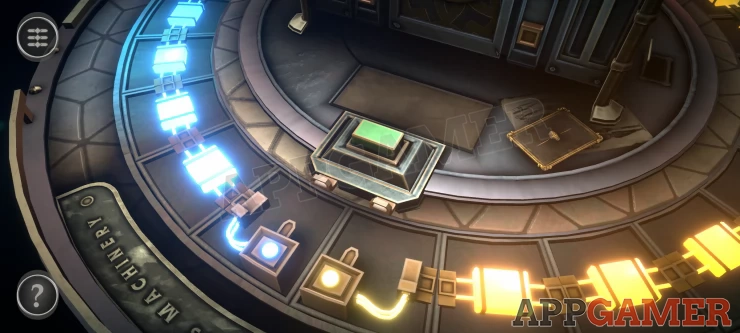
After rising up in the elevator you arrive at a new floor with puzzle areas and a main door with a dial above it pointing to number 1. This is where you will find the puzzle box rooms of Chapter 2. Tap the door to pass through
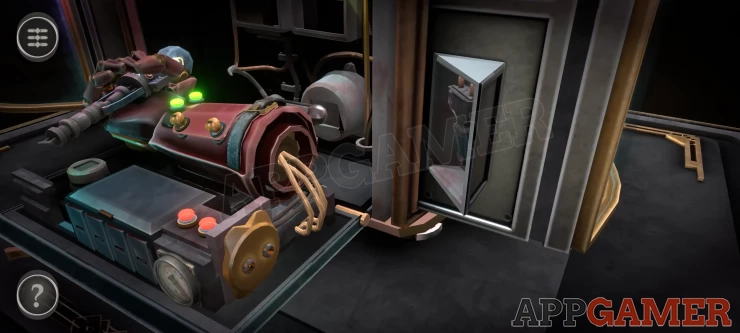
Chapter 2 - Room 1 Walkthrough
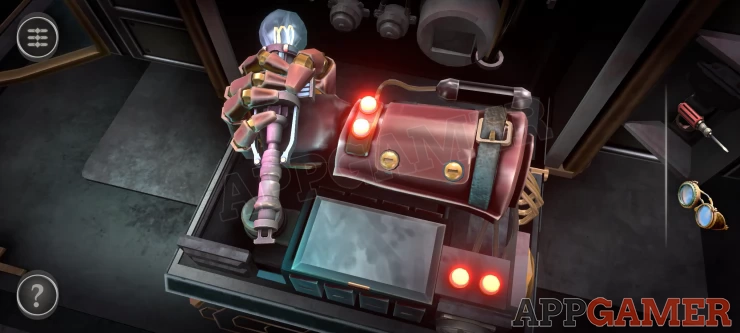
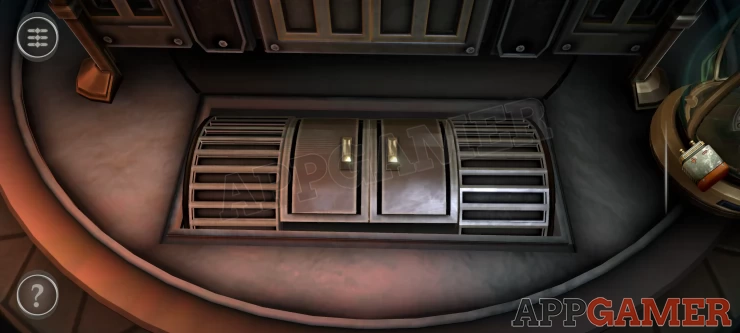
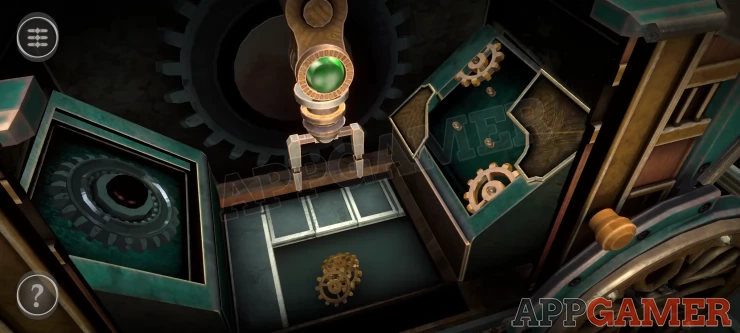
This first box has 2 compartments on the ends. First you can look on the right side and open the glass door.
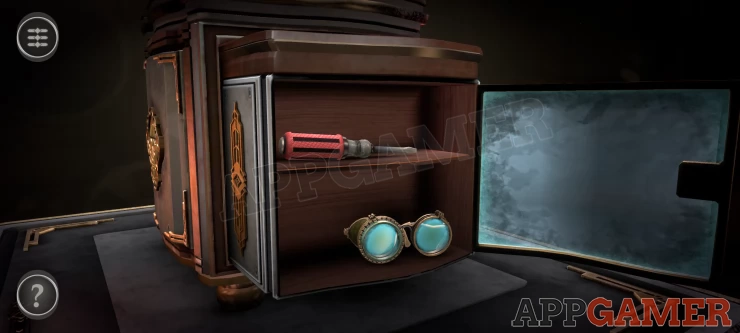
Collect the Screwdriver and the Glasses.
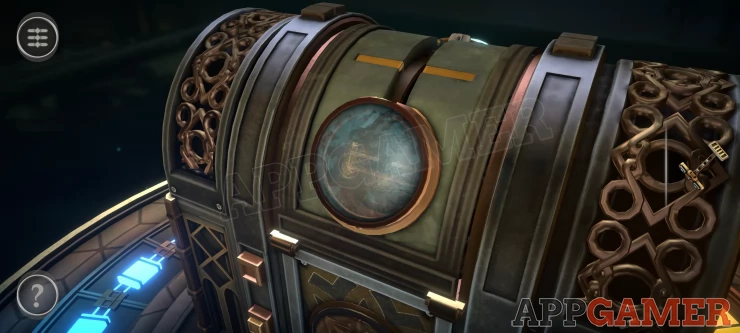
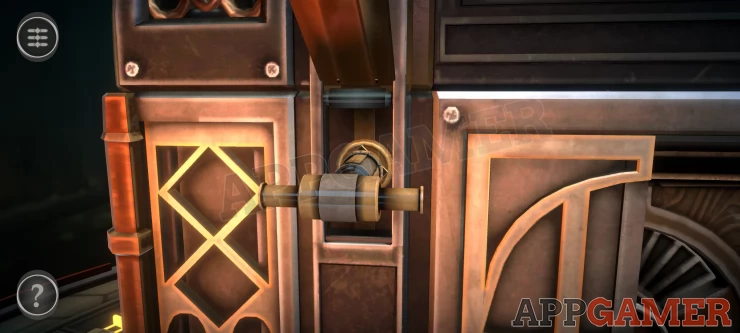
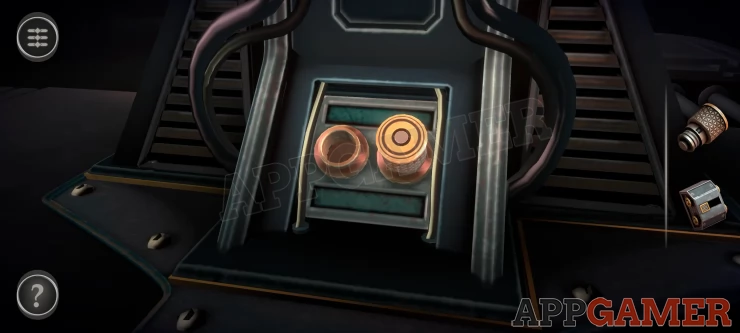
Now turn to the other side of the box to see another glass door, this one requires more effort to open.
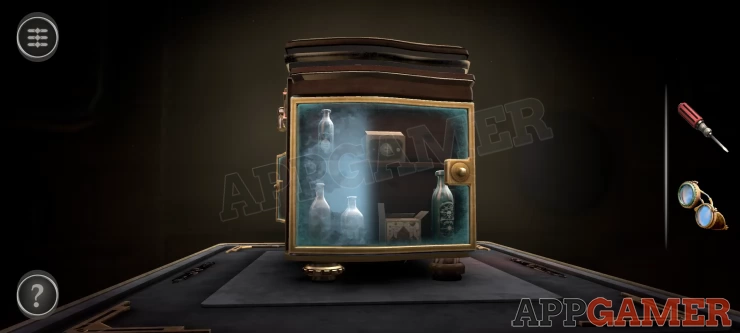
Look under the box a the feet below this end of the box, on the left you will see that it has a gear like shape, swipe on this to rotate it around until you find a blue catch.
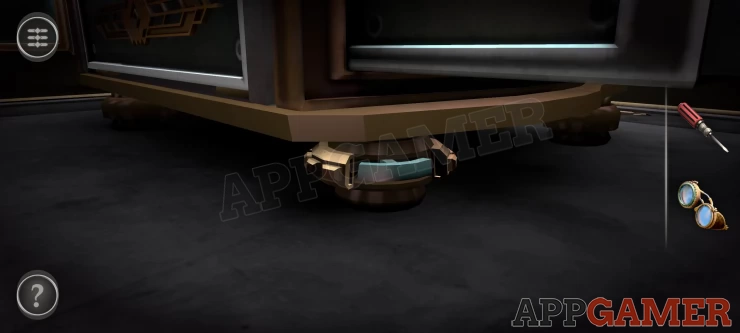
Then pull on this to release the glass door. Now you need to remove the bottle from the bottom right to find a switch behind it.
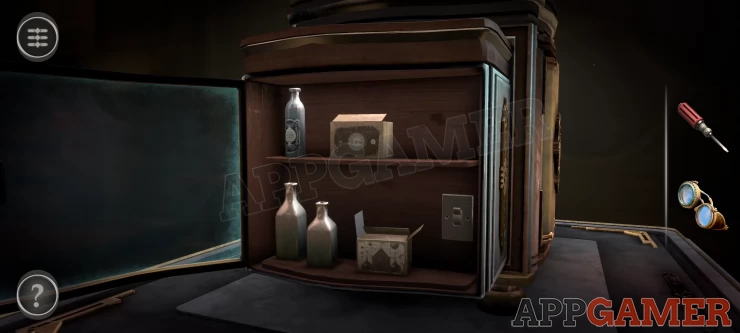
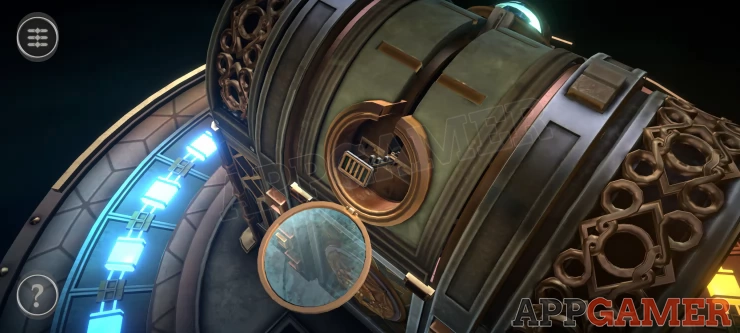
Tap this and the panel will turn around to reveal a puzzle.
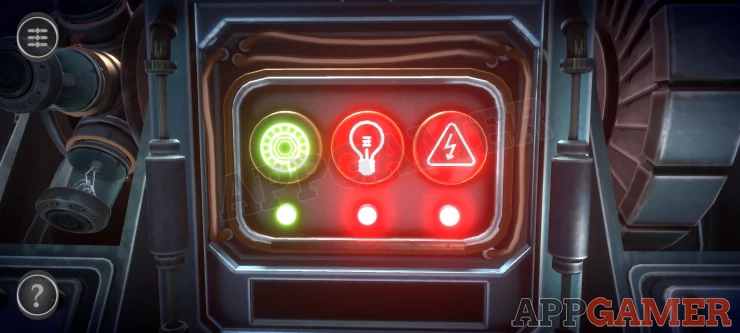
Power Puzzle
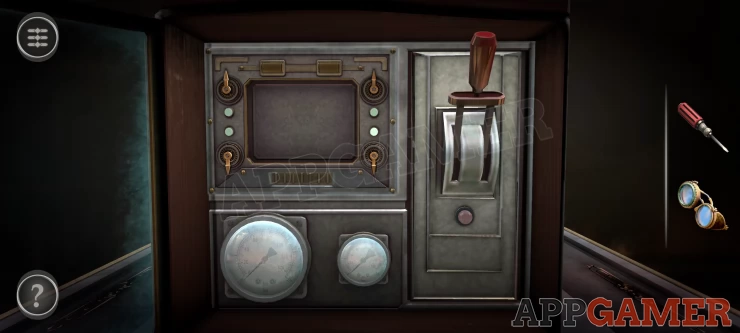
First view the panel on the top left. Slide the small button at the bottom to the left to find a red switch, then tap this to turn on the mechanism.
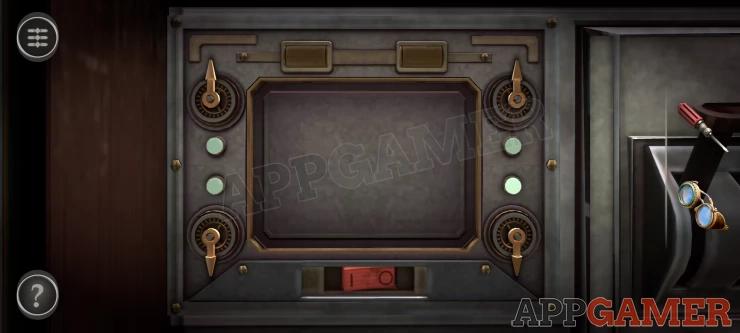
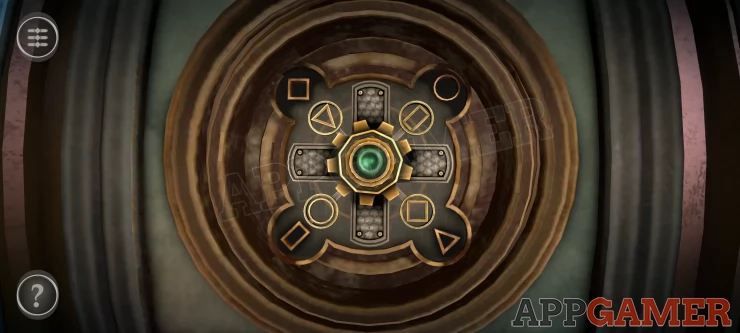
You will have a blue and red object in the center that you can drag around, as you do so the pointers will move, in certain positions the lights on the left and right will turn on, find the correct position to turn on all 4 lights.
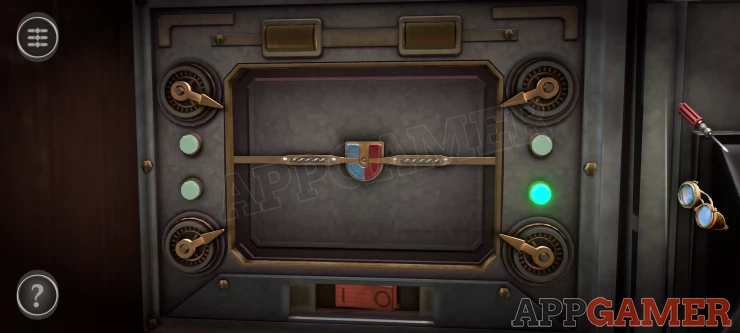
This will active one large green light at the top.
Show
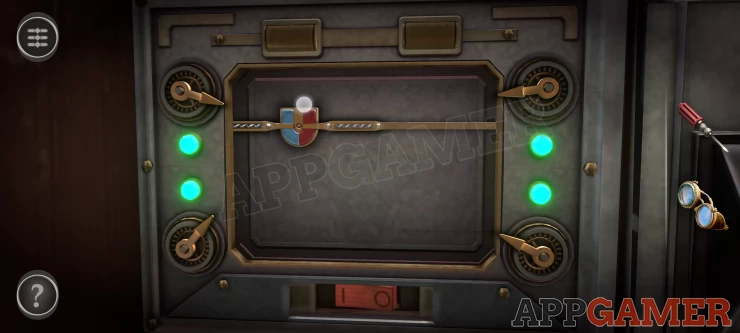
Now repeat this process again to get all 4 light son and active the second large green light.
Show
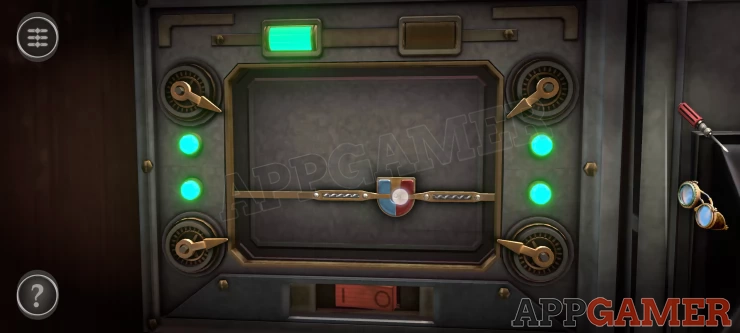
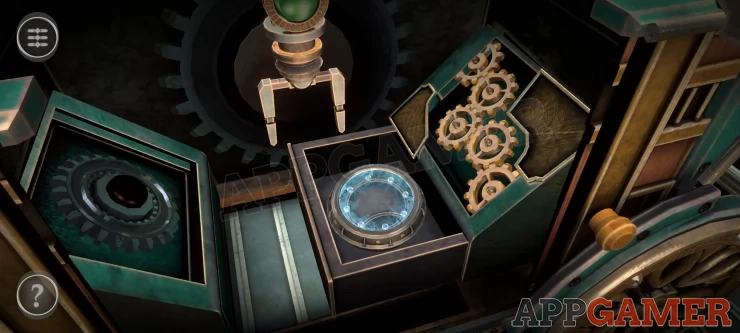
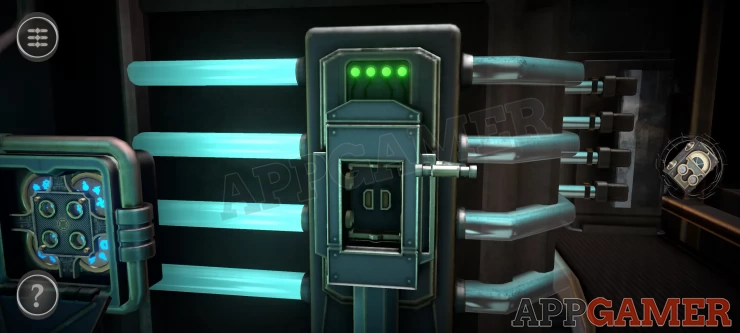
Once done you can pull the large switch on the right. This powers up the box and opens a small area at the back.
Now view the back panel of the box.
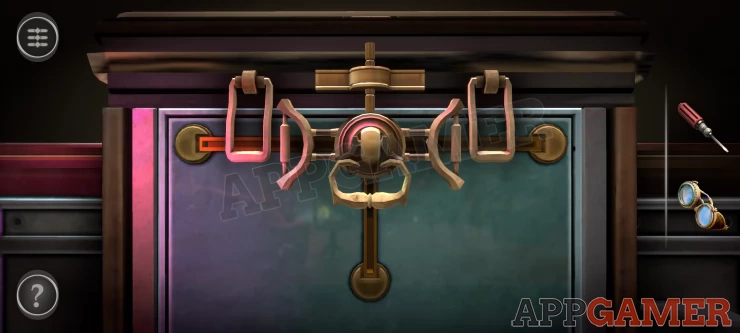
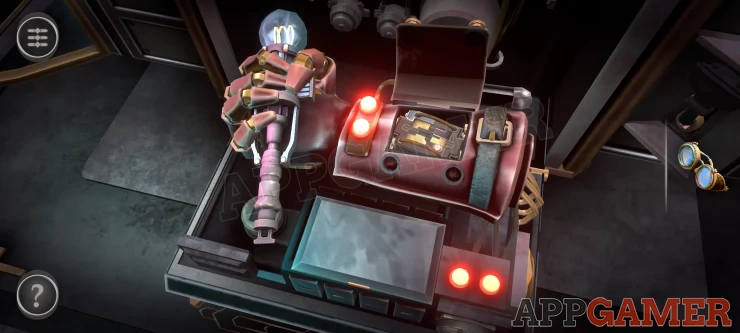
Lift the 2 catches on the left and right. Then slide out the rings on the left and right and pull down the center handle to open the back up.
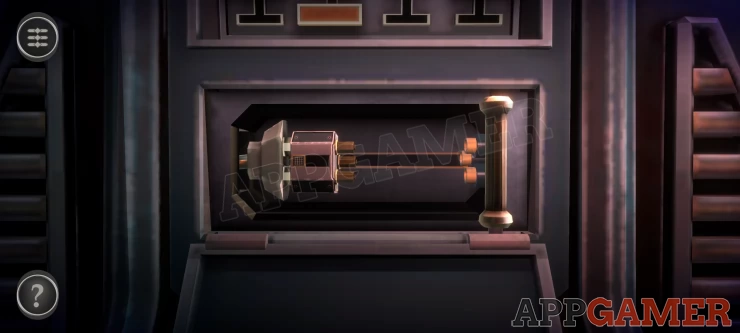
Use the screwdriver on each of the two screws on the mechanical hand to open it and then collect the Broken Mechanism.
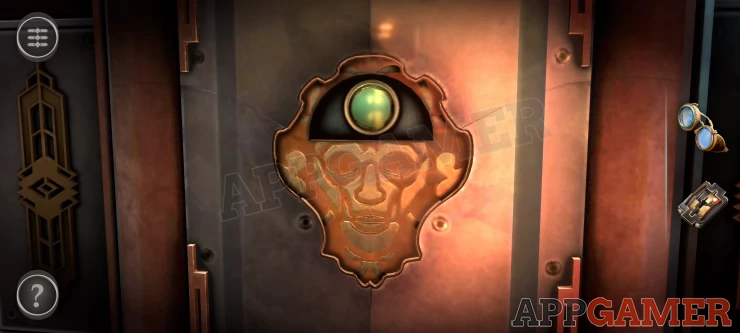
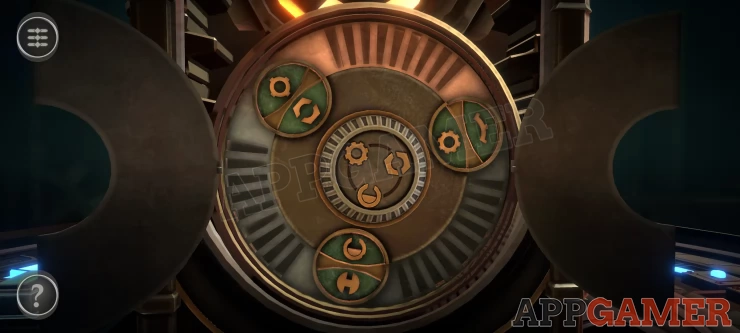
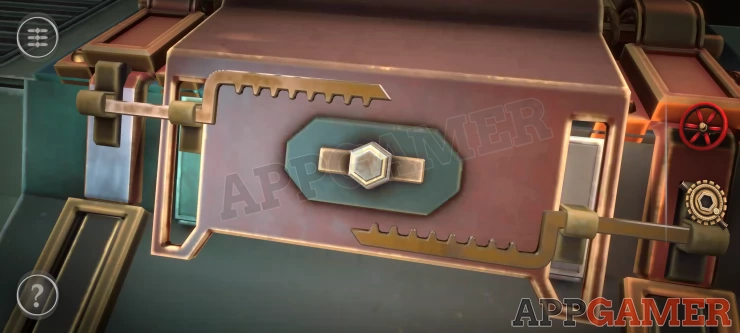
Now turn to the front of the box and view the face emblem.
Rotate the semi circle at the top to reveal a button, then press this to open the doors. There is another puzzle
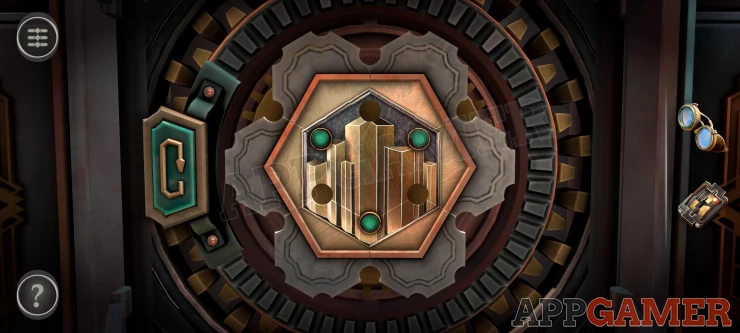
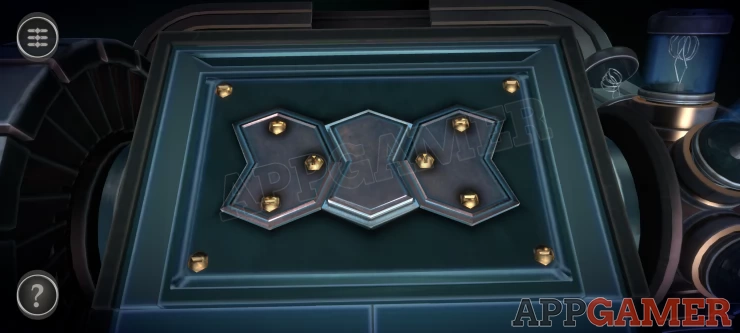
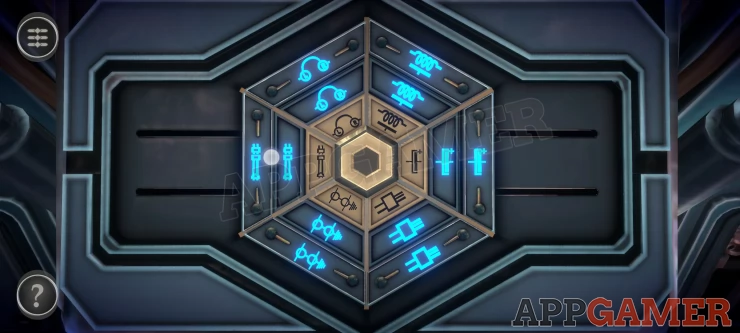
Hexagon Puzzle
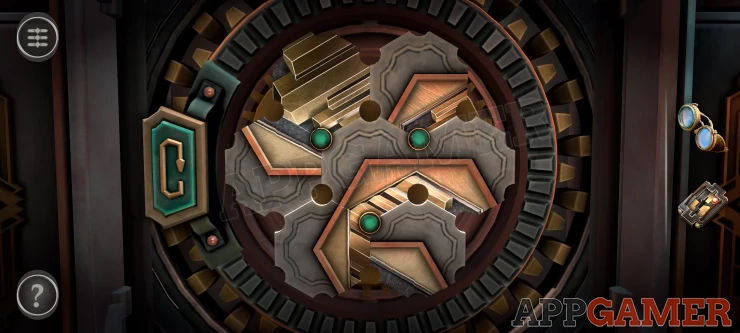
- The puzzle has 7 hexagonal pieces that need to be arranged.
- Tap the 3 green buttons to rotate the pieces around the points,
- Assemble them into a complete image to solve the puzzle
Solution: Show
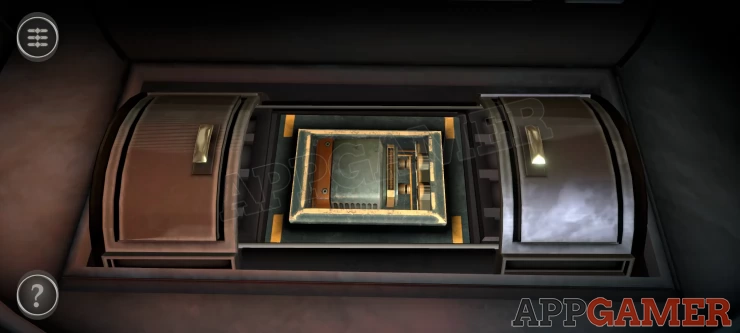
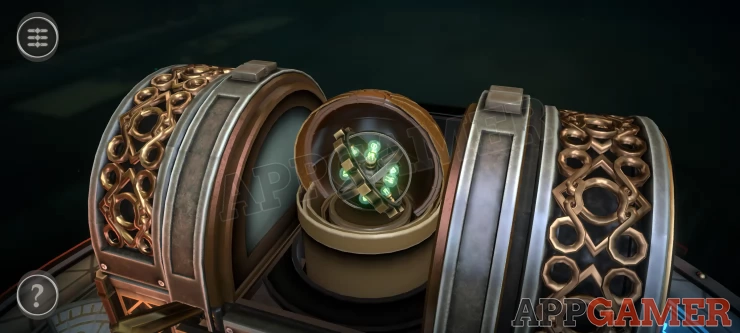
This will reveal a device on the top of the box.
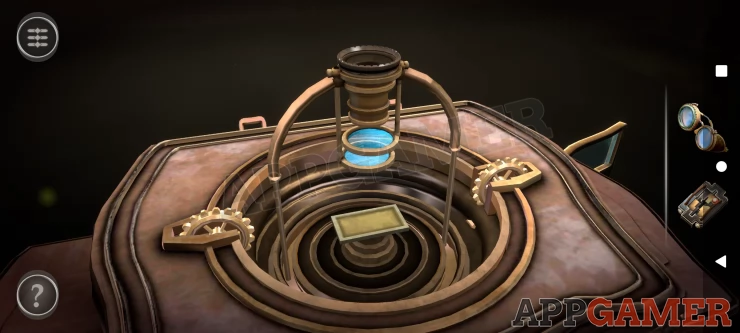
First view the glasses in your inventory.
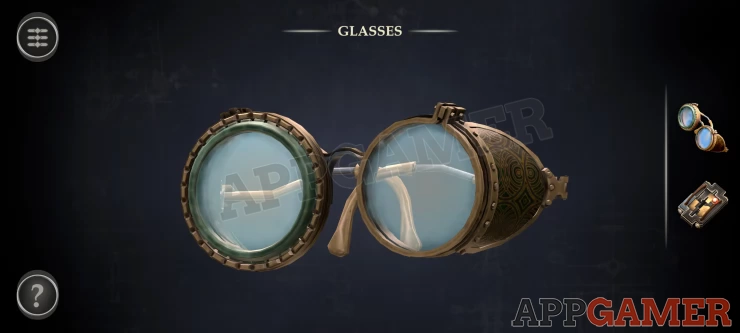
Turn the lens on the left to rotate it until it fully unscrews and you can collect the Optical Lens.
Now view the device on top of the box again and examine the plate below the lenses and add the broken mechanism to it.
Then view the top of the eye piece on the box and add the lens to it.
Rotate the lens clockwise to zoom in until you find another puzzle.
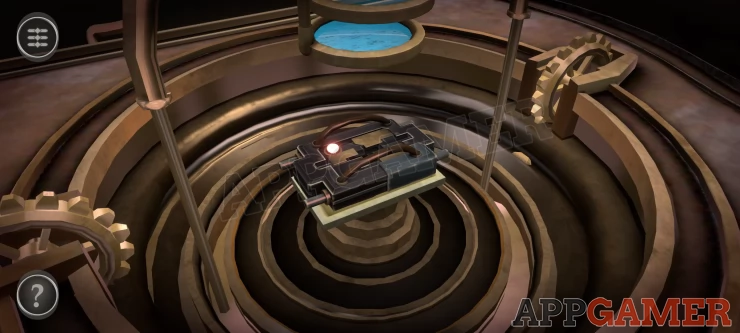
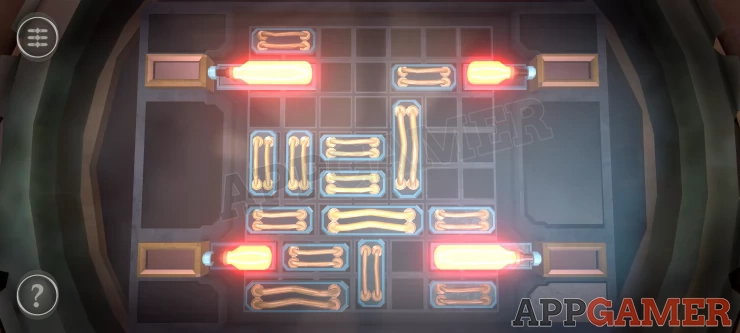
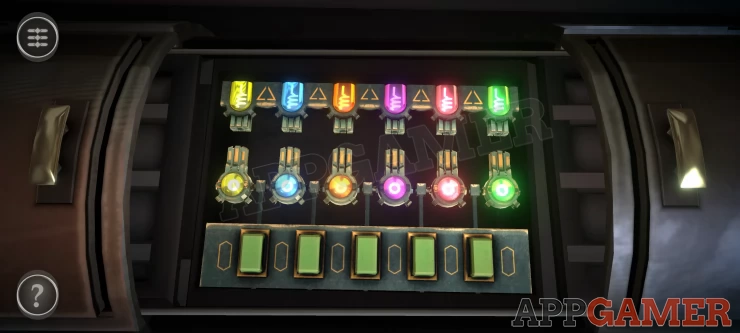
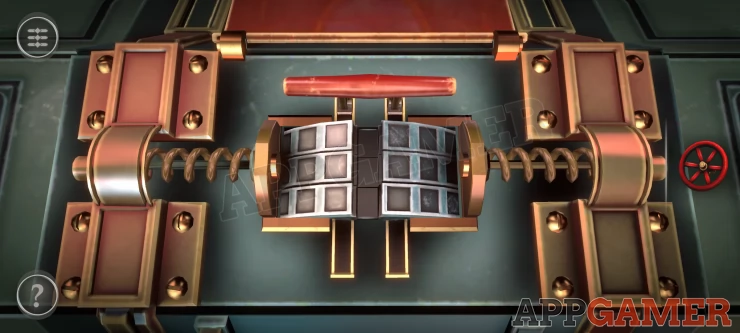
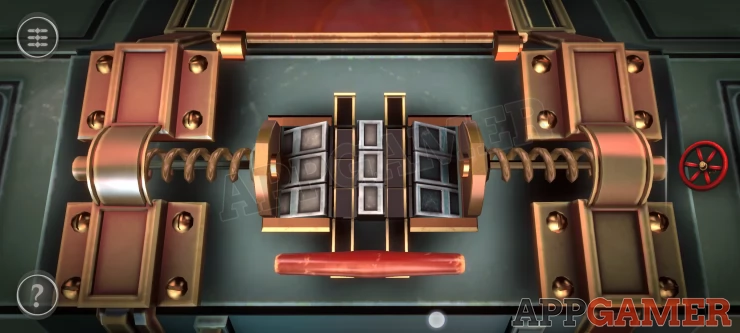
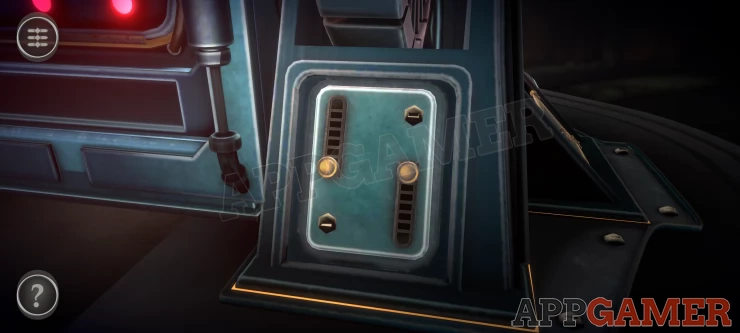
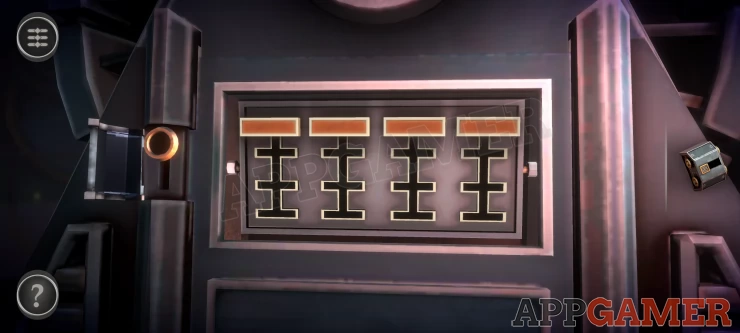
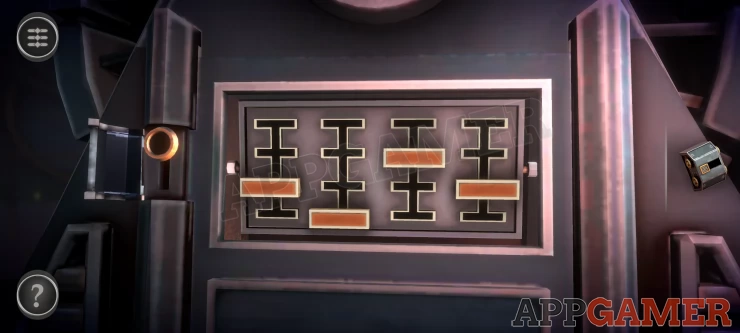
Mechanism Puzzle
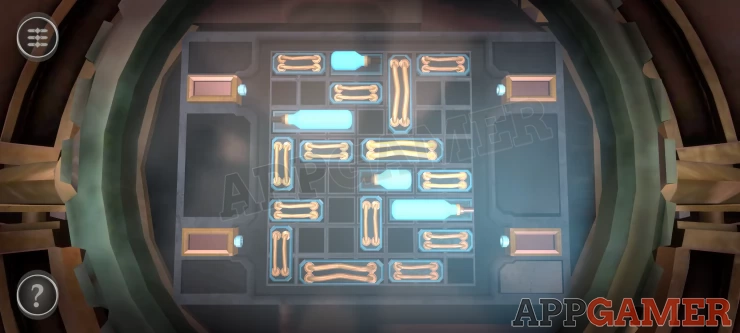
- There are 4 blue fuses that need to be plugged into the 4 sockets on the left and right.
- Slide the wires and fuses around to make room and find a way to plug them all in.
- The items can be moved in any direction.
Solution: Show
Collect the Fixed Mechanism.
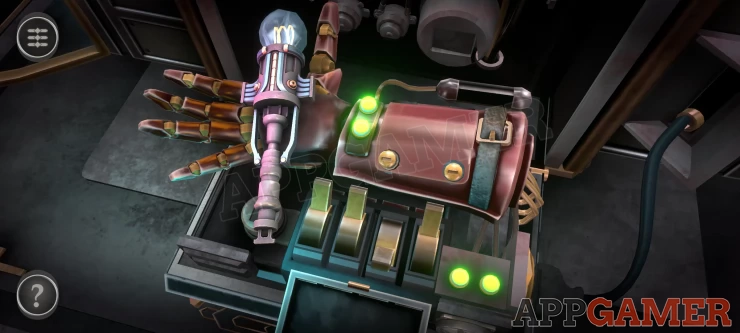
Now go back to the rear of the box and replace the mechanism into the hand.
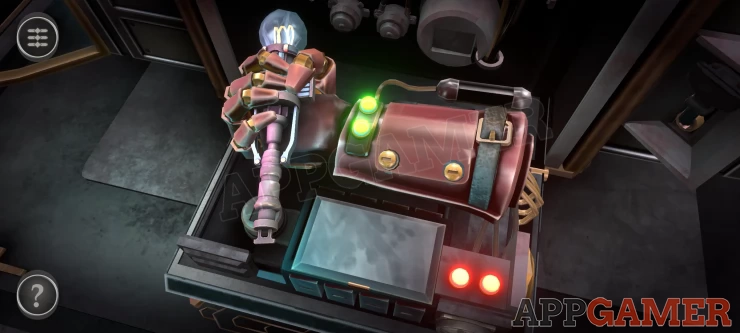
Then take a cable from the opened panel on the right side to connect to the socket on the side.
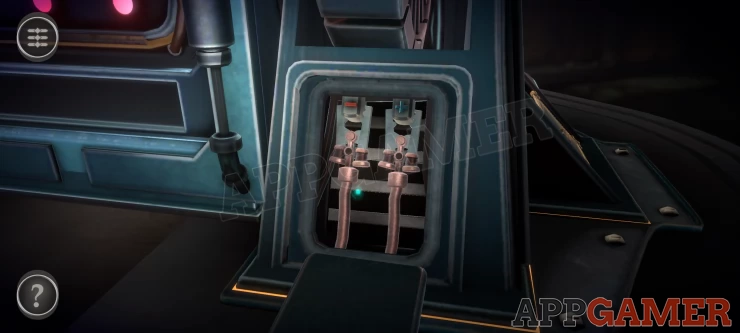
Hand Puzzle
- Now you have 4 switches
- Tapping each will open or close some of the fingers on the hand.
- Set them correctly so that all of the fingers are open.
Solution: Show
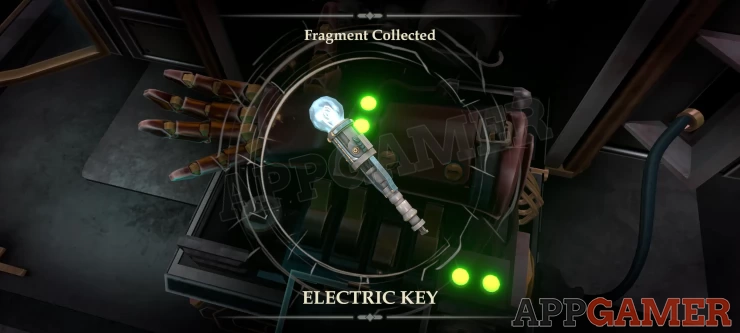
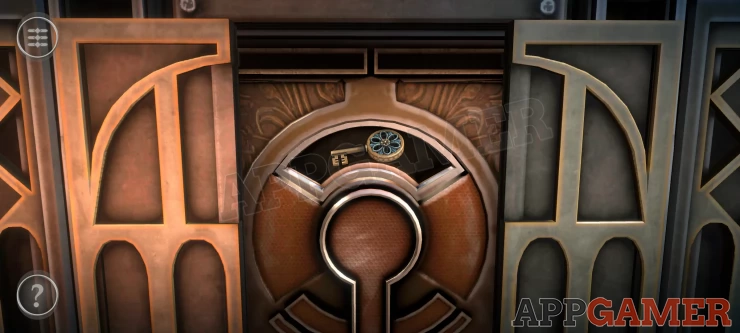
Collect the Electric Key Fragment.
This will complete the first puzzle box and return you to the main room.
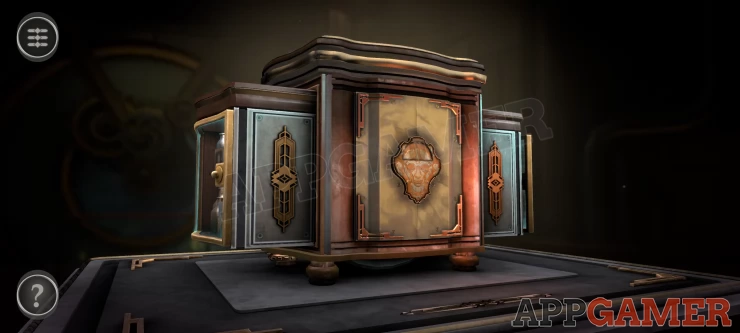
Chapter 2 - Room 2 Walkthrough
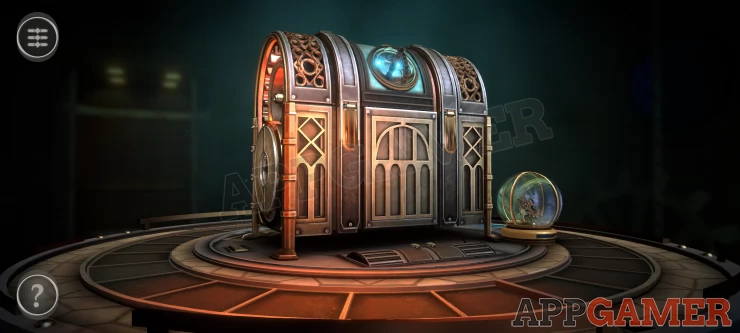
Passing into room 2 we find a large chest on the round table with a small globe bedside it.
First look on the base to the left side of the chest.
Open the small cover and then collect the Battery. Now view the base in front of the chest, there is another set of doors here.
Rotate the 2 wheels on the left and right to find gaps that then allow you to slide open the central doors.
Place the battery inside the compartment that opens, this reveals a puzzle
Colored plugs puzzle
- Use the green buttons to swap over the colored plugs in the lower row
- Match the colors to the ones in the top row
This opens up a ring of glowing batteries and turns the view to the back of the chest.
Press the green button to connect the power. Collect the Metal Lever that appears.
Next collect the Crystal globe that is on the table, then view this in your inventory.

Slide the blue switch that the bottom to the right to open it and then you can collect the Intricate Mechanism.
Now look at the top of the chest, there is a round glass cover.
Swipe down to open the cover and find a slot for a lever. Place the metal lever in the track.
Now slide the lever over to the other side. Next place the intricate mechanism into the round slot that is now accessible.
Rotate it so that the 4 symbols match and then press the center button to activate it, this opens 2 small hatches on the front of the chest.
First you need to view the back of the chest again and press the center left square button to extend a handle.
Swipe backwards on the center handle to open a compartment and collect a Tool.
Go back to the front of the chest again and use the Tool on the 2 X shaped sockets.
Turn the tool each tile to open up the doors.
Now on the panel inside the doors turn the dial at the top to find a second dial and then turn this one to let you collect a Key.
Now look on the right side of the chest to see a round puzzle.
Turn the handle on the outer ring to spin all of the segments until they line up.

Now use the key on the keyhole that appears. Collect the Mechanism Part.
Turn now to the other end of the chest to see a socket, place the mechanism part here.
Mechanism Puzzle
- The center part has 3 symbols on it.
- The same 3 symbols are also on the outer 3 circles.
- You can rotate the green circles to change the positions of the symbols. This will also turn the center part.
- You can also rotate the large outer ring to move the symbols on that.
- Line up the parts so that the 3 symbols on the center part are next to the matching ones on the green circles.
Solution: Show

Once complete the top of the chest opens and you can collect the Mechanical Sphere Fragment
This completes room 2.
Chapter 2 - Room 3 Walkthrough
The third puzzle room contains a large Steam Train themed box.
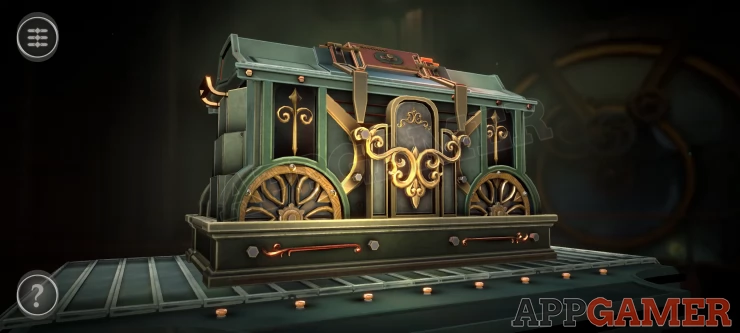
First look on the left end of the box.
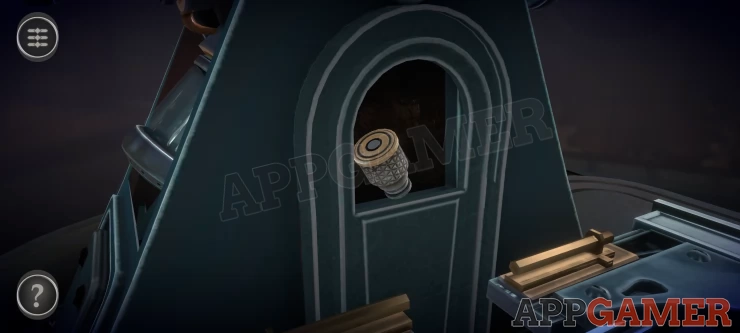
Slide the handle down to open the side and then collect a red Valve wheel from inside.
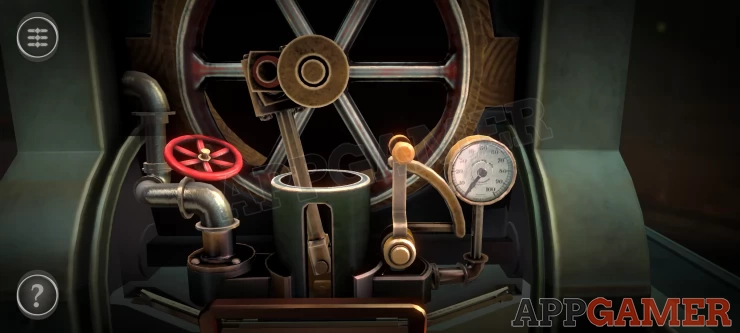
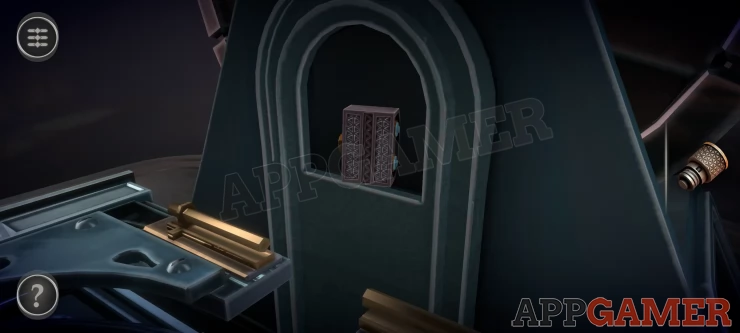
Next turn to the right side of the box and slide down the cover again, then you can collect an Ornament Piece from inside.
Now turn to the back of the box and look on the left side of this to see an ornament slot. Place the ornament piece here.
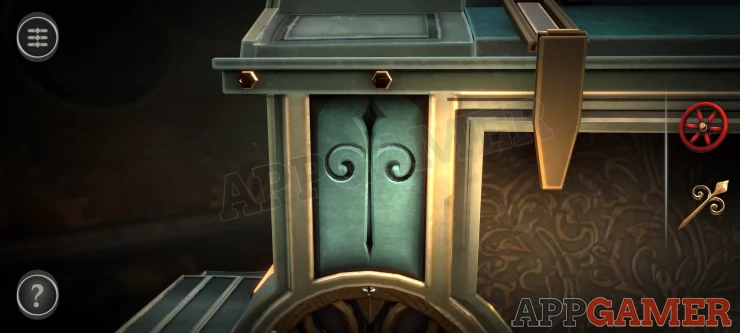
You can then collect a Mechanical Item. View this in your inventory and turn it around to see a small green button on the back.
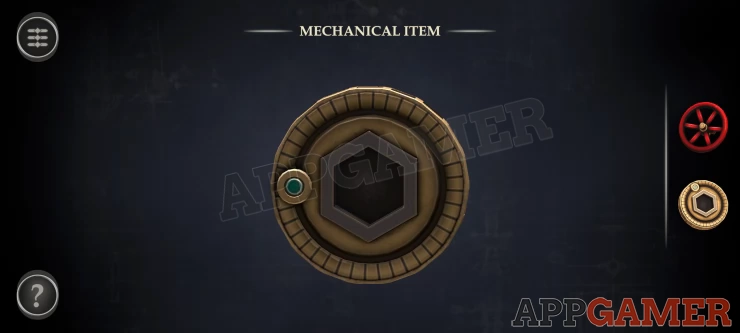
Rotate the dial with the green button clockwise to open it up, you will then collect the Gear.
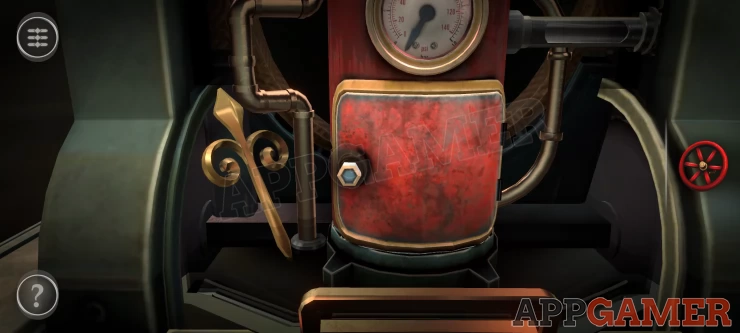
Turn to the front of the box and view the top.
Place the Gear onto the center hexagon and then turn the handle to open the top up. Inside is a red handle.
Turn the 3 dials below the handle to make 2 tracks to let you slide the handle down.
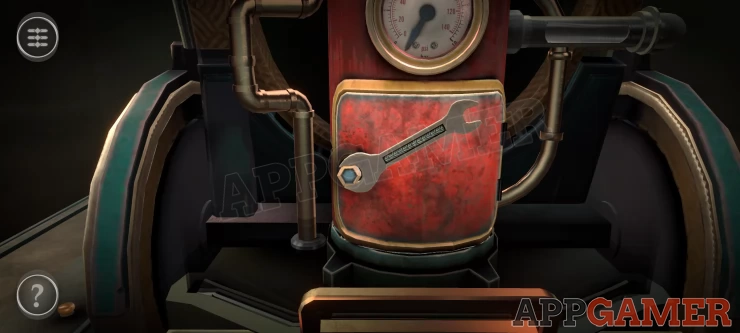
The box will open up and you will view the back. Look inside the back on the right to find and collect a Wrench.
You can then also add the red Valve to the red slot at the top and turn it to extend and connect a pipe.
Turn back to the right side of the box with the red cylinder. Use the wrench to open the bold on the case front, inside is a puzzle.
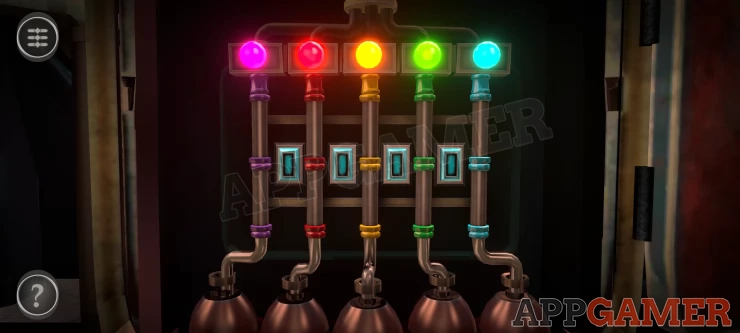
Pipes Puzzle
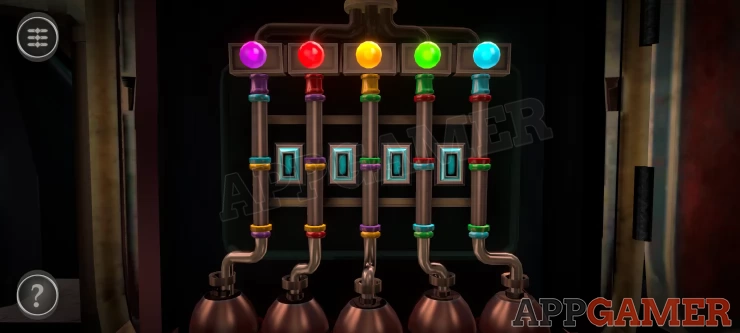
- There are 5 pipes with colors that need to be connected.
- Each pipe has 2 pieces with the matching colors.
- Use the 4 buttons to rotate pipes around and match them up to the correct color locations.
Solution: Show
Once done the boiler pressure grows and you will then see a clue at the top with 3 dial diagrams.
Show
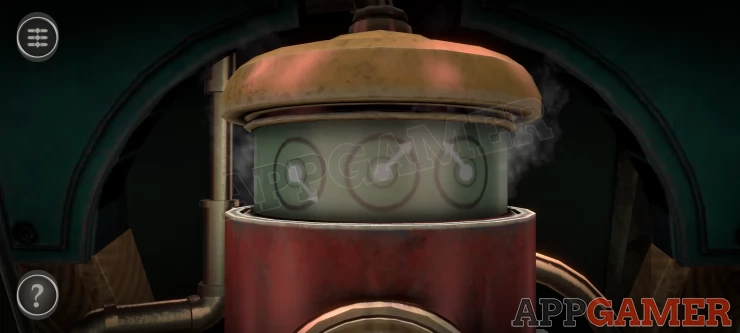
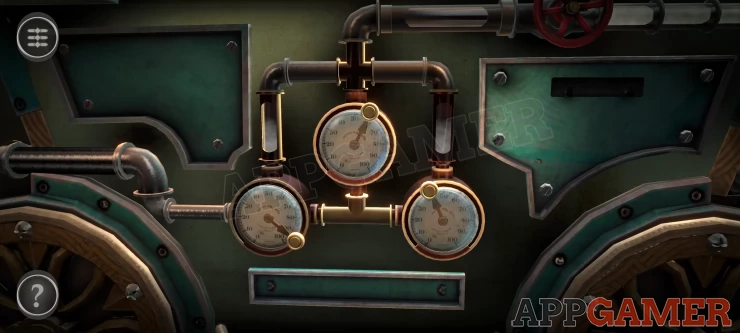
Turn to the back of the box again and view the 3 dials in the center.
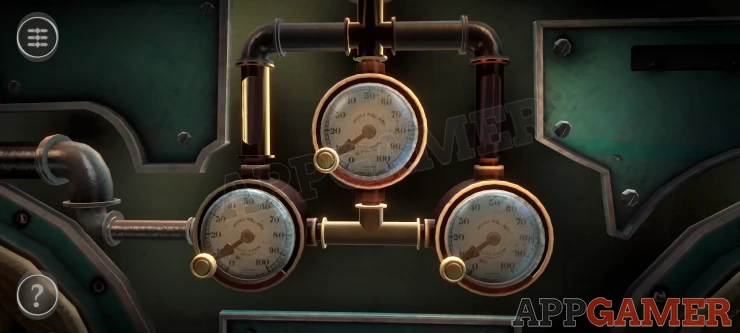
Use the small handles to set the dials to match the clue
Solution: Show
Now you will see the side of the box and a switch, move this down to the right.
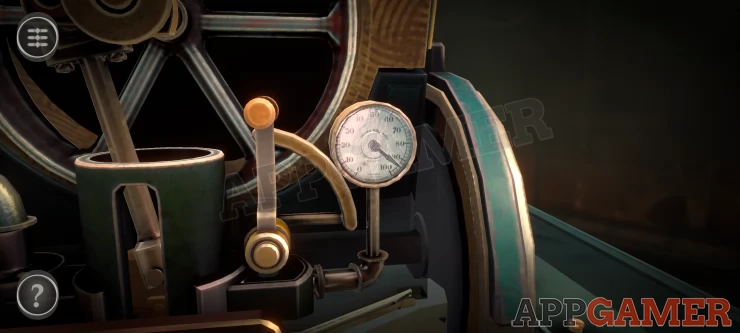
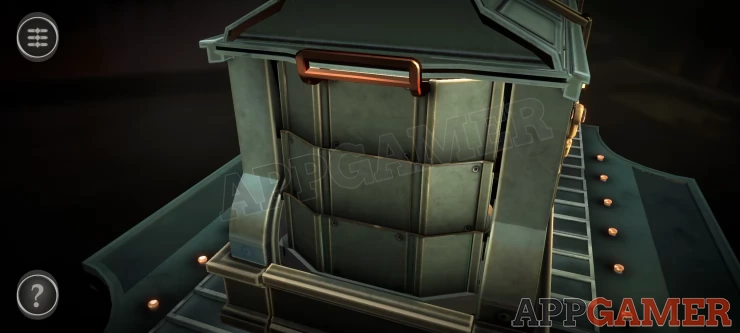
The Box (Train) will start rolling on the wheels across a moving floor.
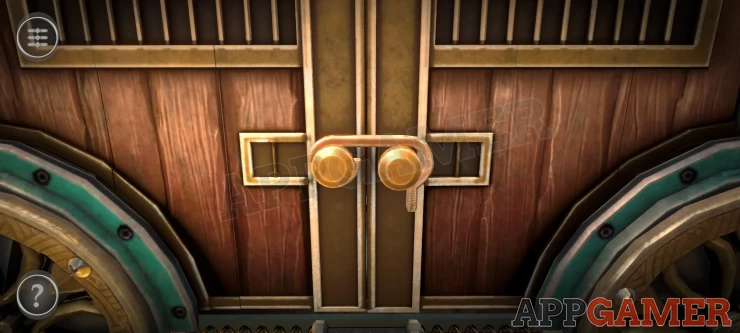
Turn to the front of the box to see Doors with a catch on the handles. Open this.
Train Gears
- Looking inside you will see the floor moving and as it does there will be a hole appear from time to time.
- Below the hole are some gears.
- Tap the green button on the claw when the hole appears to make it grab one of the gears.
- Repeat this until you have all 3 gears
A drawer opens and you can collect the Mechanical Console Fragment.
This completest the third puzzle room.
Chapter 2 - Room 4 Walkthrough
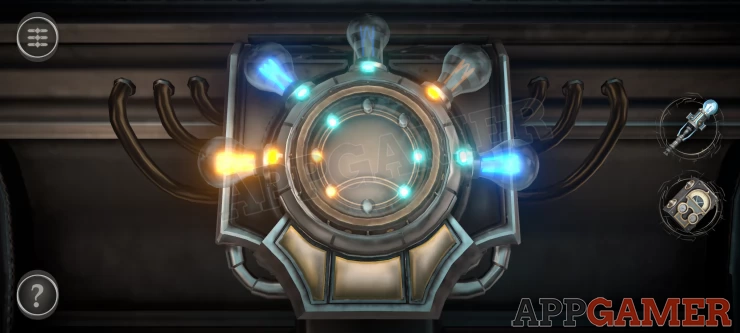
Room 4 brings us to an intricate puzzle box full or light bulbs and circuits.
Start by examining the front of the box.
Circuit Puzzle
This puzzle has 3 circle dials that you can rotate to line up the circuit lines. Notice that only the top section has lines extending out.
Rotate all of the dials to match the lines up.
Solution: Show

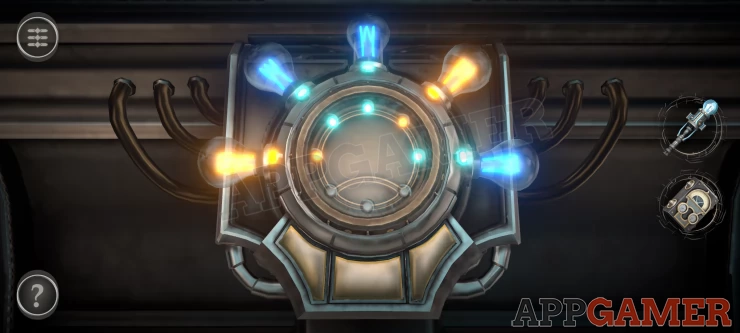
This will give you 1 green light (of 3) on the back of the box.
Now view a small panel on the bottom right of the back of the box.
Slide the 2 switches up open it and then inside slide up the 2 clips to connect them. This gives you a second green light.
Now examine the top of the box.
Rotate the 2 side pieces to allow a center column to lift up, Collect the Bulb.
Now view the right hand side and rotate the large circle of bulbs to find an empty slot.
Add the bulb to it to get the final green light. You can then move a slider switch over to reveal another puzzle.
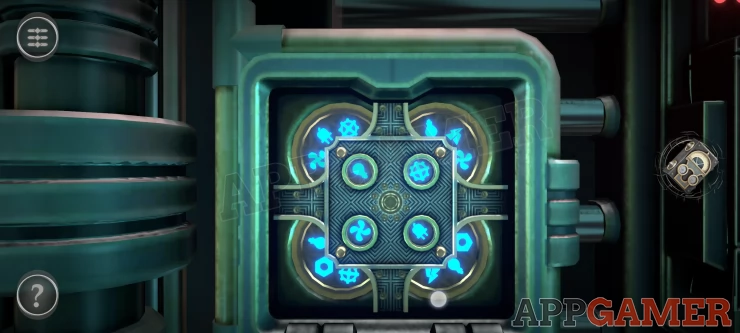
Hexagon Puzzle
- This hexagon is made up of 12 pieces with blue symbols that you can slide in and out on the left and right.
- The inner ring will have 6 fixed symbols.
- Arrange the outer symbols to match the inner ones correctly.
Solution: Show
This will rearrange the center of the box and activate a glowing sphere in the center.
Look on the inside of the 2 ends of the box now.
On the left you can collect a Fuse.
And on the right an Electric Plug.
Look on the end of the box with the light bulbs, there are 2 fuse slots with one missing.
Add the Fuse to this end to start the bulbs wheel spinning.
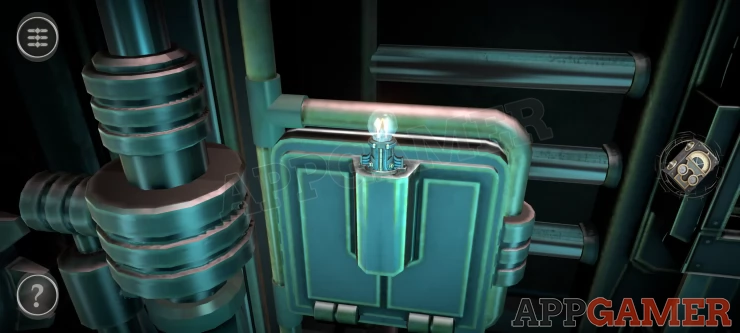
Now view the other end of the box, there are 4 sliders. First open a small panel on the left side.
Pull the switch on the left side down to turn the panel over and see a clue behind. This will give you the required positions of the sliders.
Then turn the panel back over and set the sliders to match.
Solution: Show
A compartment opens below. View the Electric plug in your inventory.
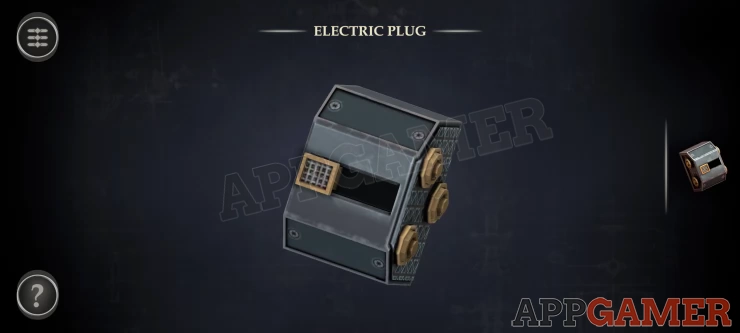
Slide the switch in the center to extend the plug, you will collect it again.
Place the opened plug into the compartment. The slide the hand across from right to left to connect it.
This fully activated the machine and you will then be able to collect the Power Source Fragment.
This completes room 4.
Use the Fragments
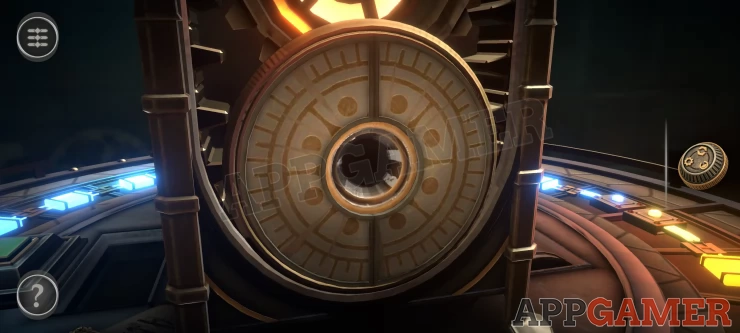
Now you are back in the hub room, turn to the opposite side.
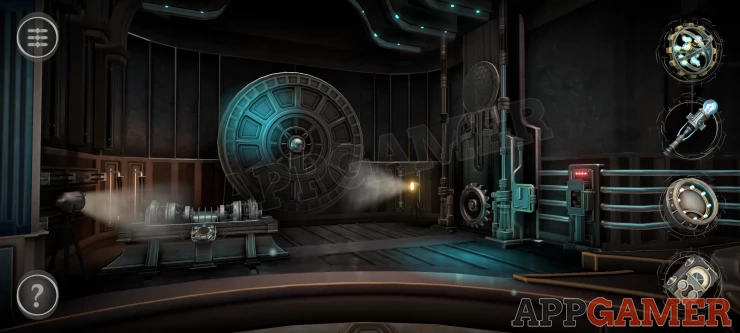
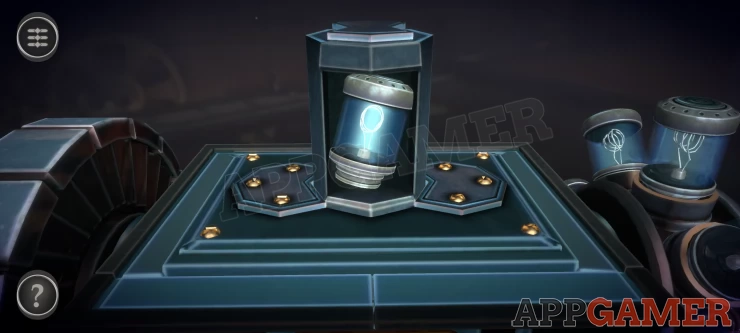
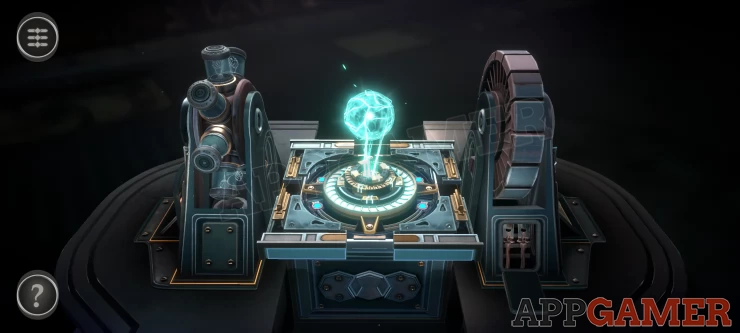
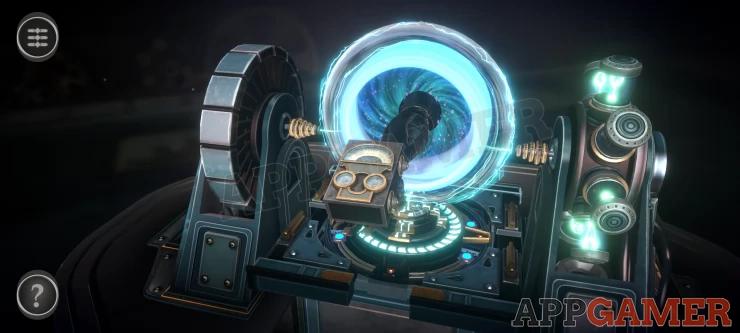
First view the large wheel on the back wall. In the center is a hemisphere, turn this to open it.
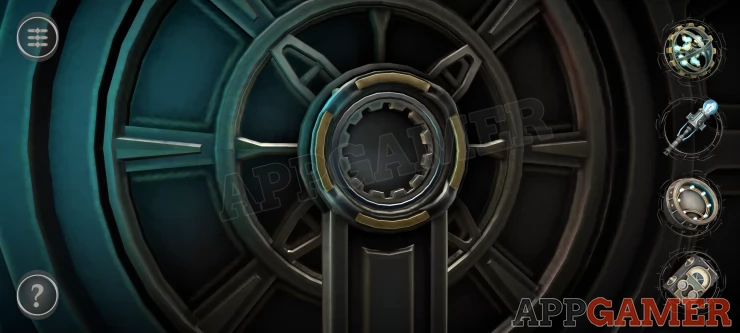
Place the Mechanical Sphere in the center. This shows 4 screens, tap the button to activate them and show a clue.
Show

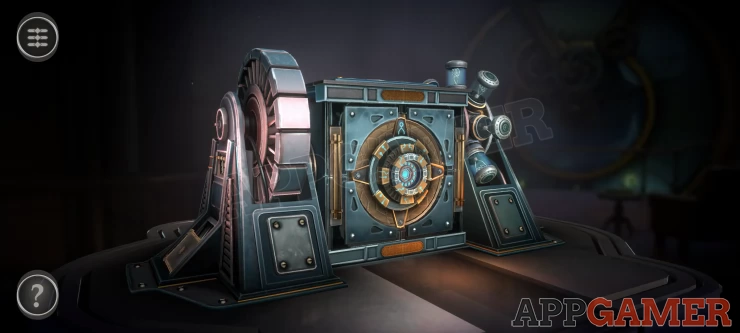
Now view the cylindrical device to the left side. Place the mechanical console into the round socket on the front.
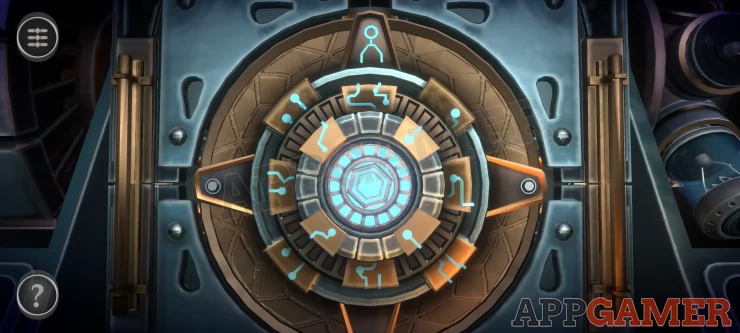
Mechanical Console Puzzle
- There are 3 buttons at the bottom.
- The left and right buttons rotate the lights on the circle to the left and right,
- The center button rotates the lights on the small segment at the bottom.
- Arrange the lights to match the bulbs around the outer edge .
Solution: Show
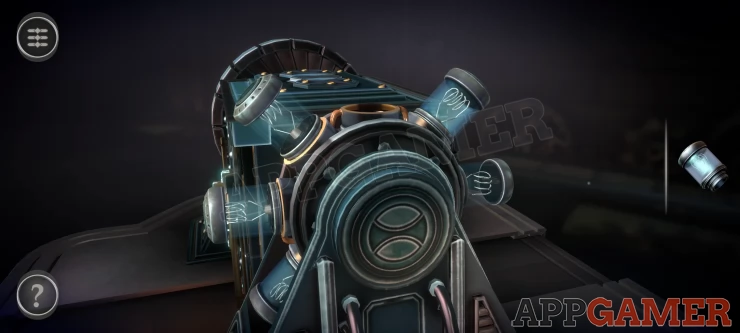
The deice will move to the right. next view the small panel just to the right of the spinning gear.
Place the Electric Key into the slot at the top. This will reveal a puzzle.
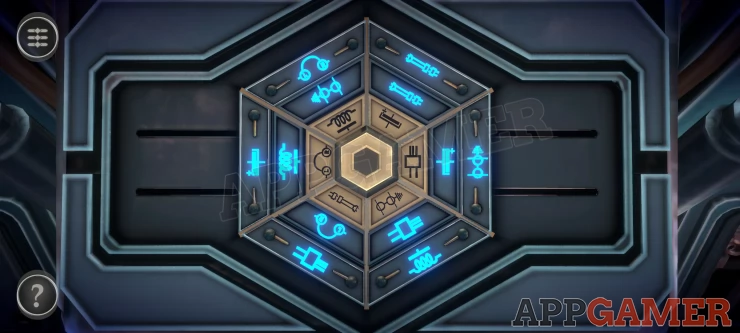
Electric Key Puzzle
- There are 4 dials with symbols on them
- turning these will change the symbol shown in the 4 holes near the center.
- Arrange the correct 4 symbols
- The clue for this was shown on the screens.
Solution: Show
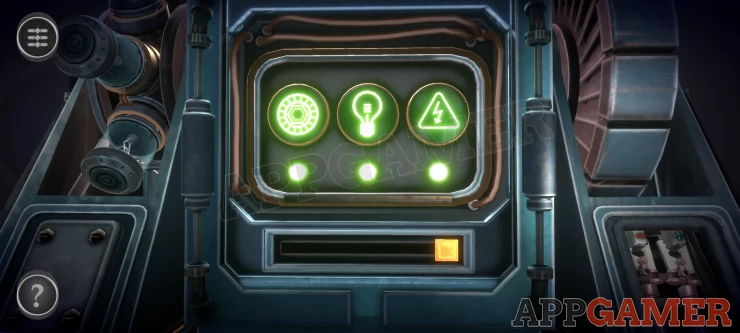
A second gear appears, then power will pass to another panel to the right, view this.
Add the Power Source to it. The pull down a lever on the right side.
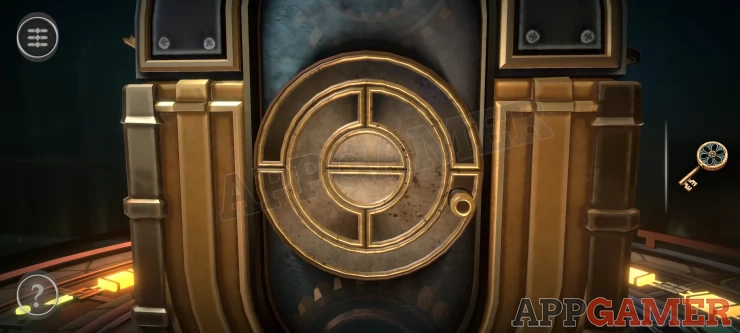
View the large column that activates to the right. Open the 2 small doors on the front and then you can collect the Token Fragment for the next chapter.
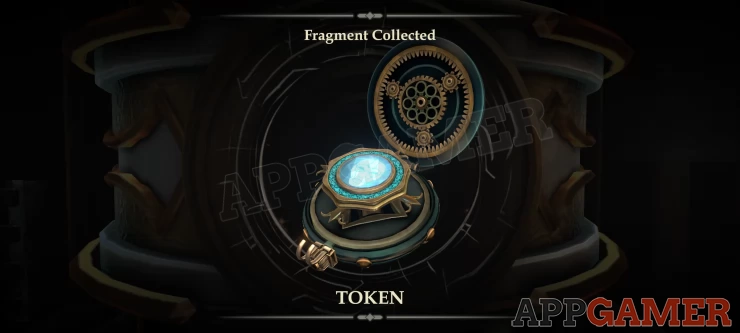
Take this to the console in the middle of the room to let you complete Chapter 2 and move on to Chapter 3
 With 20 years of experience in creating video game content for the internet and over 30 years as a gamer, Mark is now a passionate mobile App Gamer. Loving a challenge, he is always ready to get stuck in to both survival builders and puzzle solving games. He has been providing content for AppGamer since 2014.