Part 2 - First Floor
More Beyond the Room
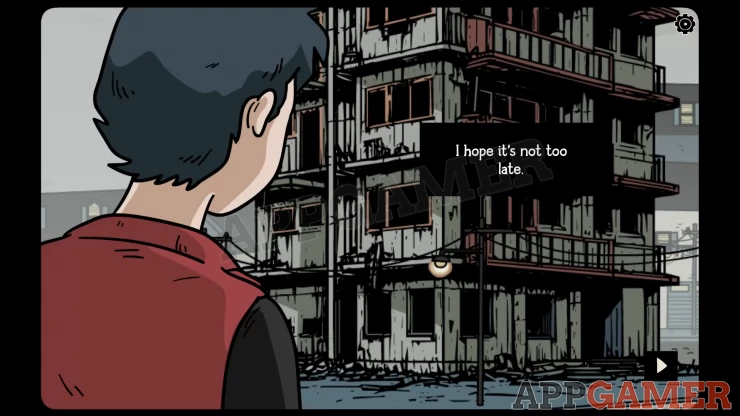
This is Part 2 of our guide to Beyond the Room, a creative escape room mystery story game from Dark Dome. The game begins with the story of an abandoned building and a dream where Darien finds himself in the building. After completing part 1 you now enter the building for real to try to help the woman trapped inside.
Beyond the Room Part 2 - First Floor Walkthrough
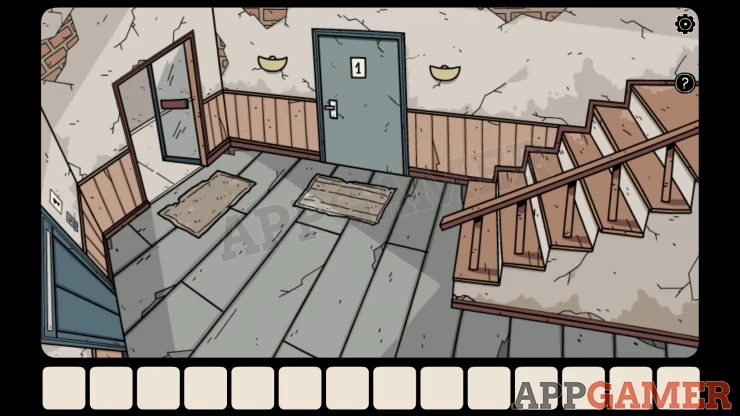
You enter on the 1st floor. There is a door marked '1', some stairs up and an elevator. You can try the elevator but it needs a key.
Tap the door to enter the first floor apartment. Notice the 4 pictures on the walls and the train set.
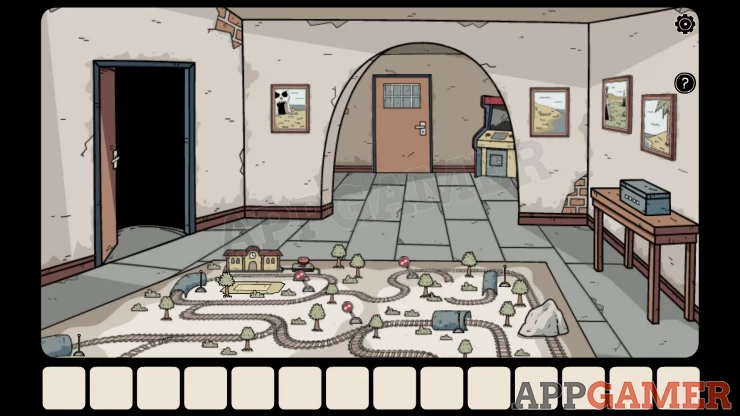
Then move through the archway.
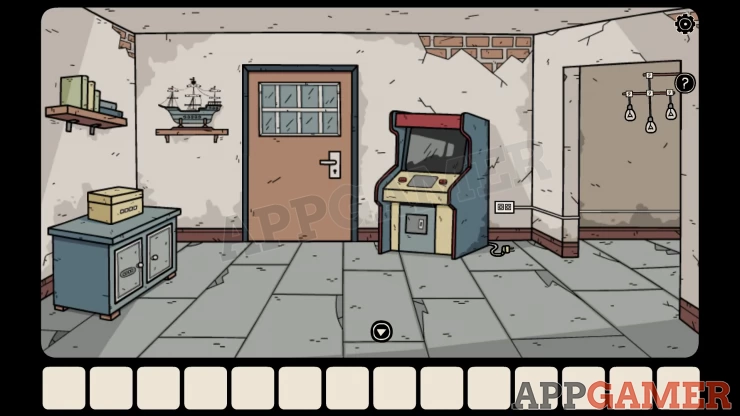
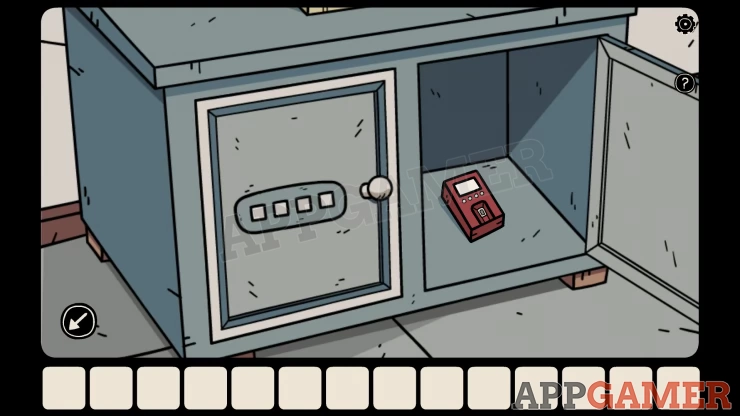
View the cupboard on the left and open the door, collect the Fingerprint Scanner.
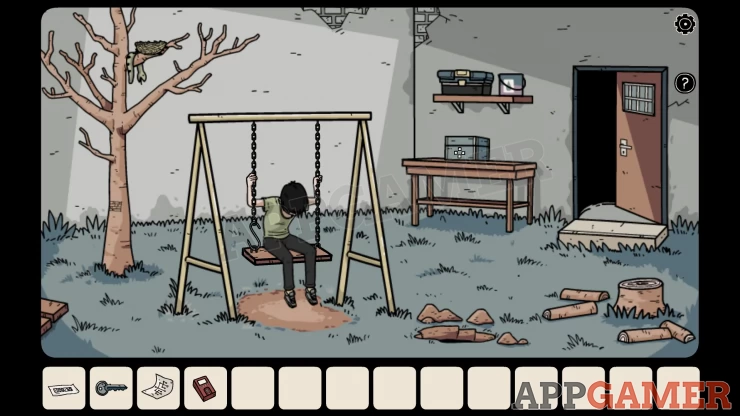
Then open the door and go outside.
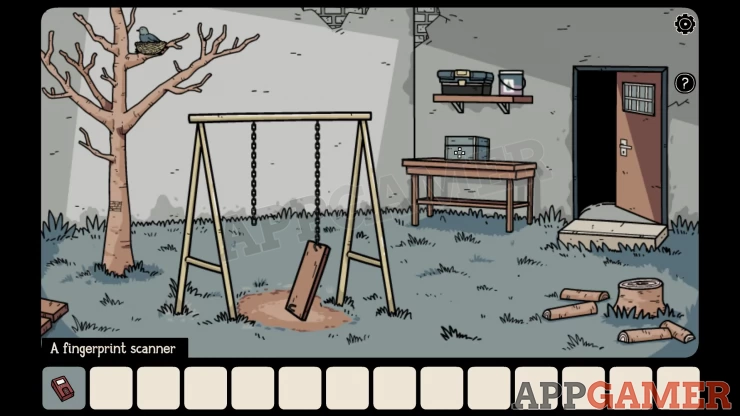
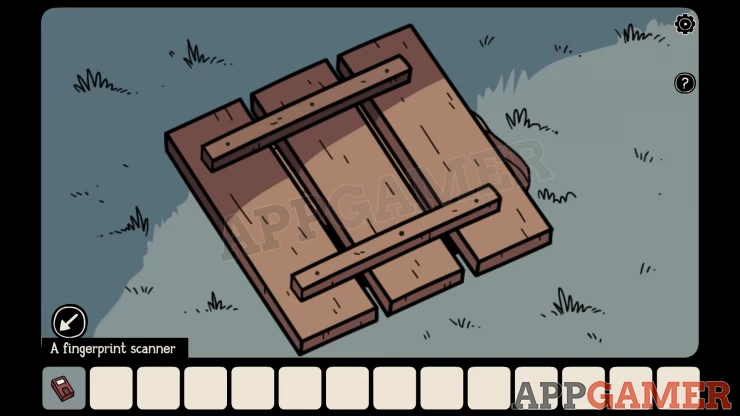
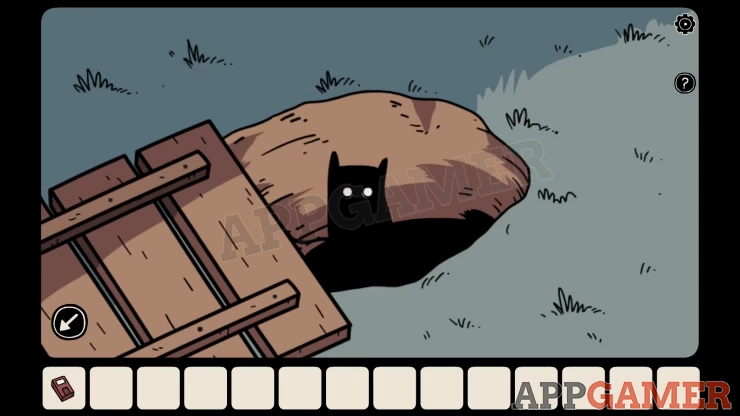
Tap a small section of wood that you can just see on the far left to see a cover over a hole.
Hidden Shadow Cat: Move the cover to find the shadow in the hole. This is the first of ten hidden shadow cats in the game. You can check the settings menu at any time to see how many you have found.
Next view the tree to the left of the broken swing to see a clue.
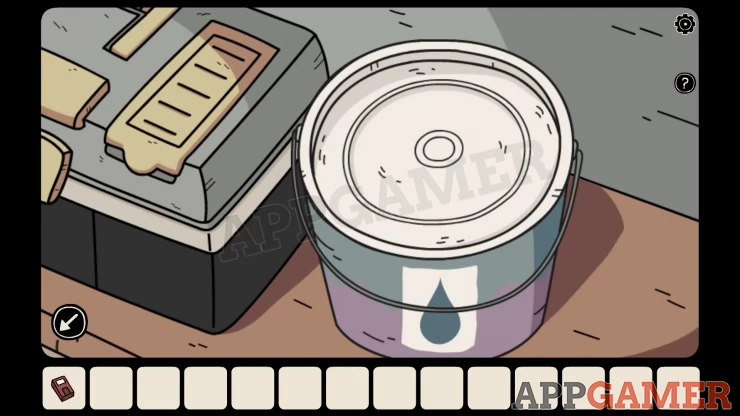
Then view the shelf on the wall by the door, open the Paint tin and collect a paper with a clue.
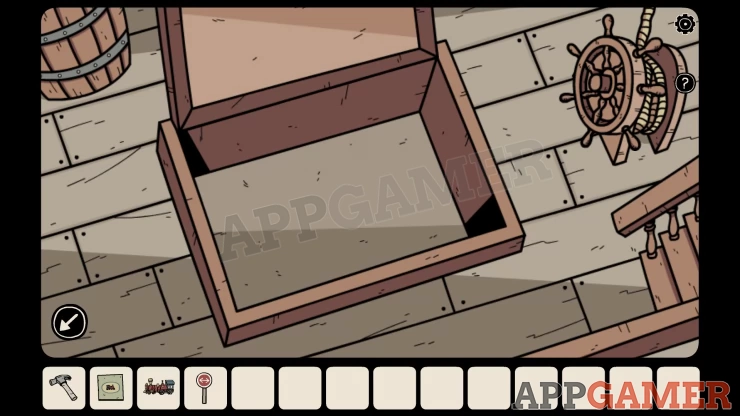
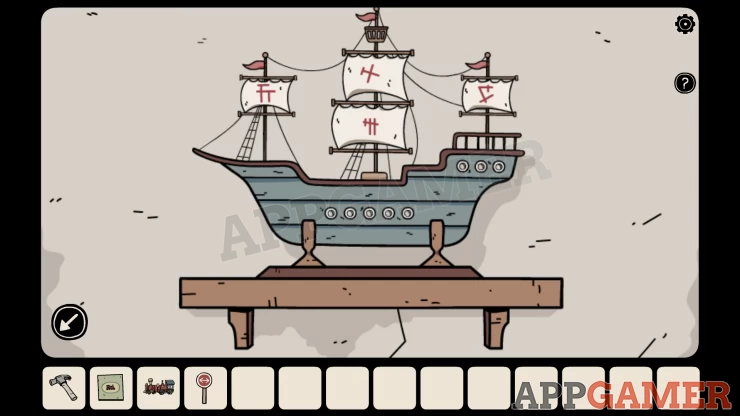
Go back inside and view the model ship on a shelf by the door.
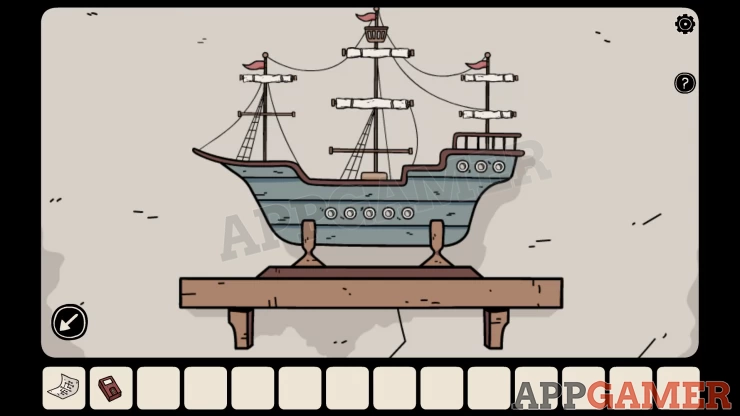
Ship puzzle
- Tap again to look inside it and see a box with boards on top.
- You can tap the boards to press them down or up
- Use a clue on the tree to open this.
Solution: Show
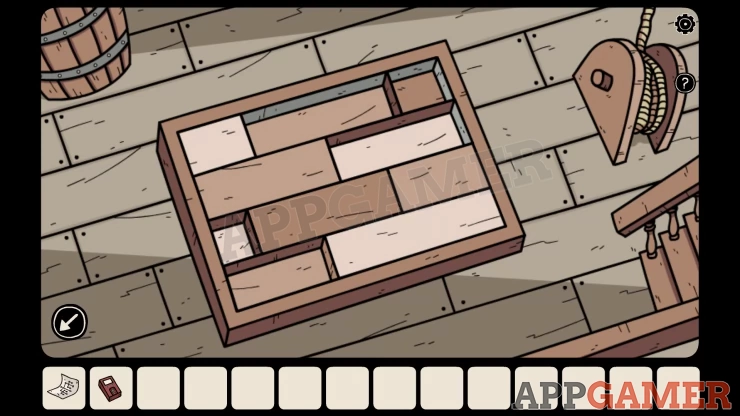
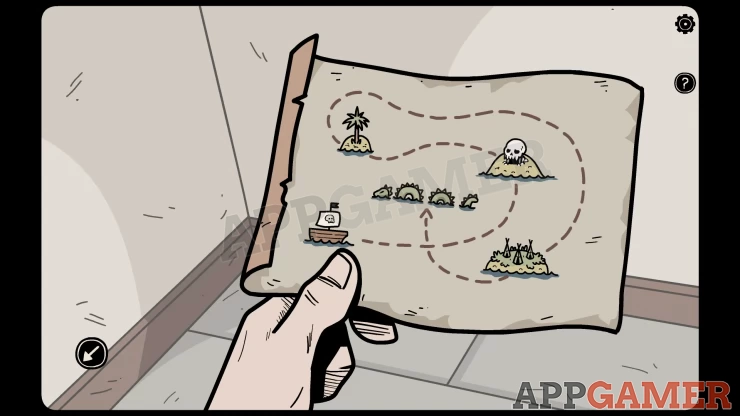
Collect a paper with a map clue and a Metal Hook.
View the map paper to see a route for a ship that passes through 4 islands. Each island has a drawing on it.
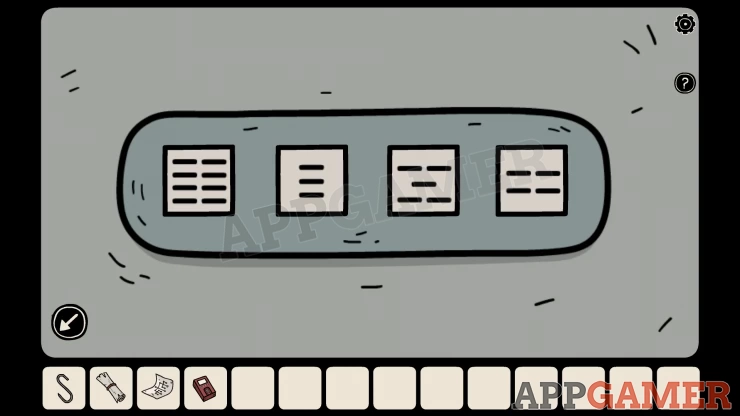
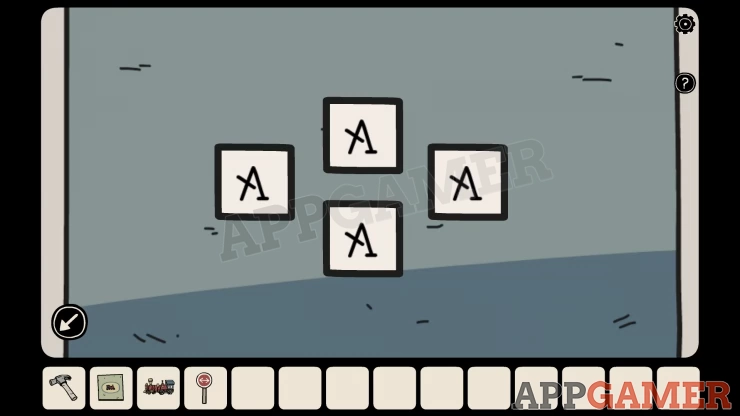
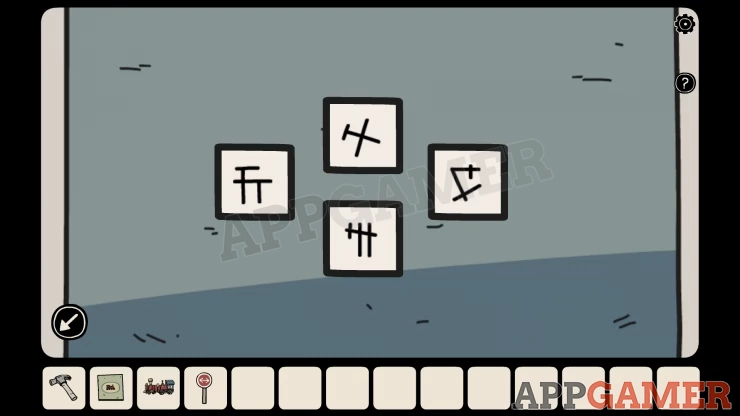
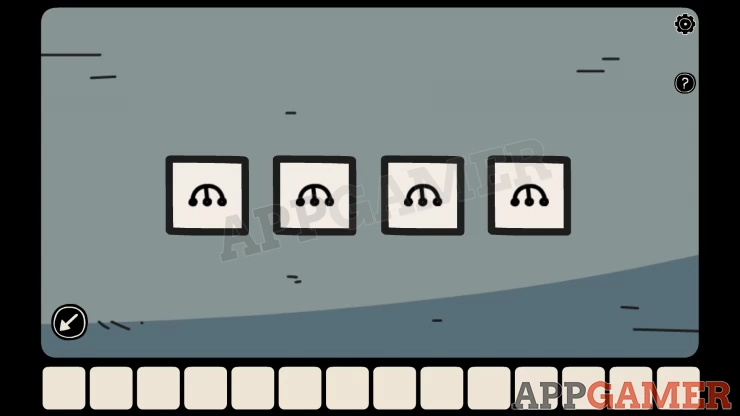
Now back up to the first room and view the 4 pictures on the wall, each picture has one of the symbols and a number of bones.
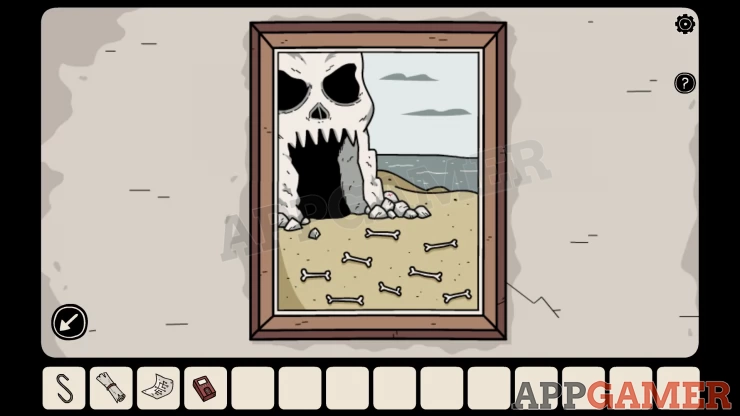
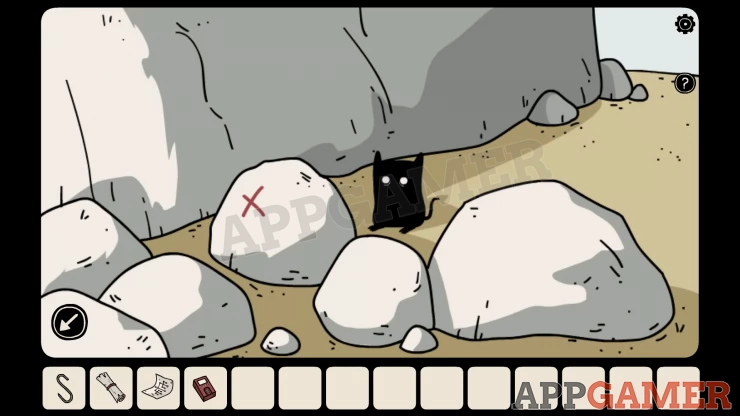
Hidden Shadow Cat: in the Skull cave picture tap on the rocks to the right with a small red X.
Solution:
Skull = 8 Snake = 4 Tents = 5 Tree = 3 Route = Skull, Tree, Tents, SnakeShow
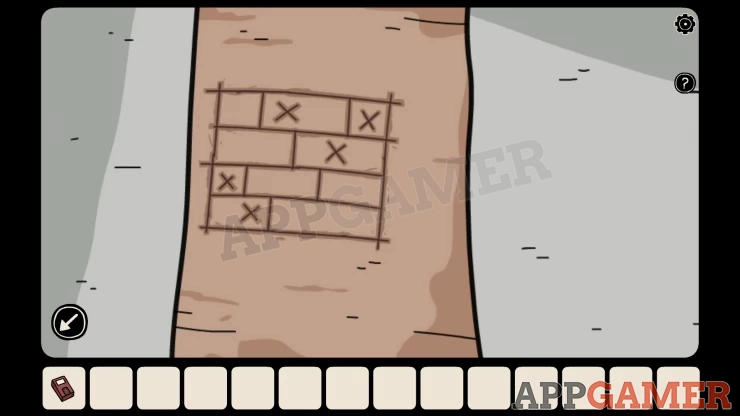
Now go through the arch again and view the left door of the blue cupboard on the left side.
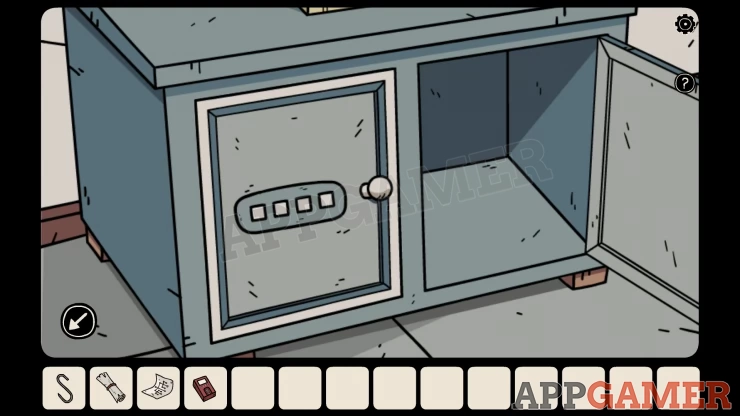
Enter the code here from the clue above.
Solution: Show
Collect a Rubber Snake and a Shovel.
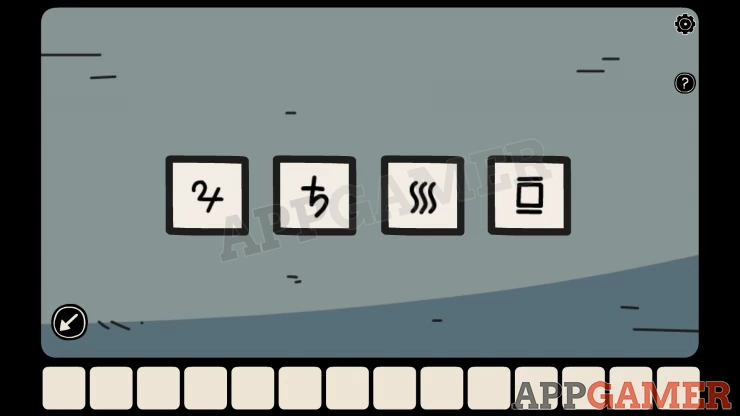
Go back outside and first view the bird in the tree. Use the Rubber snake on it to scare it away.
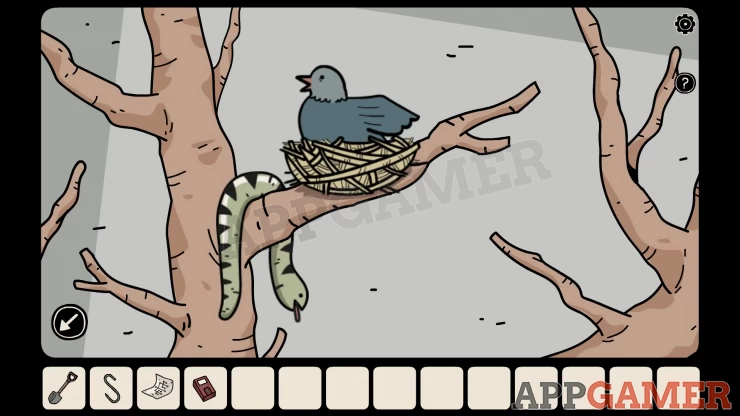
Then collect a Gray Key and a paper with 4 symbols on it from the nest.
Next add the metal hook to the broken swing. A ghostly figure will appear.
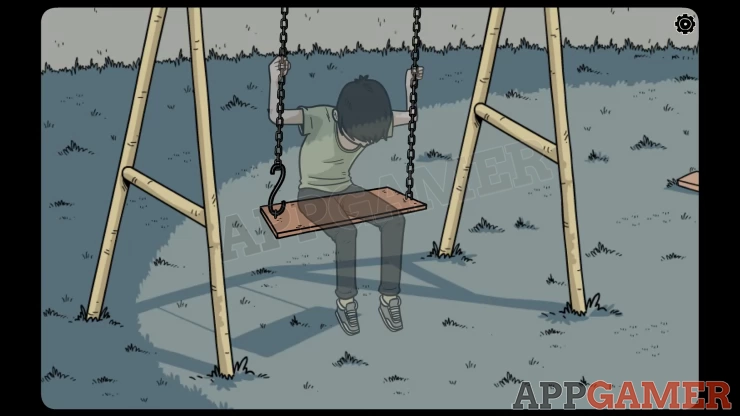
It will point to the ground. Use the shovel on this spot to dig a hole.
Collect a Railroad switcher for electric toy trains.
Go back inside and move to the room on the right, there is a large power cabinet on the wall.

First view the set of drawers below. Open the bottom 2 drawers to collect a Toy train engine and Book with clues for the train puzzle.
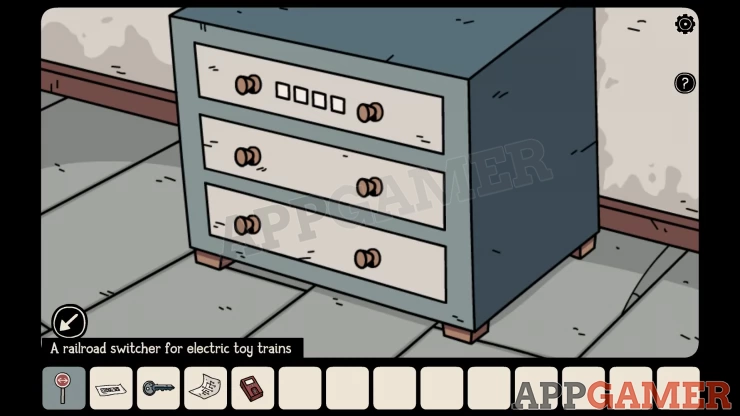
Then view the top drawer to see a code lock.
Use the clue symbols from the paper you found in the nest
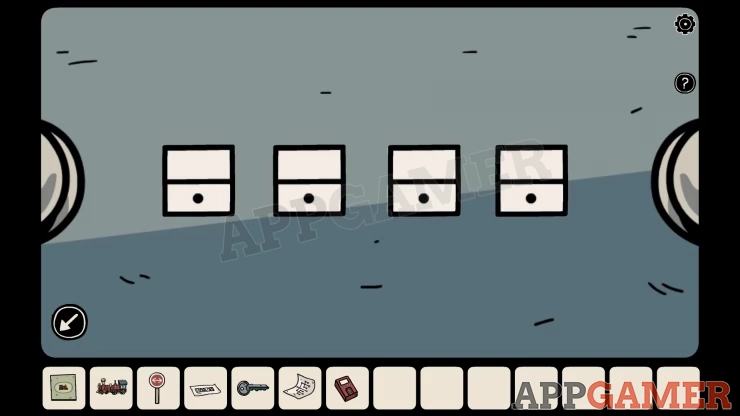
Solution: Show

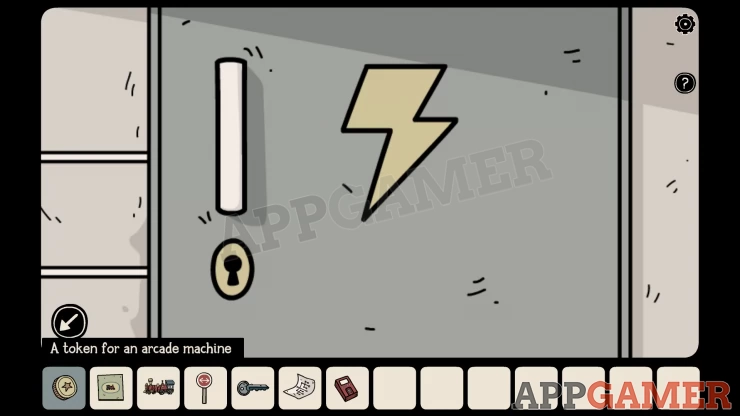
Collect a Token for an arcade machine.
Next view the cabinet on the wall and use the gray key to open it.
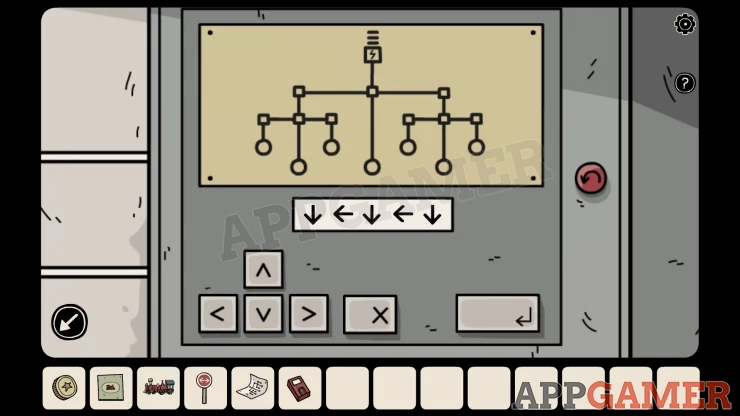
Power Cabinet Puzzle
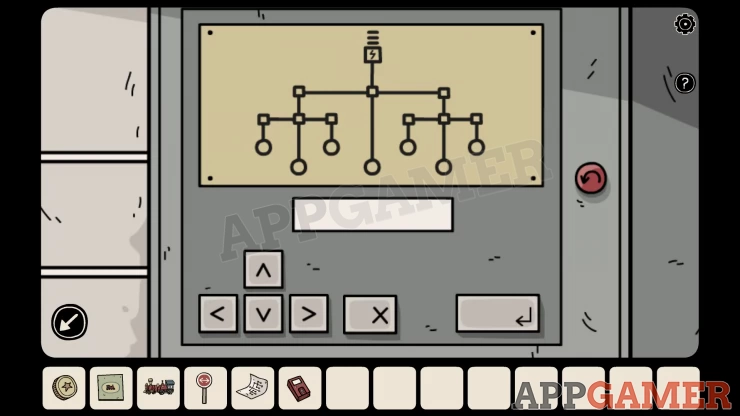
- Notice the diagram in the cabinet is the same and the lights in the room.
- It is also the same as the clue on the paper that shows 4 lights on.
- Tap the arrow keys to make a sequence of moves from the top center power source on the diagram to any of the bulbs.
- When you can entered a set of moves tap the enter key on the right to send a spark to the location.
- If you reach a bulb it will turn on.
- Repeat this 4 times to turn on 4 bulbs as shown in the clue.
Solutions:
Show


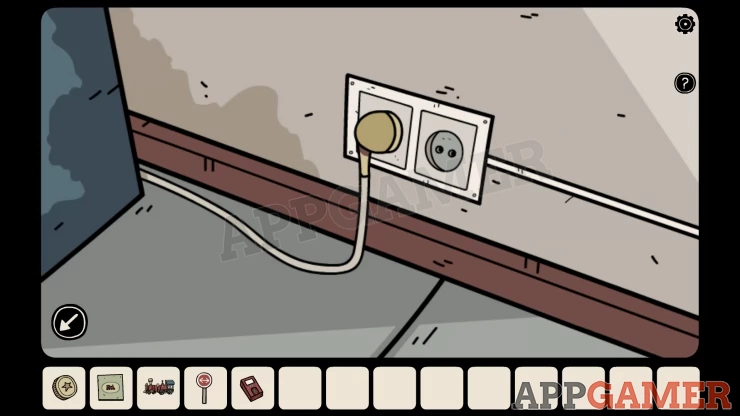
Power is now sent to the socket by the arcade machine. View the socket and plug in the machine.
Then tap on the arcade machine and add the Token to it.
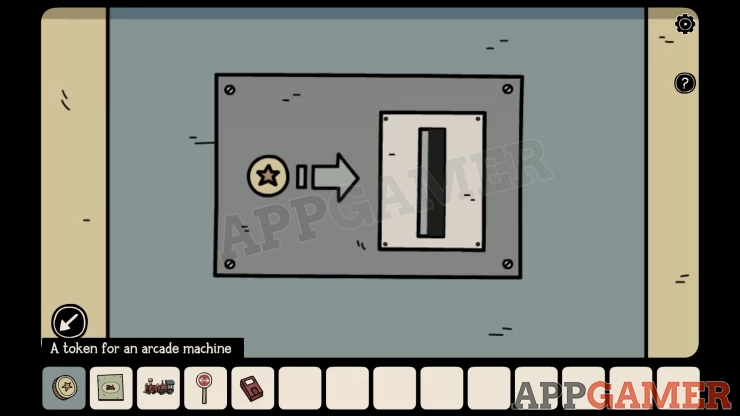
Arcade Game
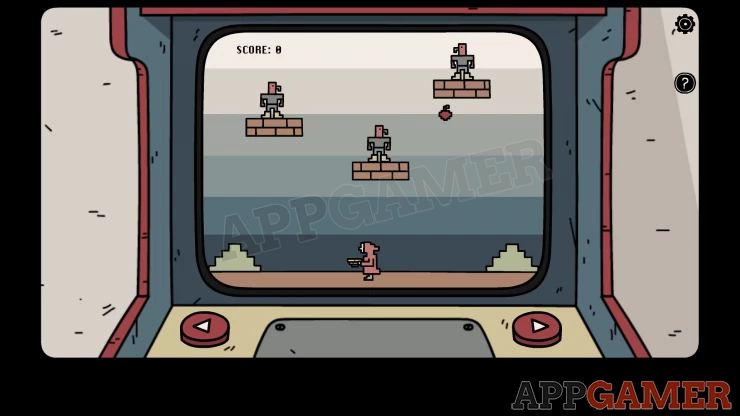
- Use the arrows to move the character with the basket and catch the apples that are being dropped.
- Catch 10 apples to win the game.
- If you miss one you have to restart.
- Remember the hi score.
Now view a Yellow box that is on the cabinet on the left of the room.
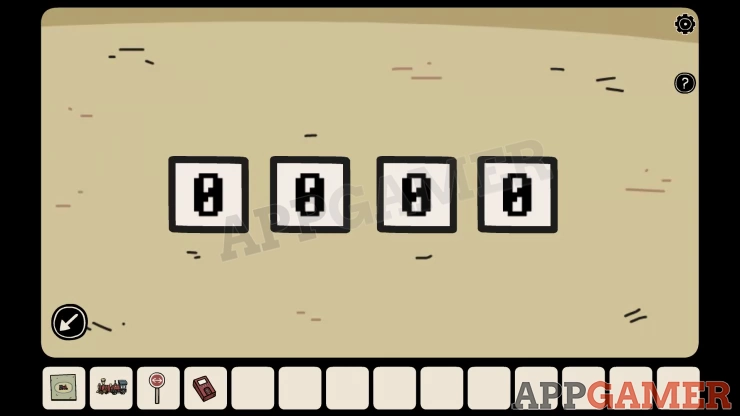
Use the code from the hi score to open it.
Code: 5736Show
Collect a Plastic Container.
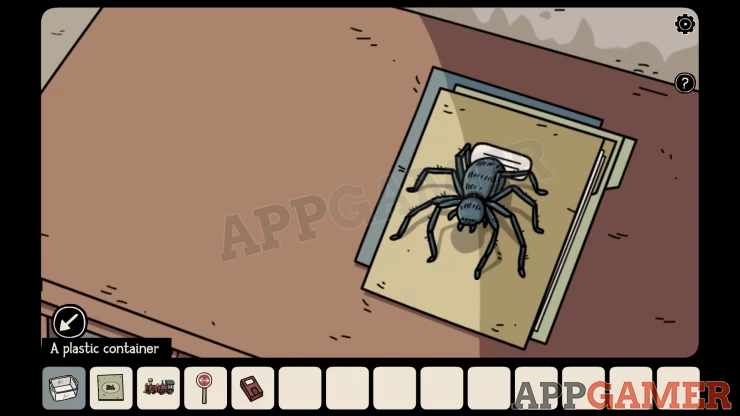
Now go through to the room on the right with the power cabinet. On the right is a table with a large spider on it. And above is a red Box.
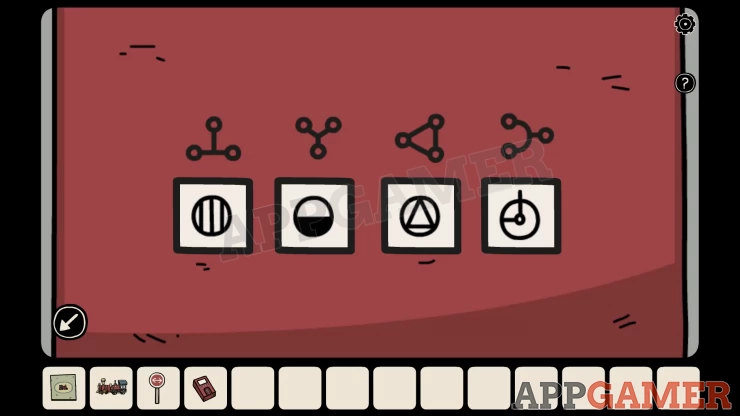
Red Box Puzzle
- The box requires a 4 symbol combination. Above the entry are 4 other symbols as clues.
- To find the combination look on the table below.
- Use the plastic contain on this to move the spider, then you can view the folders that are on the table.
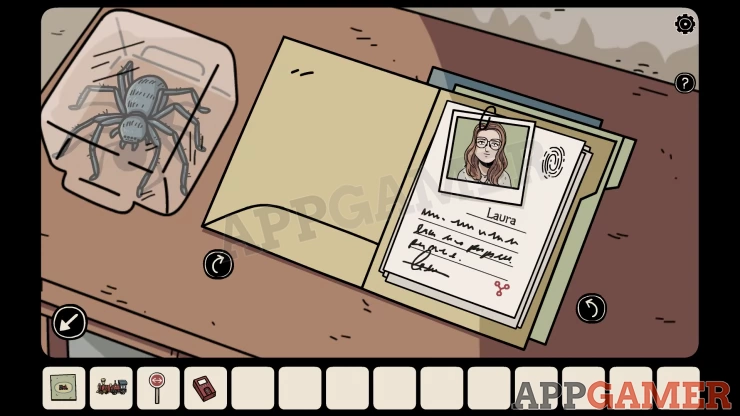
Fingerprint Clues
- There are 4 pages, each has a photo and a fingerprint of a person.
- On each page there is also a red symbol.
- Use the fingerprint scanner on the 4 prints that you find, this will then give you a different symbol for that person.
- Remember each pair of symbols (from the paper and the scanner)
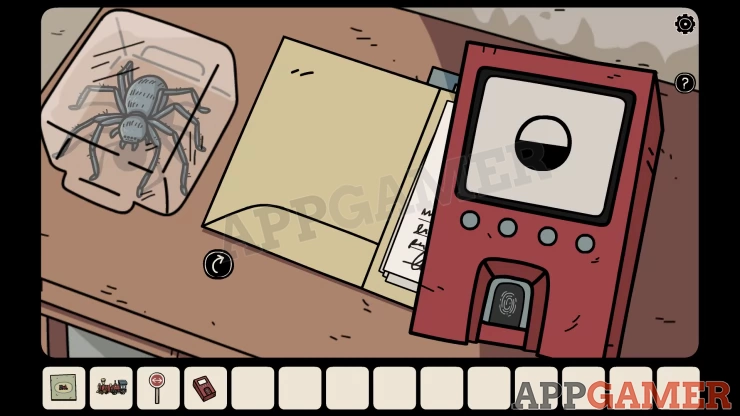
Once you know the 4 clues return to the red box on the shelf above. Enter the 4 symbols that are associated with the ones shown on the box.
Solution: Show
Collect a Miniature Ship Rudder and a Hammer.
Go back to the room on the left and view the model ship again. Inside you can add the rudder to it.
Tap this to turn it and then the sails on the model will lower to reveal a clue.
Show
Go outside and view a blue box on the table by the door. This requires 4 symbols.
Use the symbols from the ship sails.
Solution: Show
Collect the Piece of rail for an electric toy train.
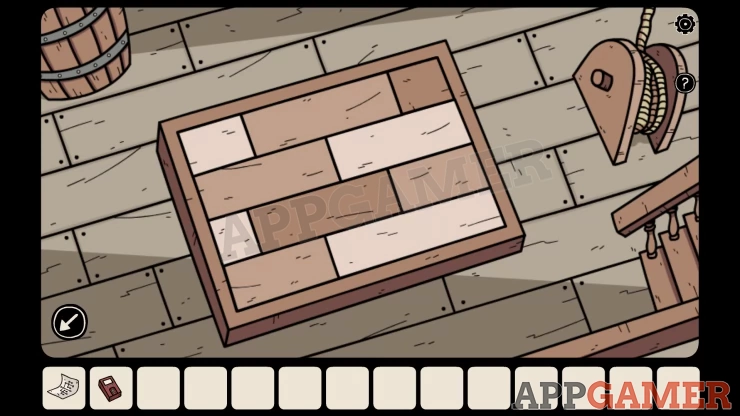
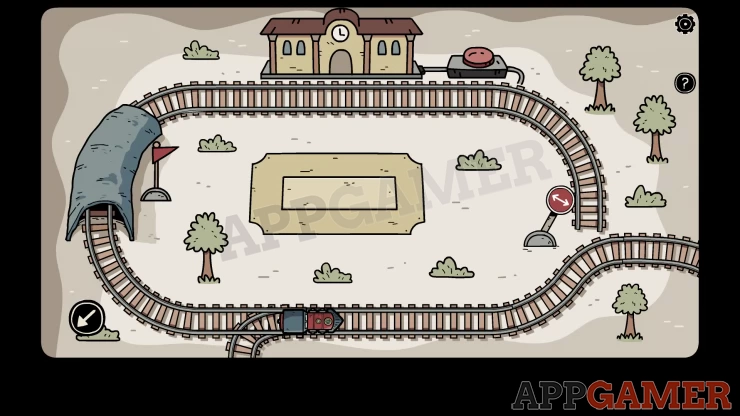
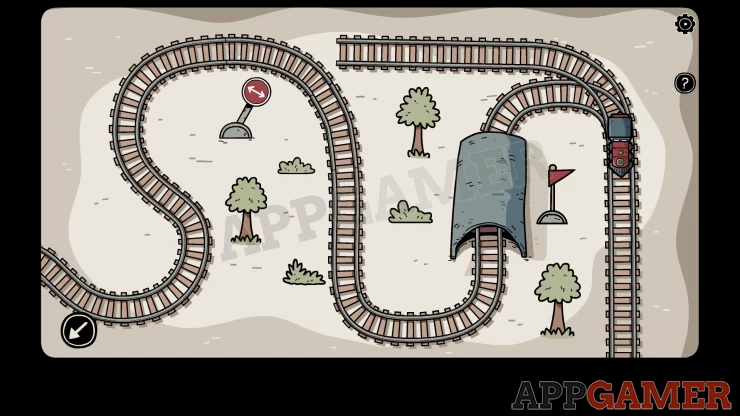
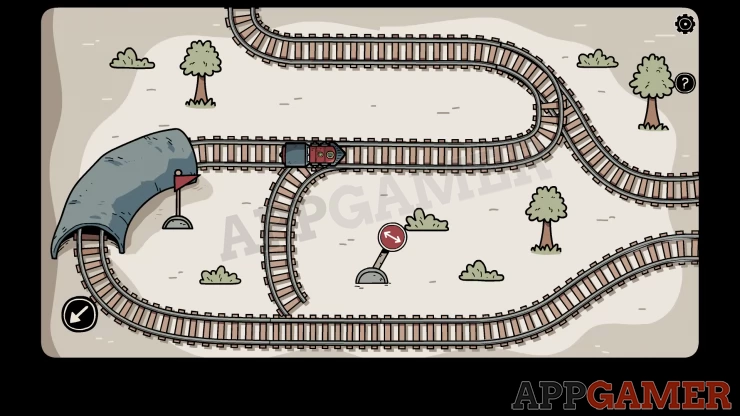
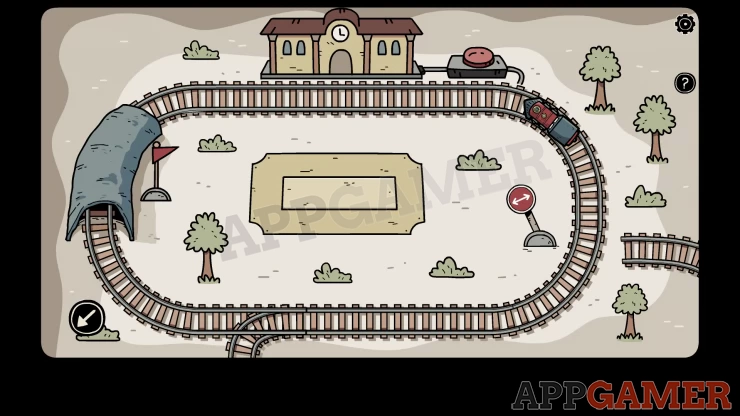
Go back inside and return to the first room. View the train set on the table.
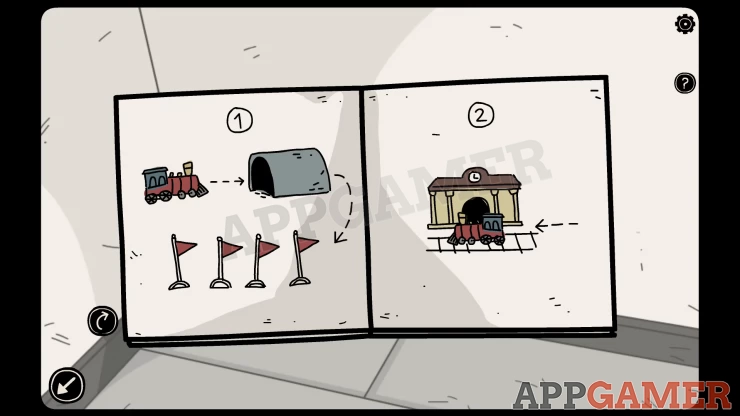
Train Puzzle
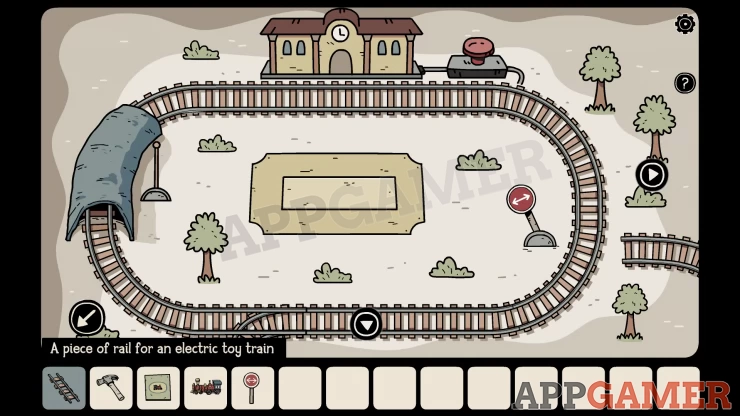
- You can navigate around the train set by using the arrows, there are 4 sections.
- Each section has a tunnel with a flag pole and some switch tracks where you can set a red arrow to change the direction of the track.
- Place the train engine on the top left are by the station.
- Then move to the top right section and palace the missing piece of track.
- Then move down to the lower right and place the switcher item on the left.
- In this same section use the hammer to break the large rock on the right.
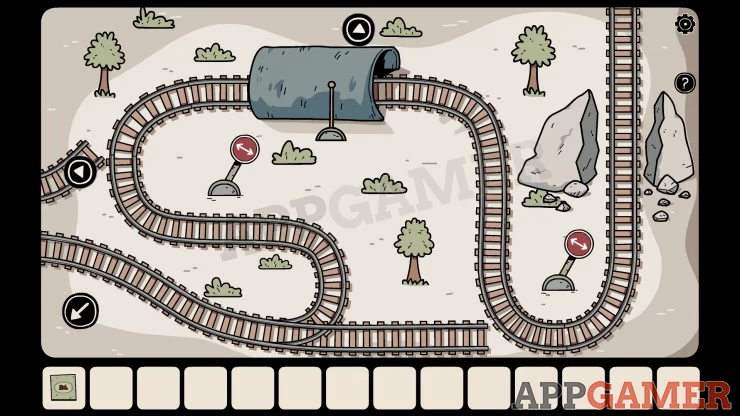
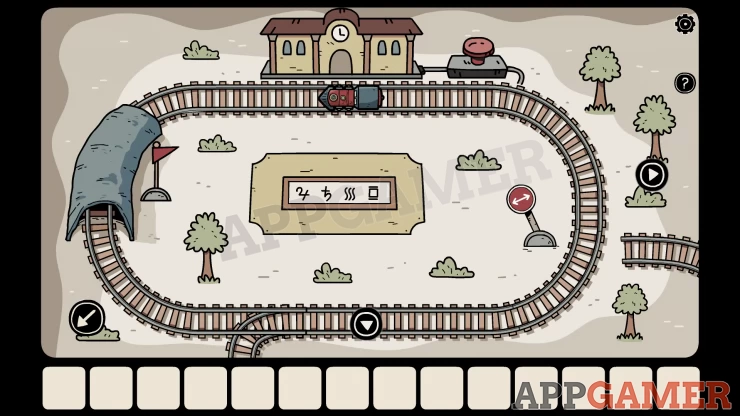
- View the Book for a clue. You need to make the train go through all of the tunnels to raise the 4 flags. Then the train needs to return to the station.
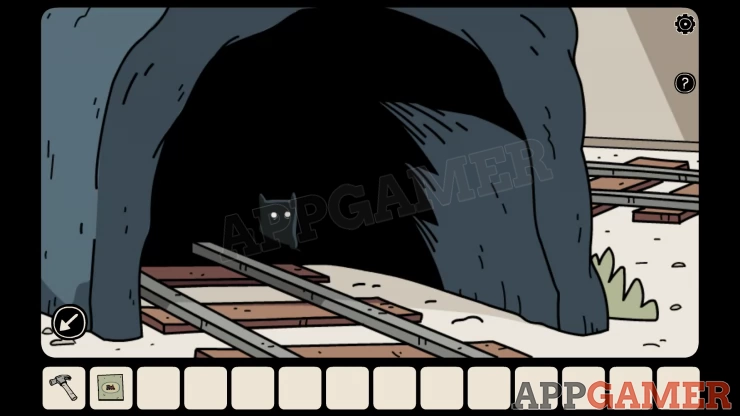
Hidden Shadow Cat: In this lower right section tap the tunnel to look inside.
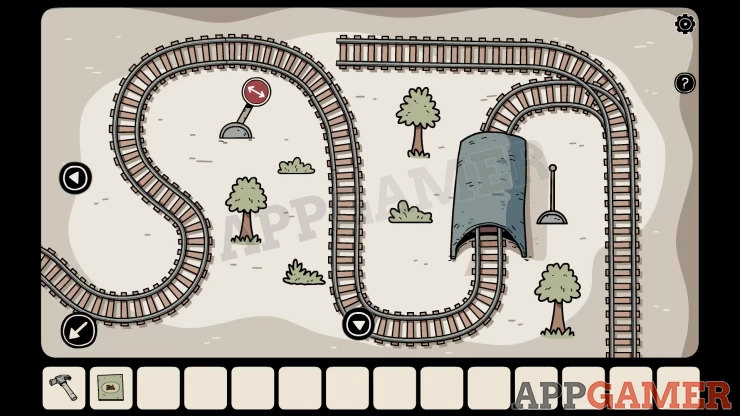
Solution:
Set the track directions as shown here, then start the train. After passing through all 4 tunnels the engine will return to the top left section where you will need to change the track direction to make it head to the station.Show

Once done you will see another clue of 4 symbols.
Show
Now view the blue box on the table to the right of the train. Use the symbols code to open it.
Solution: Show
Collect the White Key (key to the second floor)
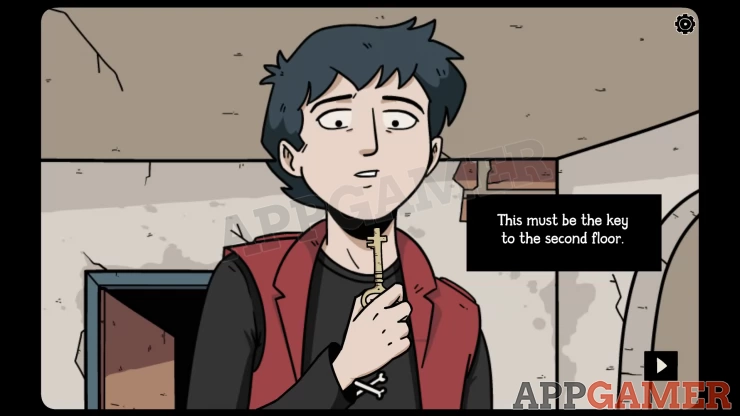
Exit the room to the entrance hall now you can go up to the second floor.
Continue in Part 3
We have questions and answers related to this topic which may also help you: Show all
 With 20 years of experience in creating video game content for the internet and over 30 years as a gamer, Mark is now a passionate mobile App Gamer. Loving a challenge, he is always ready to get stuck in to both survival builders and puzzle solving games. He has been providing content for AppGamer since 2014.